2.7 Setting Up, Executing, and Managing Jobs
Most discovery, workload portability, and workload protection actions and operations are defined, executed, and monitored as Portability Suite jobs.
-
Section 2.7.4, Starting a Saved Conversion Job in the Jobs View
-
Section 2.7.5, Changing the Start Time of a Saved Conversion Job
-
Section 2.7.6, Viewing the Parameters of a Completed or In-Progress Conversion Job
-
Section 2.7.8, Controlling the State of Source Workloads in the Jobs View
-
Section 2.7.11, Using Windows Scheduled Tasks and a Batch File to Run Jobs
2.7.1 Selecting a Conversion Job Setup Method
You can set up a conversion job and specify the job configuration parameters in one of the following two modes:
-
Advanced mode: Uses the Conversion Job window, which provides access to all job configuration parameters.
-
Wizard mode: Provides a convenient subset of the Advanced method and interactively captures only the essential parameters of a conversion job.
The following sections provide more information:
Differences Between the Advanced and Wizard Job Configuration Modes
The Advanced and Wizard job configuration modes differ in the extent of available configuration options.
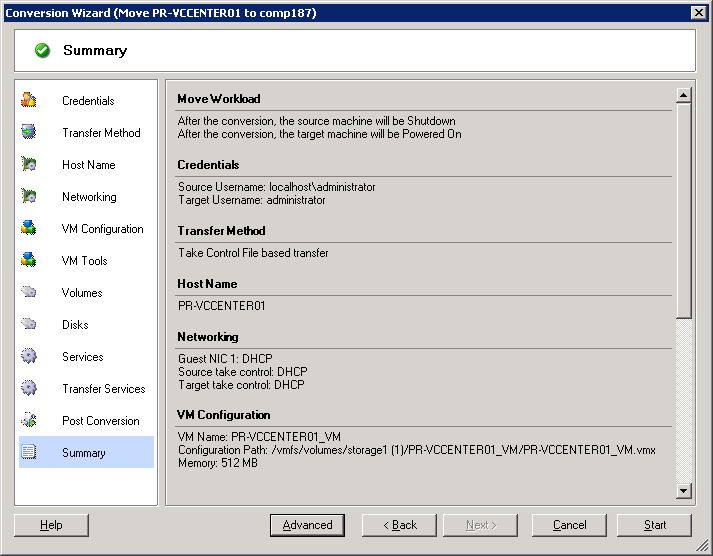
In Wizard mode, Portability Suite provides a convenient subset of the Advanced method, interactively captures the essential parameters of a conversion job, itemizes settings specified in previous wizard pages, and provides a summary at the end.
Figure 2-6 Job Configuration Window in Wizard Mode
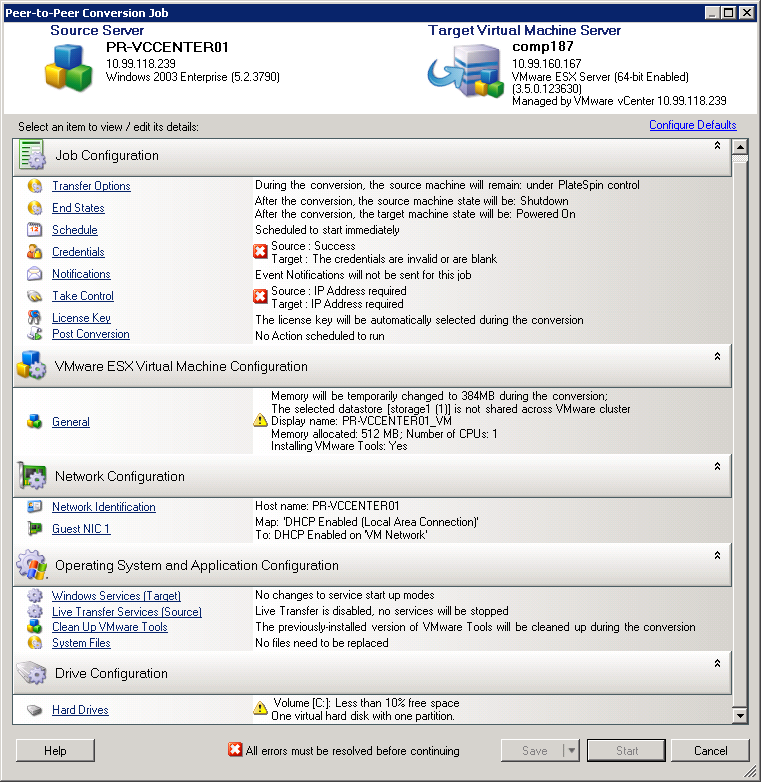
In Advanced mode, Portability Suite provides access to enhanced job configuration options and advanced settings for some aspects of a conversion job. In Advanced mode, you access settings for an aspect of a conversion job by clicking links that are grouped in categories. To hide or show category details, click the category bar.
Figure 2-7 Job Configuration Window in Advanced Mode
You can access the following enhanced job configuration options in Advanced mode, but cannot access them in Wizard mode:
-
Specifying a non-default license for a conversion job. See Selecting a License Key for a Migration or Protection Conversion.
-
Enabling automatic job progress and status notifications. See Configuring Automatic E-Mail Notifications of Job Status and Progress.
-
Job scheduling options, except when protecting a workload. See Scheduling and Synchronization.
-
Advanced options for target virtual machine configuration. See Virtualization Platform-Specific and Advanced VM Configuration Options.
-
Saving the job for on-demand execution at a later time. See Saving Conversion Jobs.
Starting a Conversion Job
To start setting up a conversion job and select either the Advanced or the Wizard method:
-
Open the Action window by using one of the following methods:
-
Drag a discovered source and drop it on a discovered target.
-
Click a task in the Tasks pane.
-
Click the New Job toolbar.
-
In the Jobs view, right-click a source and select a command from the context menu. Available commands depend on the type of source.
The Action window opens:

The Source and Target panes display workloads and targets applicable to the selected type of a conversion job.
The and options are enabled only if:
-
The system detects an existing operating system on the target
-
The operating system profile of the target matches that of the source workload
-
-
Check validation messages at the bottom of the window.
-
To start configuring your conversion job in either Wizard or Advanced mode, click or click .
-
(Optional) For convenience, to avoid displaying the window on drag-and-drop, select before proceeding. Subsequent drag-and-drops bypass the Action window and directly open a Conversion Job window in Advanced mode.
To restore the job conversion startup behavior, restore application defaults. See
General Options
in your Configuration Guide.
2.7.2 Pre-conversion Job Validation
When starting a conversion job, Portability Suite validates the job type, the source, the target, and the selected parameters, and might generate errors and warnings.
|
|
Error markers show configurations that you need to change before the conversion job can start. |
|
|
Warning markers alert you to settings that should be confirmed prior to starting the conversion. |
In a default Portability Suite configuration, validation messages display at the bottom of the Action window. See Step 1.
If you have configured Portability Suite to bypass the Action window on drag-and-drop, errors and warnings are displayed in a separate window:
Figure 2-8 Conversion Validation Window
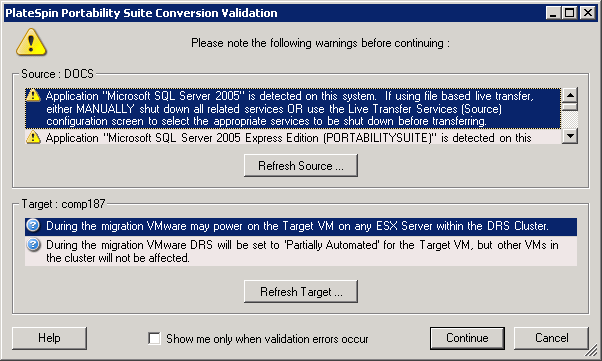
To force this window to open only on errors, select the option.
2.7.3 Saving Conversion Jobs
When you start a conversion job in Advanced mode, you have additional options for saving the job and executing it at a later time.
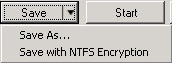
After all options have been configured for the job, click the arrow at the right side of the button, then select a command from the drop-down list:
-
Save As: Select this option to save the conversion job to run at a later time.
-
Save with NTFS Encryption: Select this option to save the conversion job to run at a later time.
2.7.4 Starting a Saved Conversion Job in the Jobs View
-
In the Portability Suite Client’s Jobs view, locate the required saved job.
-
Right-click the job and select .
Portability Suite starts the conversion job.
2.7.5 Changing the Start Time of a Saved Conversion Job
-
In the Portability Suite Client’s Jobs view, locate the required saved job.
-
Right-click the job and select .
The Change Job Start Time dialog box opens.
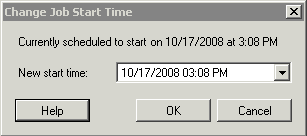
-
Specify the required new start date and time, then click .
Portability Suite reschedules the job and executes it at the specified time.
2.7.6 Viewing the Parameters of a Completed or In-Progress Conversion Job
-
In the Portability Suite Client’s Jobs view, locate the required job.
-
Right-click the job and select .
Portability Suite opens the job configuration window in Advanced mode and displays the job’s configuration parameters in read-only mode.
2.7.7 Canceling an In-Progress Job
-
In the Portability Suite Client’s Jobs view, locate the required job.
-
Right-click the job and select .
2.7.8 Controlling the State of Source Workloads in the Jobs View
You can restart or shut down your source workload in the Jobs view.
-
In the Portability Suite Client’s Jobs view, locate the required job.
-
Right-click the job and select or as applicable.
To automate the startup state of source and target workloads, specify the required post-conversion state in your conversion job. See Specifying Transfer Options.
2.7.9 Running Job Diagnostics
-
In the Portability Suite Client’s Jobs view, locate the required job.
-
Right-click the job, select , and wait for the process to complete.
After a few moments, Portability Suite launches a Web browser window with the results of comprehensive diagnostics on the job.
2.7.10 Generating Job Reports
You can generate detailed reports of running and completed jobs. A report records the tasks performed during the job.
To generate a job report:
-
In the Portability Suite Client’s view, locate the required job.
-
Right-click the job and select .
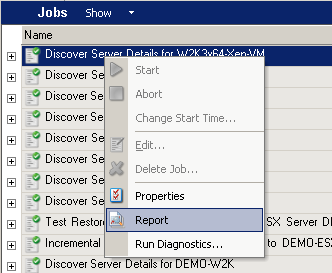
A Web browser window displays the requested report.
2.7.11 Using Windows Scheduled Tasks and a Batch File to Run Jobs
You can schedule and run a job by using Windows Scheduled Tasks and a batch file. At the scheduled time Windows calls the batch file, which launches the Portability Suite in console mode and executes the specified job.
-
Set up and save the required job, and note its location on the hard drive.
-
Use a text editor to create a batch file containing the following line:
PortabilitySuite.Console.exe run /job="path_to_job_file"Replace path_to_job_file with the actual path to the required job file.
-
Name the batch file and save it to the same directory as the PortabilitySuite.Console.exe application:
..\PlateSpin Portability Suite Client\CommandLine
-
Use Windows Scheduled Tasks to set up a task to run the batch file at the desired date and time. For more information about Windows Scheduled Tasks, see your Windows documentation.
Below is a sample command for a batch file:
PortabilitySuite.Console.exe run /job=
"C:\documents and settings\Administrator\Local Settings\
Application Data\PlateSpin ULC\PlateSpin PortabilitySuite\8.0.0.xxxx\
jobs\4f035cda-5c2b-4b73-9923-148ba743e560\32025d86-8850-4c79-8bf3-bb9c22b0ac1d.job"