2.6 Configuring Portability Suite Default Options

Default options control Portability Suite’s global settings and its default behavior. Configure the default options following installation or to reflect changes in your environment.

2.6.1 General Options

Use this tab to restore default settings, clear saved credentials, and to specify the locations of executable files for external applications you can launch from within the Portability Suite Client user interface. To access this dialog box in the Portability Suite Client, click Tools > Options.

Restore Defaults: When this option is selected, Portability Suite resets the job configuration method (launches the Actions dialog box after a drag-and-drop) and resumes checking for software updates on the Client startup.

Clear Saved Credentials: Removes stored usernames and passwords for source and target machines.

External Application Settings: Use the adjacent Browse buttons to locate application executables.

Restore Defaults: Resets the paths to their defaults.

2.6.2 SMTP Notifications

Use this tab to specify Simple Mail Transfer Protocol (SMTP) server settings for event and job progress notifications. To access this dialog box in the Portability Suite Client, click Tools > Options.

SMTP Server Settings: Specify your SMTP server’s IP address, port, and a reply address for e-mail event and progress notifications.

SMTP Account Credentials: Provide valid credentials if your SMTP server requires authentication.

You can also configure migration progress notifications on a per-migration basis. See Configuring Automatic E-Mail Notifications of Job Status and Progress in your User Guide.

2.6.3 User Activity Logging

Use this tab to specify options related to user activity logging. See Setting Up User Activity Logging.

To access this dialog box in the Portability Suite Client, click Tools > Options.

Enable Logging: When this option is selected, Portability Suite logs all user activities.

Maximum file size before rollover (MB): When the size of a log file reaches the specified value, it is rolled over to a new file with a sequential number appended to the name.

Maximum number of files for rollover: When the number of log files reaches the specified value, the system starts overwriting the oldest file each time a rollover is performed.

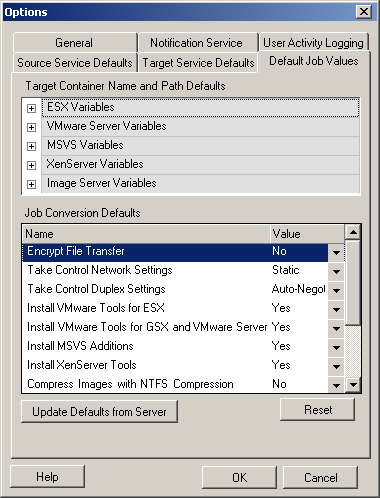
2.6.4 Default Job Values

Use this tab to specify default migration job values specific to the target virtualization platform. To access this dialog box in the Portability Suite Client, click Tools > Options.

Target Container Name and Path Details: These variables control naming conventions for target paths and containers. Expand a variable set and click a variable to edit its value.

Job Conversion Defaults: Use this area to set defaults that affect all migration jobs. Some of these defaults are platform-specific or job-specific. For example, Virtual Disk Sizing Mode only applies for VMware Server or MSVS Target Containers. Take Control Duplex Settings is only relevant for a migration involving a physical source machine.

Reset: Restores default job values.

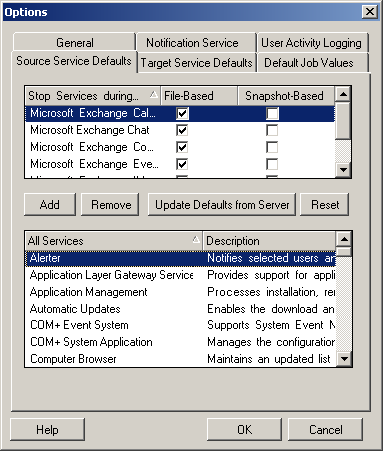
2.6.5 Source Service Defaults

Use this tab to select Windows services to stop on the source workload during a Live Transfer migration. See Handling Services During Live Transfer (Windows Source Workloads) in your User Guide.

To access this dialog box in the Portability Suite Client, click Tools > Options.

Stop Services during Transfer section: Lists services that are stopped by default. To stop a service during data transfer that uses a specific transfer method by default, select the corresponding check box. A deselected check box means the service remains active during Live Transfer.

All Services section: Lists unique services on all discovered machines. Click Add to add a selected service from the lower section to the upper section and set it to stop during the migration.

Update Defaults from Server: Retrieves defaults from Portability Suite Server.

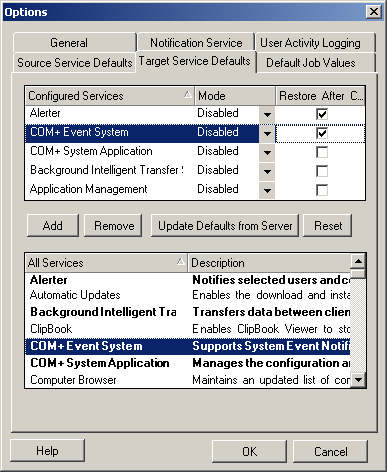
2.6.6 Target Service Defaults

Use this tab to select Windows services whose mode on the target is to be different from that of the source. See Handling the Startup Mode of Services (Windows Targets) in your User Guide.

To access this dialog box in the Portability Suite Client, click Tools > Options.

Configure Services section: Lists services and their target startup modes. Select the Restore After Conversion check box to use the selected mode during the migration. The service is then restored to match the source after the migration is complete and the target machine is ready to run.

All Services section: Lists unique services on all discovered machines. Click Add to add a service to the upper section. Use the Mode drop-down list to select the service state for the target. This is set during the configuration step of the job.

Remove: Removes a service.

Reset: Clears the upper section. The modes of all services in the target will match those on the source.