8.4 Configuring Migration to a Virtual Target
8.4.1 Migrating a Workload to a VM Host (P2V, V2V) Using Migrate Client
IMPORTANT:
-
When you migrate workloads to a ESX server that belongs to a DRS cluster, the VMware DRS and VMware HA are set as disabled only for the target VM. However, the other VMs in the cluster are not be affected.
-
If the ESX host is a part of the VMware DRS or HA enabled cluster, you must discover the ESX host via vCenter or vCenter Cluster.
To initiate a peer-to-peer workload virtualization migration job:
-
Discover or refresh your source workload and your target VM host.
-
Start a migration job.
-
Configure the required parameters of the job.
See Configuring Migration Parameters Using the Migrate Client.
-
Run the job.
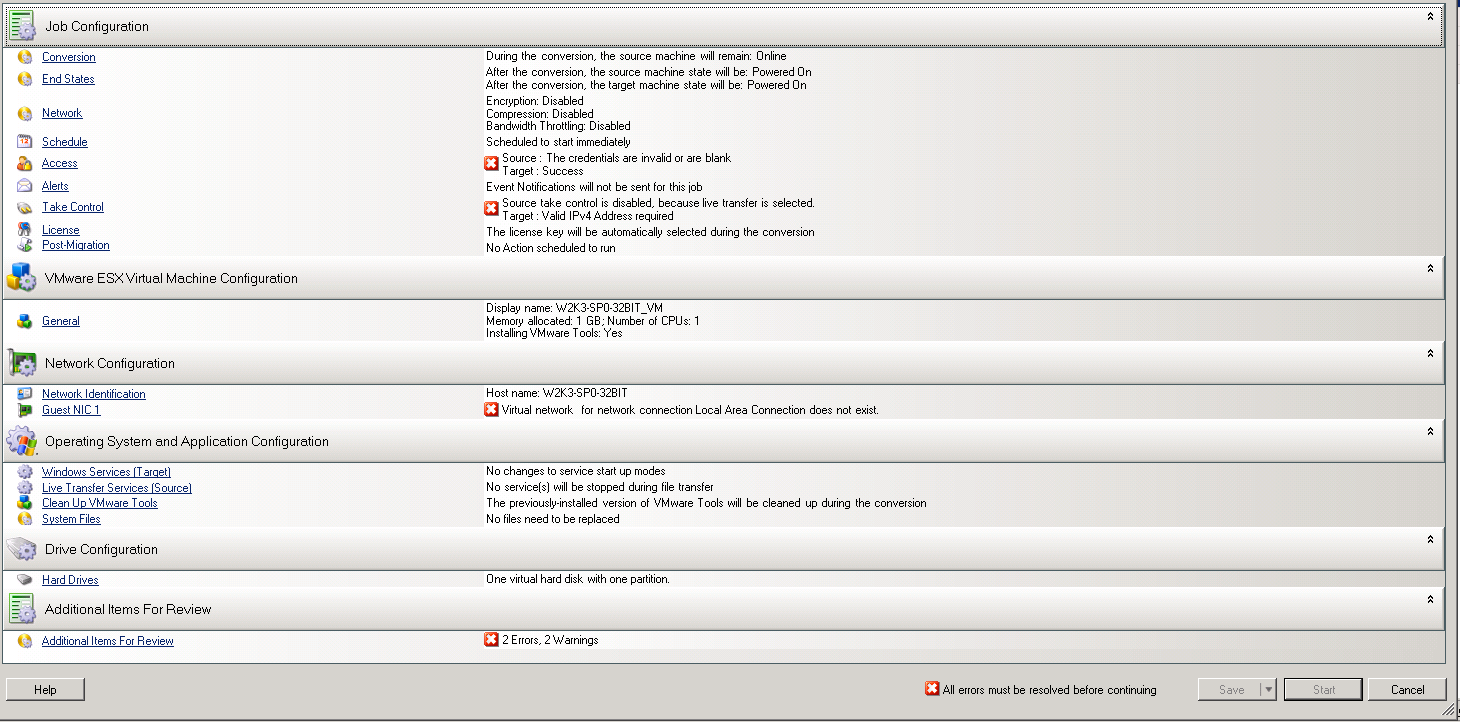
Figure 8-1 Peer-to-Peer Migration Job Window
8.4.2 Migrating a Workload to a VM Host (P2V, V2V) Using Web Interface
-
Launch the PlateSpin Migrate Web Interface.
-
On the Workloads page, select the workload you want to configure.
-
Click Configure Migration.
-
Select one of the following based on the scope of data you want to transfer from the source to the target:
-
Full Replication: A full volume of data transfer takes place from the source to the target.
-
Incremental Replication: Only differences are transferred from the source to the target, provided they have similar operating system and volume profiles.
-
-
Select the VM host, which you previously configured as a target, to which you want to migrate the source data. Select. See Targetsa.
-
Click Configure Migration.
-
Configure the following settings:
Setting Name
Description
Schedule Settings
Incremental Recurrence
Specify the following:
-
Start of Recurrence: The date when you want to start the replication. You can specify the date or click the calendar icon to select the date. By default, the time is 12.00 a.m.
-
Recurrence Pattern: The pattern to follow for the recurrence of the replication. For example:
-
To use incremental recurrence everyday, select Daily.
-
To never use incremental recurrence, select None.
NOTE:
-
Scheduled incremental replications are skipped until the first full replication is complete.
-
When you schedule incremental recurrence, the replication takes place for a maximum period of 60 days from the starting time of replication. For example:
-
If you select Daily, then the replication takes place for 60 days from the time the replication starts.
-
If you select Weekly, then the replication takes place for 8 weeks from the time the replication starts.
-
If you select Monthly, then the replication takes place for 2 months from the time the replication starts.
-
-
Full Replication
Do one of the following:
-
To specify a schedule for the replication, click Start and specify the date when you want to start the full replication.
-
To start full replication manually without setting a schedule, click None.
NOTE:You must prepare the workload prior to the scheduled time.The full replication cannot run unless the target VM exists and the workload preparation is complete. Migrate skips the scheduled full replication and retries it at the next scheduled time.
Blackout Window
Use these settings to force a replication blackout. The replication blackout suspends scheduled replications during peak utilization hours or prevents conflicts between VSS-aware software and the PlateSpin VSS block-level data transfer component.
To specify a blackout window, click Edit and do the following:
-
Specify the start and end time for the blackout period.
-
Select one of the blackout recurrence pattern such as daily, weekly, or monthly. If you do not want to force a replication blackout, select None.
NOTE:The blackout start and end times are based on the system clock on the PlateSpin Server.
Compression Level
These settings control whether data is compressed during transmission between the source and target workloads, and the level of data compression applied. See Data Compression. Select one of the following options:
-
Fast: Consumes the least CPU resources on the source, but yields a lower compression ratio.
-
Optimal: Consumes optimal CPU resources on the source and yields an optimal compression ratio. This is the recommended option.
-
Maximum: Consumes the most CPU resources on the source, but yields a higher compression ratio.
Bandwidth Throttling
These settings control the bandwidth throttling. PlateSpin Migrate enables you to control the amount of available bandwidth consumed by direct source-to-target communication over the course of a workload migration. You can specify a throughput rate for each migration job. Throttling provides a way to prevent migration traffic from congesting your production network and to reduce the overall load of your PlateSpin Server.
To throttle replications to a specified rate, specify the required throughput value in Mbps and the time pattern.
Migration Settings
Transfer Method
(For Windows Workloads) Select a data transfer mechanism and security through encryption.See Supported Data Transfer Methods.
To enable encryption, select the Encrypt Data Transfer option. See Security and Privacy
NOTE:The Offline Transfer with Temporary Boot Environment transfer method is not applicable for the Web interface.
Transfer Encryption
(For Linux Workloads) To enable encryption, select the Encrypt Data Transfer option. See Security and Privacy.
Source Credentials
Specify the credentials required for accessing the workload. See Discovery Guidelines for Machine Types and Credentials.
CPU
(For migration to vCloud and VM containers using VMware 5.1, 5.5, and 6.0 with a minimum VM hardware Level 8) Specify the number of sockets and the number of cores per socket for the target workload. It automatically calculates the total cores. This parameter applies on the initial setup of a workload with an initial replication setting of Full Replication.
NOTE:The maximum number of cores the workload can use is subject to external factors such as the guest operating system, the VM hardware version, VMware licensing for the ESXi host, and ESXi host compute maximums for vSphere (see vSphere 5.1 Configuration Maximums).
Some distributions of a guest OS might not honor the cores and cores per socket configuration. For example, guest OSes using SLES 10 SP4 retain their original cores and sockets settings as installed, whereas other SLES and RHEL distributions honor the configuration.
Number of CPUs
(For migration to VM containers using VMware 4.1) Specify the required number of vCPUs (virtual CPUs) to assign to the target workload. This parameter applies on the initial setup of a workload with an initial replication setting of Full Replication. Each vCPU is presented to the guest OS on the VM container as a single core, single socket.
Resource Pool for Target VM
(For migration to VM container that is part of a DRS Cluster) Specify the Resource Pool location where the migrated VM is to be created.
VM Folder for Target VM
(For migration to VM container that is part of a DRS Cluster) Specify the VM folder location where the migrated VM is to be created.
Virtual Machine Name
Specify a display name for the new virtual machine.
Configuration File Datastore
Select a datastore associated with your VM for storing VM configuration files.
Virtual Machine Configuration Path
Specify the path to the configuration file on the target virtual machine.
Disks
Specify the path to the hard disk on the target virtual machine.
Volumes
Select volumes to be included in the target for migration.
NTFS Cluster Size
(For File-Based Windows Workloads) Specify the cluster size for the NTFS volume. For information about the default cluster size for an NTFS volume, see Microsoft Support Site.
Non-volume Storage
(For Linux Workloads) Specify a non-volume storage, such as a swap partition, that is associated with the source workload. This storage is re-created in the migrated workload.
Disks For Volume Groups
(For Linux Workloads) Specify the datastore name and the path where the virtual disk must be created on the target machine. You can choose to retain the path specified by default.
Volume Groups
(For Linux Workloads) Specify the LVM volume groups to be migrated with the LVM logical volumes listed in the Converted Logical Volumes section of the settings.
Converted Logical Volumes
(For Linux Workloads) Specify one or more LVM logical volumes to be migrated for a Linux workload.
Replication Network for Target
Specify a network interface (NIC or IP address) on the target to use for replication traffic.
Replication Networks for Source
Specify one or more network interfaces (NIC or IP address) on the source to use for replication traffic.
Services to Stop Before Any Replication
(For Windows Workloads) We recommend that all the non-VSS compliant services or anti-virus are stopped temporarily on the source while the VSS snapshot is being captured on the source. Select the Windows services that you want to be temporarily stopped on the source workload while the VSS snapshot is being captured on the source. These services are restored as soon as the VSS snapshot creation completes.
Services to Stop for Cutover with Replication
(For Windows Workloads) Select the Windows services that should be permanently stopped on the source workload for cutover with any replication. The services stopped on the source workload during the replication process are not restored afterwards. This does not apply for Test Cutover.
Daemons to Stop Before Any Replication
(For Linux Workloads) Select the Linux services that you want to be temporarily stopped on the source workload before replication. These services will be restored back after replication completes.
Daemons to Stop for Cutover with Replication
(For Linux Workloads) Select the Linux services that should be permanently stopped on the source workload for Cutover with any Replication. The services stopped on the source workload during the replication process are not restored after Cutover. The stopped services are restored after a Test Cutover.
Target Workload Settings
(These settings are applied during the Run Cutover.)
VM Memory
Specify the amount of memory allocated to the target workload.
VM Tools
To install the VM tools, select the Install VM Tools option. This option is selected by default.
Hostname
Do one of the following:
-
To retain the same hostname, select No Change.
-
To change the hostname, select Set To and specify the new name.
System Identifier (SID) - (This setting is applicable only for Windows Server 2008, Windows Server 2003, Windows XP, and Windows Vista)
Before you generate a new SID for the Windows Server 2003 or Windows XP target workload computer, you must do the following:
-
Enable the SID generation:
-
Open a web browser and go to:
https://hostname or IP_address/platespinconfiguration
Replace hostname or IP_address with the DNS hostname or IP address of your PlateSpin Migrate Server.
If SSL is not enabled, use http in the URL.
-
On the PlateSpin Server Configuration page, set alwaysGenerateNewSid to True.
-
-
Ensure that the hostname of the source and target workloads are different.
To generate a new system identifier for the target workload, select Generate New System Identifier (SID) in the Target Workload Test Settings section of the Web Interface. For Windows Server 2008 and Windows Vista, you must specify the local Administrator account credentials. If this account has been locally renamed on the source, provide the new name. If this account is disabled on Windows Vista (by default), you must first enable it.
Domain / Workgroup
(For Windows Workloads) Depending on whether the source workload belongs to workgroup or domain, one of the following displays:
-
Workgroup: Workgroup_name
where Workgroup_name is the workgroup name to which the source belongs.
-
Domain: Domain_name
where Domain_name is the domain name to which the source belongs.
Do one of the following depending on where you want the target workload to join:
-
When the source workload belongs to a workgroup: Assume that the source workload belongs to a workgroup named WorkGroup1.
-
For the target workload to join the same workgroup (WorkGroup1), retain the following existing selection:
Workgroup: Workgroup1
-
For the target workload to join a different workgroup (say WorkGroup2), select Join Workgroup and specify the name as WorkGroup2.
-
For the target workload to join a domain, select Join Domain and specify the domain name you want the target to join.
-
-
When the source workload belongs to a domain: Assume that the source workload belongs to a domain named Domain1.
-
For the target workload to join a workgroup, click Join Workgroup and specify the name of the workgroup you want the target to join.
-
For the target workload to join the same domain (Domain1) with the domain registration settings preserved, retain the following existing selection:
Domain: Domain1
-
For the target workload to join the same domain (Domain1) without preserving the domain registration settings, select Join Domain and specify the domain name as Domain1.
-
For the target workload to join a different domain, select Join Domain and specify the domain name you want the target to join.
-
Domain Credentials
(For Windows Workloads) If you select Join Domain, specify the domain administrator credentials.
Network Connections
Select the local area connection and then select one of the following:
-
DHCP: Obtain an IP address automatically assigned by a DHCP server.
-
Static: Specify a static IP address.
For Windows workloads that have more than one NIC, select the connection for each NIC.
DNS Servers
Specify the DNS Servers for the target workloads. This is applicable only if you select Static in the Network Connections option:
-
Primary DNS server: Specify the primary DNS server address.
-
Alternative DNS server: Specify an alternate DNS server address.
-
Additional DNS server: To specify additional DNS server addresses:
-
Click Advanced.
-
Specify the DNS server address.
-
Click Add to add the server in the DNS Server Addresses list.
-
Click OK.
-
Services States on Target VM
(For Windows Workloads) Select Windows services that must be automatically stopped on the target VM.
Daemons States to Change
(For Linux Workloads) Select Linux daemons that must be automatically stopped on the target VM.
Target Workload Test Settings
(These settings are applied during the Test Cutover)
VM Memory
Specify the amount of memory allocated to the target workload.
VM Tools
To install the VM tools, select the Install VM Tools option. This option is selected by default.
Hostname
Do one of the following:
-
To retain the same hostname, select No Change.
-
To change the hostname, select Set To and specify the new name.
System Identifier (SID) - (This Setting is applicable only for Windows Server 2008, Windows Server 2003, Windows XP, and Windows Vista)
Before you generate a new SID for the Windows Server 2003 or Windows XP target workload computer, you must do the following:
-
Enable the SID generation:
-
Open a web browser and go to:
https://hostname or IP_address/platespinconfiguration
Replace hostname or IP_address with the DNS hostname or IP address of your PlateSpin Migrate Server.
If SSL is not enabled, use http in the URL.
-
On the PlateSpin Server Configuration page, set alwaysGenerateNewSid to True.
-
-
Ensure that the hostname of the source and target workloads are different.
To generate a new system identifier for the target workload, select Generate New System Identifier (SID) in the Target Workload Test Settings section of the Web Interface. For Windows Server 2008 and Windows Vista, you must specify the local Administrator account credentials. If this account has been locally renamed on the source, provide the new name. If this account is disabled on Windows Vista (by default), you must first enable it.
Domain / Workgroup
(For Windows Workloads) Depending on whether the source workload belongs to workgroup or domain, one of the following displays:
-
Workgroup: Workgroup_name
where Workgroup_name is the workgroup name to which the source belongs.
-
Domain: Domain_name
where Domain_name is the domain name to which the source belongs.
Do one of the following depending on where you want the target workload to join:
-
When the source workload belongs to a workgroup: Assume that the source workload belongs to a workgroup named WorkGroup1.
-
For the target workload to join the same workgroup (WorkGroup1), retain the following existing selection:
Workgroup: Workgroup1
-
For the target workload to join a different workgroup (say WorkGroup2), select Join Workgroup and specify the name as WorkGroup2.
-
For the target workload to join a domain, select Join Domain and specify the domain name you want the target to join.
-
-
When the source workload belongs to a domain: Assume that the source workload belongs to a domain named Domain1.
-
For the target workload to join a workgroup, click Join Workgroup and specify the name of the workgroup you want the target to join.
-
For the target workload to join the same domain (Domain1) with the domain registration settings preserved, retain the following existing selection:
Domain: Domain1
-
For the target workload to join the same domain (Domain1) without preserving the domain registration settings, select Join Domain and specify the domain name as Domain1.
-
For the target workload to join a different domain, select Join Domain and specify the domain name you want the target to join.
-
Domain Credentials
(For Windows Workloads) If you select Join Domain, specify the domain administrator credentials.
Network Connections
Select the network connection and then select one of the following:
-
DHCP: Obtain an IP address automatically assigned by a DHCP server.
-
Static: Specify a static IP address.
DNS Servers
Specify the DNS Servers for the target workloads. This is applicable only if you select Static in the Network Connections option:
-
Primary DNS server: Specify the primary DNS server address.
-
Alternative DNS server: Specify an alternate DNS server address.
-
Additional DNS server: To specify additional DNS server addresses:
-
Click Advanced.
-
Specify the DNS server address.
-
Click Add to add the server in the DNS Server Addresses list.
-
Click OK.
-
Services States on Target VM
(For Windows Workloads) Select Windows services that must be automatically stopped on the target VM.
Daemons States to Change
(For Linux Workloads) Select Linux daemons that must be automatically stopped on the target VM.
Tag
Tag
Select a tag to assign to the workload. For more information about tags, see Using Tags to Help Sort Workloads.
-
-
(Optional) To change the target, click Change Target.
NOTE:If you change the target, all the settings you specified will be cleared.
-
Do one of the following:
-
Click Save to save the settings.
-
Click Save and Prepare to save the settings and start preparing the workload migration.
-
Click Cancel to exit.
-
8.4.3 Migrating a Workload to a VM Host Using the X2P Workflow
Semi-automated refers to the process of workload virtualization in which a workload's target infrastructure is a virtual machine that PlateSpin Migrate regards as a physical machine. This applies to the following virtualization platforms:
-
Windows Server 2008 R2 Hyper-V
-
Citrix XenServer 6.1
-
RHEL KVM 7.0
-
SUSE Linux Enterprise Server (SUSE) 11 SP3 Xen (fully virtualized guest)
To migrate a workload to one of these platforms:
-
Use the native interface of the required virtualization platform to create a virtual machine whose operating system profile matches that of your source workload.
-
Begin booting the newly created virtual machine by using the appropriate PlateSpin boot ISO image, load the appropriate driver, if needed, then continue the boot process.
This discovers and registers the target virtual machine as a PlateSpin Migrate physical machine target. This is similar to the process described in Discovering Target Physical Machines. However, instead of burning the ISO image to a CD to boot physical hardware, you save the image on the VM host and use it to boot the target VM.
-
Use the PlateSpin Migrate Client to create and execute an X2P migration job.
-
Upon completion of the migration job, install virtualization enhancement software specific to the target virtualization platform.
The following topics provide additional notes about migrating workloads to the specific virtualization platform involved.
Migrating a Workload to Microsoft Hyper-V
You can use Microsoft Hyper-V as the target virtualization platform in a semi-automated workload virtualization.
NOTE:Hyper-V 2012 and Hyper-V 2012 R2 automatic workload virtualization is also available.
Prerequisites:
-
Your source workload is supported by PlateSpin Migrate and Hyper-V.
Additional information:
This section includes the following topics:
Downloading and Saving the Boot ISO Image (Hyper-V)
-
Download the appropriate boot ISO image for your workload.
-
(Optional) If you want to perform an unattended registration of your target, update the ISO image with the required registration parameters.
See KB Article 7920832.
-
Save the ISO image in a location that Hyper-V server can access. For example: c:\temp.
This ensures that the boot ISO image is available to the target VM as a bootable CD-ROM image.
Creating and Configuring the Target Virtual Machine (Hyper-V)
-
Use the Hyper-V Manager’s New Virtual Machine Wizard to create a new virtual machine with the following settings:
-
Name and Location: Specify a name for your new target and accept the default location.
-
Assign Memory: Assign at least 384 MB of RAM to the VM.
-
Connect Virtual Hard Disk: Ensure that the virtual disk size is equal to or greater than the system disk of your source workload.
-
Installation Options: Configure the VM to boot from an ISO image file, and point the wizard to the downloaded boot ISO image.
-
Summary: Configure the VM to not start upon creation (deselect the Start the virtual machine after it is created option).
-
-
After creating the VM, remove the default NIC and replace it with a generic one, called Legacy Network Adapter.
This is required because the New Virtual Machine Wizard creates a NIC of a custom Microsoft type, which is currently unsupported by PlateSpin Migrate.
-
Connect the newly added NIC (Legacy Network Adapter) to the external virtual network.
Registering the Virtual Machine with PlateSpin Server (Hyper-V)
Complete these steps to register your target with PlateSpin Server when you are using an unmodified boot ISO image.
-
At the command line in the Hyper-V Virtual Machine Connection Console, provide the required information at each individual prompt:
-
PlateSpin Server: Use the following format:
http:// server_host /platespinmigrate
Replace server_host with the actual PlateSpin Server host’s name or IP address.
-
Credentials (User Name/Password): Enter the name of an admin-level user on the PlateSpin Server host, including the domain or machine name. For example: domain\username, or localhost\Administrator. Provide a valid password for the specified user.
-
Network Card: Select the network card that is active, then either enter a temporary static IP address for this card or press the Enter key to use a DHCP server.
-
Temporary hostname: Provide a temporary VM name for PlateSpin Migrate Client to use to list the newly registered VM. The workload’s target hostname you select in the migration job overwrites this name.
-
SSL encryption: If your PlateSpin Migrate is installed on a host with SSL encryption enabled, enter Yes. If not, enter No.
-
PlateSpin Migrate Network: Unless you have defined your own PlateSpin Migrate Network in PlateSpin Migrate Client, press the Enter key. If you are working with a non-default PlateSpin Migrate Network, type its name, then press the Enter key.
A controller on your target virtual machine communicates with PlateSpin Server and registers the virtual machine as a physical target for a migration job.
NOTE:If registration fails with an authorization error, you might need to synchronize the clocks of the source and the target, modify the LAN Manager Authentication Level on the target, or both. See Table H-1, Common Issues and Solutions Related to Discovery Operations.
-
Migrating Your Source Workload to the Target Virtual Machine (Hyper-V)
-
Use PlateSpin Migrate Client to start an X2P migration job with your source workload being the job’s migration source and the target being the new VM on Hyper-V.
-
Monitor the migration job in PlateSpin Migrate Client‘s Jobs view.
When the job reaches the Configure Target Machine step, the virtual machine’s console returns to the boot prompt of the boot ISO image.
-
Shut down the virtual machine and reconfigure it to boot from disk rather than from the boot image.
-
Power on the virtual machine.
The migration job resumes, reboots the target, and completes the workload configuration.
Post-Migration Steps (Hyper-V)
Install Hyper-V Integration Services (virtualization enhancement software). For more information, see your Microsoft Hyper-V Getting Started Guide.
Migrating a Workload to Citrix XenServer
You can use Citrix XenServer as the target virtualization platform in a semi-automated workload virtualization.
Prerequisites:
-
Your target is a fully virtualized (not paravirtualized) VM.
-
Your source workload is supported by PlateSpin Migrate and Citrix XenServer.
Additional information:
This section includes the following topics:
Downloading and Saving the Boot ISO Image (Citrix XenServer)
-
Download the appropriate PlateSpin boot ISO image.
-
(Optional) If you want to perform an unattended registration of your target, update the ISO image with the required registration parameters.
See KB Article 7013485 .
-
Save the downloaded image file in the following directory:
/var/lib/xen/images
Creating and Configuring the Target Virtual Machine (Citrix XenServer)
-
On Citrix XenServer, use the Virtual Machine Manager Wizard or the Create Virtual Machines program shortcut to create a new virtual machine.
Ensure that the new virtual machine is created with the following settings:
-
Virtualization method: Fully virtualized.
-
Memory: Assign at least 384 MB of RAM to the VM. This ensures that the VM has sufficient resources during the migration and improves transfer speed. If the virtual machine requires less memory after the migration, reduce the assigned memory after the migration completes.
-
Disks: Assign one or more disks, depending on the requirements of your source workload. The storage can be either a raw SAN LUN or a virtual disk. Also, create a Virtual CD-ROM assigned to the downloaded boot ISO image.
-
Operating System: Must match the operating system profile of your source workload.
-
-
Ensure that the VM is configured to restart on reboot by exporting the VM’s settings from the xend database to a text file and making sure that the on_reboot parameter is set to restart. If not, shut down the VM, update the settings, and reimport them into the xend database.
For detailed instructions, see the XenServer 6.1.0 Virtual Machine User's Guide.
-
From the Virtual Machine Manager, launch the virtual machine console and monitor the boot process.
When the virtual machine completes the boot process, it prompts you for parameters that control the registration of the machine and its profile with PlateSpin Migrate. If you are using the unattended registration process, the required parameters are read from an answer file.
Registering the Virtual Machine with PlateSpin Server (Citrix XenServer)
Complete these steps to register your target with PlateSpin Server when you are using an unmodified boot ISO image.
-
At the command line, provide the required information at each individual prompt:
-
PlateSpin Server: Use the following format:
http:// server_host /platespinmigrate
Replace server_host with the actual PlateSpin Server host’s name or IP address.
-
Credentials (User Name/Password): Enter the name of an admin-level user on the PlateSpin Server host, including the domain or machine name. For example: domain\username, or localhost\Administrator. Provide a valid password for the specified user.
-
Network Card: Select the network card that is active, then either enter a temporary static IP address for this card or press the Enter key to use a DHCP server.
-
Temporary hostname: Provide a temporary VM name for PlateSpin Migrate Client to use to list the newly registered VM. The workload’s target hostname you select in the migration job overwrites this name.
-
SSL encryption: If your PlateSpin Migrate is installed on a host with SSL encryption enabled, enter Yes. If not, enter No.
-
PlateSpin Migrate Network: Unless you have defined your own PlateSpin Migrate Network in PlateSpin Migrate Client, press the Enter key. If you are working with a non-default PlateSpin Migrate Network, type its name, then press the Enter key.
A controller on your target virtual machine communicates with PlateSpin Server and registers the virtual machine as a physical target for a migration job.
-
Migrating Your Source Workload to the Target Virtual Machine (Citrix XenServer)
-
Use PlateSpin Migrate Client to start an X2P migration job with your source workload being the job’s migration source and the target being the new VM on the Citrix XenServer hypervisor.
-
Monitor the migration job in the PlateSpin Migrate Client‘s Jobs view.
When the job reaches the Configure Target Machine step, the virtual machine’s console returns to the boot prompt of the boot ISO image.
-
Shut down the virtual machine, reconfigure it to boot from disk rather than from the boot image, and deselect the VS Tools Installed option.
-
Power on the virtual machine.
The migration job resumes, reboots the target, and completes the workload configuration.
Migrating a Workload to RHEL KVM
You can use RHEL KVM as the target virtualization platform in a semi-automated workload virtualization.
Prerequisites:
-
Your target is a fully virtualized (not paravirtualized) VM.
-
Your source workload is supported by PlateSpin Migrate and RHEL KVM.
This section includes the following topics:
Downloading and Saving the Boot ISO Image (RHEL KVM)
-
Download the appropriate PlateSpin boot ISO image to a location on your RHEL KVM machine.
-
(Optional) If you want to perform an unattended registration of your target, update the ISO image with the required registration parameters.
See KB Article 7013485 .
Creating and Configuring the Target Virtual Machine (RHEL KVM)
-
On RHEL KVM, use the Virtual Machine Manager Wizard or the Create Virtual Machines program shortcut to create a new virtual machine.
Ensure that the new virtual machine is created with the following settings:
-
Virtualization method: Fully virtualized.
-
Memory: Assign at least 384 MB of RAM to the VM. This ensures that the VM has sufficient resources during the migration and improves transfer speed. If the virtual machine requires less memory after the migration, reduce the assigned memory after the migration completes.
-
Disks: Assign one or more disks, depending on the requirements of your source workload. The storage can be either a raw SAN LUN or a virtual disk. Also, create a Virtual CD-ROM assigned to the downloaded boot ISO image.
-
Operating System: Must match the operating system profile of your source workload.
-
-
Ensure that the VM is configured to restart on reboot.
-
From the Virtual Machine Manager, launch the virtual machine console and monitor the boot process.
When the virtual machine completes the boot process, it prompts you for parameters that control the registration of the machine and its profile with PlateSpin Migrate. If you are using the unattended registration process, the required parameters are read from an answer file.
Registering the Virtual Machine with PlateSpin Server (RHEL KVM)
Complete these steps to register your target with PlateSpin Server when you are using an unmodified boot ISO image.
-
At the command line, provide the required information at each individual prompt:
-
PlateSpin Server: Use the following format:
http:// server_host /platespinmigrate
Replace server_host with the actual PlateSpin Server host’s name or IP address.
-
Credentials (User Name/Password): Enter the name of an admin-level user on the PlateSpin Server host, including the domain or machine name. For example: domain\username, or localhost\Administrator. Provide a valid password for the specified user.
-
Network Card: Select the network card that is active, then either enter a temporary static IP address for this card or press the Enter key to use a DHCP server.
-
Temporary hostname: Provide a temporary VM name for PlateSpin Migrate Client to use to list the newly registered VM. The workload’s target hostname you select in the migration job overwrites this name.
-
SSL encryption: If your PlateSpin Migrate is installed on a host with SSL encryption enabled, enter Yes. If not, enter No.
-
PlateSpin Migrate Network: Unless you have defined your own PlateSpin Migrate Network in PlateSpin Migrate Client, press the Enter key. If you are working with a non-default PlateSpin Migrate Network, type its name, then press the Enter key.
A controller on your target virtual machine communicates with PlateSpin Server and registers the virtual machine as a physical target for a migration job.
-
Migrating Your Source Workload to the Target Virtual Machine (RHEL KVM)
-
Use PlateSpin Migrate Client to start an X2P migration job with your source workload being the job’s migration source and the target being the new VM on the RHEL KVM hypervisor.
-
Monitor the migration job in the PlateSpin Migrate Client‘s Jobs view.
When the job reaches the Configure Target Machine step, the virtual machine’s console returns to the boot prompt of the boot ISO image.
-
Shut down the virtual machine, reconfigure it to boot from disk rather than from the boot image.
-
Power on the virtual machine.
The migration job resumes, reboots the target, and completes the workload configuration.
Migrating a Workload to the SLES 11 SP3 Xen Hypervisor
You can use the Xen Hypervisor on SLES as the target virtualization platform in a semi-automated workload virtualization.
Prerequisites:
-
Your source workload is supported by PlateSpin Migrate and the Xen hypervisor.
Additional information:
This section includes the following topics:
Downloading and Saving the Boot ISO Image (Xen on SLES)
-
Download the appropriate boot ISO image for your workload.
-
(Optional) If you want to perform an unattended registration of your target, update the ISO image with the required registration parameters.
See KB Article 7920832.
-
Save the downloaded image file in the following directory:
/var/lib/xen/images
Creating and Configuring the Target Virtual Machine (Xen on SLES)
-
On SLES 11, use the Virtual Machine Manager Wizard or the Create Virtual Machines program shortcut to create a new virtual machine.
Ensure that the new virtual machine is created with the following settings:
-
Virtualization method: Fully virtualized.
-
Memory: Assign at least 384 MB of RAM to the VM. This ensures that the VM has sufficient resources during the migration and improves transfer speed. If the virtual machine requires less memory after the migration, reduce the assigned memory after the migration completes.
-
Disks: Assign one or more disks, depending on the requirements of your source workload. The storage can be either a raw SAN LUN or a virtual disk. Also, create a Virtual CD-ROM assigned to the downloaded boot ISO image.
-
Operating System: Must match the operating system profile of your source workload.
-
-
Ensure that the VM is configured to restart on reboot by exporting the VM’s settings from the xend database to a text file and making sure that the on_reboot parameter is set to restart. If not, shut down the VM, update the settings, and reimport them into the xend database.
For detailed instructions, see your SLES 11 documentation.
-
From the Virtual Machine Manager, launch the virtual machine console and monitor the boot process.
When the virtual machine completes the boot process, it prompts you for parameters that control the registration of the machine and its profile with PlateSpin Migrate. If you are using the unattended registration process, the required parameters are read from an answer file.
Registering the Virtual Machine with PlateSpin Server (Xen on SLES)
Complete these steps to register your target with PlateSpin Server when you are using an unmodified boot ISO image. For information on how to modify the image for an unattended registration process, see KB Article 7920832.
-
At the command line, provide the required information at each individual prompt:
-
PlateSpin Server: Use the following format:
http:// server_host /platespinmigrate
Replace server_host with the actual PlateSpin Server host’s name or IP address.
-
Credentials (User Name/Password): Enter the name of an admin-level user on the PlateSpin Server host, including the domain or machine name. For example: domain\username, or localhost\Administrator. Provide a valid password for the specified user.
-
Network Card: Select the network card that is active, then either enter a temporary static IP address for this card or press the Enter key to use a DHCP server.
-
Temporary hostname: Provide a temporary VM name for PlateSpin Migrate Client to use to list the newly registered VM. The workload’s target hostname you select in the migration job overwrites this name.
-
SSL encryption: If your PlateSpin Migrate is installed on a host with SSL encryption enabled, enter Yes. If not, enter No.
-
PlateSpin Migrate Network: Unless you have defined your own PlateSpin Migrate Network in PlateSpin Migrate Client, press they Enter key. If you are working with a non-default PlateSpin Migrate Network, type its name, then press the Enter key.
A controller on your target virtual machine communicates with PlateSpin Server and registers the virtual machine as a physical target for a migration job.
-
Migrating Your Source Workload to the Target Virtual Machine (Xen on SLES)
-
Use PlateSpin Migrate Client to start an X2P migration job with your source workload being the job’s migration source and the target being the new VM on the Xen hypervisor.
-
Monitor the migration job in the PlateSpin Migrate Client‘s Jobs view.
When the job reaches the Configure Target Machine step, the virtual machine’s console returns to the boot prompt of the boot ISO image.
-
Shut down the virtual machine, reconfigure it to boot from disk rather than from the boot image, and deselect the VS Tools Installed option.
-
Power on the virtual machine.
The migration job resumes, reboots the target, and completes the workload configuration.
Post-Migration Steps (Xen on SLES)
Install SUSE Drivers for Xen (virtualization enhancement software). For more information, see the following online document:
8.4.4 Migrating Windows Clusters
You can migrate a Microsoft Windows cluster’s business services. The supported clustering technologies are:
-
Windows Server 2012 R2 and Windows Server 2012: Server-based Microsoft Failover Cluster (Node and Disk Majority Quorum and No Majority: Disk Only Quorum models)
-
Windows Server 2008 R2 and Windows Server 2008: Server-based Microsoft Failover Cluster (Node and Disk Majority Quorum and No Majority: Disk Only Quorum models)
-
Windows Server 2003 R2 and Windows Server 2003: Server-based Windows Cluster Server (Single-Quorum Device Cluster model)
You can enable or disable Windows cluster discovery for your PlateSpin Migrate environment. See Enabling or Disabling Windows Cluster Discovery.
NOTE:The Windows cluster management software provides the failover and failback control for the resources running on its cluster nodes. This document refers to this action as a cluster node failover or a cluster node failback.
Planning Your Cluster Migration
Migration of a cluster is achieved through incremental replications of changes on the active node streamed to a virtual one node cluster. Before you configure Windows clusters for migration, ensure that your environment meets the prerequisites and that you understand the conditions for migrating cluster workloads.
Prerequisites
The scope of support for cluster migration is subject to the following conditions:
-
Active node hostname or IP address: You must specify the hostname or IP address of the cluster’s active node when you perform an Add Workload operation. Because of security changes made by Microsoft, Windows clusters can no longer be discovered by using the virtual cluster name (that is, the shared cluster IP address).
-
Active node discovery: Ensure that the PlateSpin global configuration setting DiscoverActiveNodeAsWindowsCluster is set to True on the PlateSpin Server Configuration page. This is the default setting. See Enabling or Disabling Windows Cluster Discovery.
-
Resource name search values: You must specify search values to use that can help differentiate the name of the shared Cluster IP Address resource from the name of other IP address resources on the cluster. See Adding Resource Name Search Values
-
Resolvable hostname: The PlateSpin Server must be able to resolve the hostname of each of the nodes in the cluster.
NOTE:The hostname must be resolvable by the IP address. That is, both hostname lookup and reverse lookup are required.
-
Quorum resource: A cluster’s quorum resource must be co-located on the node with the cluster’s resource group (service) being migrated.
-
PowerShell 2.0: Windows PowerShell 2.0 Engine must be installed on each node of the cluster.
-
Shared Disks: All shared disks belong to the active node.
-
Domain Controller: The migrated single-cluster virtual machine requires access to a domain controller with the same parameters as the original domain controller. To address this requirement, consider either leaving the original domain controller online, migrate it concurrently with the cluster.
-
RPC Services: The services on the RPC server should be running on both the cluster nodes, other wise migration fails with error: RPC Server is not available.
-
Network Security Permissions: The Network security permissions on the local Security policies page should be enabled for all the cluster nodes.
Block-Based Transfer
When you use block-based transfer for cluster workloads, the block-based driver components are not installed on the cluster nodes. The block-based transfer occurs using a driverless synchronization with an MD5-based replication. Because the block-based driver is not installed, no reboot is required on the source cluster nodes.
NOTE:File based transfer and block-based transfer with a BBT driver are not supported for migrating Microsoft Windows clusters.
Cluster Node Failover during the First Full Replication
A cluster workload requires that the first full replication completes successfully without a cluster node failover. If a cluster node failover occurs prior to the completion of the first full replication, you must remove the existing workload, re-add the cluster using the active node, and try again.
Cluster Node Failover during Replication
If a cluster node failover occurs prior to the completion of the copy process during a full replication or an incremental replication, the command aborts and a message displays indicating that the replication needs to be re-run.
Cluster Node Failover between Replications
The nodes must have similar profiles to prevent interruptions in the replication process. If a cluster node failover occurs between the incremental replications of a cluster workload and if the new active node’s profile is similar to the failed active node, the migration contract continues as scheduled for the next incremental replication. Otherwise, the next incremental replication command fails.
The profiles of cluster nodes are considered similar if all of the following conditions are met:
-
Serial numbers for the nodes’ local volumes (System volume and System Reserved volume) must be the same on each cluster node.
NOTE:Use the customized Volume Manager utility to change the local volume serial numbers to match each node of the cluster. See Synchronizing Serial Numbers on Cluster Node Local Storage.
If the local volumes on each node of the cluster have different serial numbers, you cannot run a replication after a cluster node failover occurs. For example, during a cluster node failover, the active node Node 1 fails, and the cluster software makes Node 2 the active node. If the local drives on the two nodes have different serial numbers, the next replication command for the workload fails.
-
The nodes must have the same number of volumes.
-
Each volume must be exactly the same size on each node.
-
The nodes must have an identical number of network connections.
Enabling or Disabling Windows Cluster Discovery
PlateSpin Migrate can discover and inventory Windows Server failover clusters in your PlateSpin environment based on the active node in each cluster. Alternatively, it can treat all active and non-active cluster nodes as standalone machines.
To enable cluster discovery for all Windows clusters, ensure that the parameter DiscoverActiveNodeAsWindowsCluster is set to True. This is the default setting. Cluster discovery, inventory, and workload migration use the hostname or IP address of a cluster’s active node, instead of using its cluster name and an administration share. You do not configure separate workloads for the cluster’s non-active nodes. For other cluster workload migration requirements, see Prerequisites.
To disable cluster discovery for all Windows clusters, set the parameter DiscoverActiveNodeAsWindowsCluster to False. This setting allows the PlateSpin Server to discover all nodes in a Windows failover cluster as standalone machines. That is, it inventories a cluster’s active node and non-active nodes as a regular, cluster-unaware Windows workloads.
To enable or disable cluster discovery:
-
Go to the PlateSpin Server configuration page at
https://<platespin-server-ip-address>/PlateSpinConfiguration
-
Search for DiscoverActiveNodeAsWindowsCluster, then click Edit.
-
In the Value field, select True to enable cluster discovery, or select False to disable cluster discovery.
-
Click Save.
Adding Resource Name Search Values
To help identify the active node in a Windows failover cluster, PlateSpin Migrate must differentiate the name of the shared Cluster IP Address resource from the names of other IP address resources on the cluster. The shared Cluster IP Address resource resides on the cluster’s active node.
The global parameter MicrosoftClusterIPAddressNames on the PlateSpin Server Configuration page contains a list of search values to use in discovery for a Windows cluster workload. When you add a Windows cluster workload, you must specify the IP address of the cluster’s currently active node. PlateSpin Migrate searches the names of the cluster’s IP address resources on that node to find one that starts with the specified characters of any value in the list. Thus, each search value must contain enough characters to differentiate the shared Cluster IP Address resource on a specific cluster, but it can be short enough to apply to discovery in other Windows clusters.
For example, a search value of Clust IP Address or Clust IP matches the resource names Clust IP Address for 10.10.10.201 and Clust IP Address for 10.10.10.101.
The default name for the shared Cluster IP Address resource is Cluster IP Address in English, or the equivalent if the cluster node is configured in another language. The default search values in the MicrosoftClusterIPAddressNames list include the resource name Cluster IP Address in English and each of the supported languages.
Because the resource name of the shared Cluster IP Address resource is user-configurable, you must add other search values to the list, as needed. If you change the resource name, you must add a related search value to the MicrosoftClusterIPAddressNames list. For example, if you specify a resource name of Win2012-CLUS10-IP-ADDRESS, you should add that value to the list. If you have multiple clusters using the same naming convention, an entry of Win2012-CLUS matches any resource name that starts with that sequence of characters.
To add search values in the MicrosoftClusterIPAddressNames list:
-
Go to the PlateSpin Server configuration page at
https://<platespin-server-ip-address>/PlateSpinConfiguration
-
Search for MicrosoftClusterIPAddressNames, then click Edit.
-
In the Value field, add one or more search values to the list.
-
Click Save.
Setting the Quorum Arbitration Timeout
You can set the QuorumArbitrationTimeMax registry key for Windows Server failover clusters in your PlateSpin environment by using the global parameter FailoverQuorumArbitrationTimeout on the PlateSpin Server Configuration page. The default timeout is 60 seconds, in keeping with the Microsoft default value for this setting. See QuorumArbitrationTimeMax on the Microsoft Developer Network website. The specified timeout interval is honored for quorum arbitration at failover and failback.
To set the quorum arbitration timeout for all Windows failover clusters:
-
Go to the PlateSpin Server configuration page at
https://<platespin-server-ip-address>/PlateSpinConfiguration
-
Search for FailoverQuorumArbitrationTimeout, then click Edit.
-
In the Value field, specify the maximum number of seconds to allow for quorum arbitration.
-
Click Save.
Setting Local Volume Serial Numbers
You can use the Volume Manager utility to change the local volume serial numbers to match in each node of the cluster. See Synchronizing Serial Numbers on Cluster Node Local Storage.
PlateSpin CutOver
When the PlateSpin Cutover operation is complete and the cluster comes online, you see a multi-node cluster with one active node (all other nodes are unavailable).
To perform a PlateSpin cutover (or to test the PlateSpin cutover) on a Windows cluster, the cluster must be able to connect to a domain controller. To leverage the test cutover functionality, you need to migrate the domain controller along with the cluster. During the test, bring up the domain controller, followed by the Windows cluster workload (on an isolated network).
PlateSpin Cluster Migration
A PlateSpin cluster migration operation requires a full replication for Windows Cluster workloads. After PlateSpin cluster migration is complete, you must reattach the shared storage and rebuild the cluster environment before you can rejoin additional nodes to the newly restored cluster.
For information about rebuilding the cluster environment after a PlateSpin migration, see Knowledgebase Article 7016770.
After PlateSpin cluster migration is complete for a Windows Server 2003 or Windows Server 2003 R2 cluster, you must restart the cluster service on the target.
Migrating Windows Clusters with the Web Interface
Use the PlateSpin Migrate Web Interface to add the active node by specifying the IP address of the active node, configure migration for the active node, and then run the migration.
Migrating Windows Clusters Using the Migrate Client
You can use a Move job to migrate the essential services of a cluster that results in a functional single-node cluster in a virtual machine.
The workflow of migrating a Windows cluster is similar to that of migrating a standalone server:
-
Discover the active node by specifying the IP address of the active node.
-
In the Servers view, use drag-and-drop to start a migration job, then configure the job’s parameters.
-
(Conditional: successful migration) If the migration job completes successfully, perform a Server Sync operation on the active node.
NOTE:If the active node in the cluster fails over before you can perform a Server Sync operation, perform a full migration using the new active node, and then perform a Server Sync on this new node.
-
(Conditional: failover prior to migration) If a cluster failover occurs prior to the completion of file transfer, the migration job aborts. If this happens, refresh the source and retry the migration job.
NOTE:If you select Shut down for the source’s post-migration end state, a shutdown of all source nodes of the cluster results.