2.9 Localizing and Customizing User Application Strings and Name Formats
Identity Manager provides several tools for localizing or customizing the User Application’s text. This section includes the following topics:
2.9.1 Localizing User Application Strings
See Table 2-4 for links to the documentation that describes how to localize User Application components.
Table 2-4 Localization and Customization Topics
|
Topic |
Where to find it: |
|---|---|
|
To set the User Application’s preferred locale |
See the sections “Preferred Locale” and “Choosing a Preferred Language” in the Identity Manager User Application: User Guide. |
|
To localize e-mail templates |
|
|
To localize challenge questions |
See “Security: Best Practices” in the Novell Identity Manager Administration Guide. |
|
To localize the password sync status application name |
|
|
To localize the names of container or shared pages |
See the property in Section 6.2.1, Creating Container Pages. |
|
To localize portlet preferences |
See Section 7.3.5, Modifying Preferences for Portlet Registrations. |
|
For general information about localizing provisioning objects or customizing their display text, such as:
|
See |
2.9.2 Customizing Text
The text displayed in the User Application is stored in either the User Application driver or in a set of language-based JAR files (UserAppStrings_xx.JAR) located in the User Application WAR. You use different tools to customize the text depending on where the text is stored. For text stored in the:
-
User Application driver: Use the provisioning tools in Designer for Identity Manager.
For more information, see the section “Localizing Provisioning Objects” in the User Application: Design Guide.
-
User Application WAR: Follow the procedure described in this section.
The text strings stored in the User Application WAR file are stored in a language-based JAR file. There is one JAR for each supported language, and the JAR file names indicate the associated language by appending the Java locale code for the associated language. The base name of the JAR file is UserAppStrings_locale-code.JAR. For example, the English language strings are stored in the UserAppStrings_en.JAR. The JAR files are copied to the l10n-resources subfolder of the User Application’s installation directory.
NOTE:To customize graphics or theming, see Section 5.1.7, Theme Administration
To customize the text stored in the User Application WAR, decide:
Once you know what to change, follow these steps:
You can follow the example outlined in Text Change Example
The User Application strings typically change between versions. This means that you have to apply your string changes or customizations to each new release.
What strings do I want to change?
-
Review the User Application tabs.
-
Make a list that includes each string you want to change and where the string is located in the User Application user interface. You can use this list when testing your changes to ensure that you made the text changes in the appropriate places.
-
Determine whether the strings are stored in the User Application driver or in the language-based JAR. The following guidelines help you determine where the strings are stored:
-
Navigation, headers, names, and instructions: This content is stored in language-based JARs.
-
Identity Self-Service tab: This content is stored in language-based JARs, unless it is related to directory abstraction layer entities (such as display name, lists, and categories). Content related to directory abstraction layer entities is stored in the User Application driver.
-
Work Dashboard tab: This content is stored in language-based JARs, unless it is in the Form Details section. The content in the Form Details section is stored in the User Application driver.
-
Administration tab: This content is stored in language-based JARs.
-
Roles and Resources tab: This content is stored in language-based JARs unless it is related to role or SoD names or descriptions. Role or SoD names and descriptions are stored in the User Application driver.
-
Compliance tab: This content is stored in the language-based JARs unless it is related to the provisioning request definition. Content related to the provisioning request definition is stored in the User Application driver.
-
For information on changing the strings stored in the User Application driver, see the section “Localizing Provisioning Objects” in the User Application: Design Guide.
What languages do I want to support?
-
Locate the JAR files corresponding to the language(s) you want to support. For example, English strings are located in UserAppStrings_en.JAR.
-
Unzip the JARs into a working directory using a zip tool or the Java JDK JAR program.
Modify or customize the strings
-
Search the files in the working directory to locate the strings you want to change.
Use a tool that allows you to search for a specified string across all of the files in a folder (the string(s) you want to change might be located in more than one file).
HINT:The strings in the files are in the properties file format of key=value. Modify only the value, and not the key. Modifying the key can cause run-time errors. Follow the additional editing tips identified below.
-
When editing the properties files:
-
Use an editor that formats properties files for improved readability, when possible.
-
Use an editor that displays characters rather than unicode encoding for improved readability. Some of the properties files contain unicode-encoding.
-
In the editor, turn off wrapping to improve readability. It helps identity each property on a separate line.
-
In some files, the key value might be difficult to identify, especially if your editor does not provide automatic property file formatting. In these cases, search for the equals sign, and find the first occurrence of the equals sign that does not have a backslash preceding it (\=). The key precedes the equals sign (=), and the value follows it.
-
Make sure to maintain the proper properties file format.
To learn more, see Java Properties Object
-
Repackage the updated files and deploy
-
Add the properties files back to the JAR using the Java JDK jar program. You must maintain the folder location within the JAR.
-
Add the modified JAR into the User Application WAR maintaining the folder location within the WAR. You can use the Java JDK Jar program.
This example uses the Java JDK Jar program and maintains the folder location:
jar -uvf IDMPRov.WAR WEB-INF/lib/UserAppStrings_en.jar
-
Redeploy the WAR file to your application server.
Test your changes
-
Access the User Application.
-
Using your list of changes, review each occurrence of the string you changed to determine if you made the change appropriately.
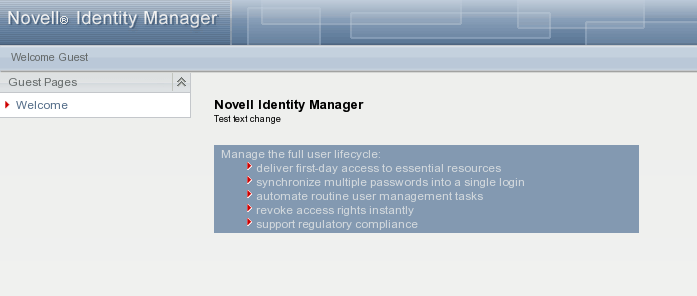
Text Change Example
This section provides a simple text change example.
Open the User Application Welcome page and notice the text that says
Securely manage the access needs of your ever-changing user community
Figure 2-7 Sample Text Change

To change this string in the English language JAR.
-
Expand the UserAppStrings_en.JAR file to a temporary directory.
-
Use a find tool to locate the string.
Notice that it is located in this properties file ./com/novell/afw/portal/portlet/message/IDMWelcomeMessageRsrc_en.properties
-
Open the properties file and change the text from:
Securely manage the access needs of your ever-changing user community
to
Test text change
-
Save and close the file.
-
Follow the steps described in Repackage the updated files and deploy.
-
Open the User Application’s Welcome page and verify your changes.
2.9.3 Configuring the Format of Localized User Names
The User Application allows you to configure the format of displayed user names in your environment based on the user’s current locale.
You can then use localized user names in Approval forms in the User Application, using the literal %LocaleFormattedFullName% for forms with the User entity definition key. For more information about creating or configuring User Application forms in Designer, see Creating Forms for a Provisioning Request Definition,
in the User Application: Design Guide.
This section helps you configure the format of localized names by editing the Full Name entity in the Directory Abstraction Layer (DAL) in Designer.
-
Start Designer.
-
Open your current project and click the project name in the Outline view.
-
In the Provisioning view, right-click and select .
-
In the Directory Abstraction Layer editor, expand .
-
Select the locale name pattern you want to modify.
-
Modify the expression to specify the format you want to use for the locale. For example, if you want to display the user’s surname first and given name second, modify the expression as follows:
attr.getValue("Surname") + " " + attr.getValue("Given Name")You can either modify the expression manually in the Expression field or click the icon and use the ECMA Expression Builder to modify the expression. For more information about modifying ECMAScript expressions, see
Working with ECMA Expressions,
in the User Application: Design Guide. -
Save your changes to the locale name pattern.
-
Repeat Step 5 through Step 7 for each name pattern you want to configure.
-
When finished, close the Directory Abstraction Layer editor.
-
In the Modeler, right-click the User Application driver and select .
-
Click , then click to restart the driver.
-
Click .
-
(Conditional) If you have installed Identity Manager Home and Provisioning Dashboard, you can also enable the same formatting in the typeahead fields. For more information, see
Enabling Localized User Names in Typeahead Fields
in the NetIQ Identity Manager Home and Provisioning Dashboard User Guide.
2.9.4 Ensuring that Characters Display Properly in Role Report PDF Files
By default, the role report feature of the Roles Based Provisioning Module uses UniGB-UCS2-H
for the PDF encoding and STSong-Light
for the PDF font for Chinese simplified, Chinese traditional, Russian and Japanese locales. For the other locales, Cp1252
is used for PDF encoding and Helvetica
or Helvetica-Bold
is used for the PDF font.
If the user's browser locale or preferred locale is set to one of the above four locales, the report will be able to display most of characters from these locales. However, some extended characters found in ISO-8859 may not be displayed properly in the report.
Conversely, if the browser locale or preferred locale is not set to one of these four locales then some Asian characters will not display properly.
To allow all characters to display properly in generated PDF files, you need to:
-
Edit the Configuration XML Data in iManager
-
Configure the User Application
Detailed instructions are provided below.
NOTE:You may also notice problems displaying some characters in role reports for languages that are not in the standard set of supported languages. If you add a new language (such as Polish), you may also need to perform the steps provided in this section to ensure that all characters display properly for that language as well.
Editing the Configuration XML Data in iManager
-
Login to iManager as your Administrator.
-
Click the View Objects icon.
-
In the Tree, navigate to the following location:
Context > Driver Set > Driver > AppConfig > AppDefs
For example:
novell > TestDrivers > UserAppDriver > AppConfig > AppDefs
-
Click .
-
In the Valued Attributes list, select XmlData and click .
-
In the Edit Attribute window, search for PREF_FONT and replace the corresponding <value></value> with <value>Arialuni.ttf</value>.
-
Search for PREF_ENCODING and replace the corresponding <value></value> with <value>Identity-H</value>.
-
Click , the click again.
-
Restart the User Application Driver.
Configuring the User Application
-
If you edited the </property> tag (in Step 6 and Step 7) to add support for the four locales by specifying Arialuni.ttf as the preferred font, the directory that contains the file Arialuni.ttf (the name of the file must match the entry specified for PREF_FONT above) has to be added to the Application Server’s classpath.
For example, if the file Arialuni.ttf was saved to the directory /home/lab/font, and the Application Server that the User Application war file is deployed on is JBoss, the start script for JBoss could be modified with the following entry:
JBOSS_CLASSPATH="$JBOSS_CLASSPATH:/home/user/font" -
Restart the Application Server:
-
For JBoss, restart the Application Server once all configuration manual steps have been completed.
-
For WebSphere and WebLogic, the patched User Application war must be re-deployed with their Administration tools once all manual configuration steps have been completed.
-
2.9.5 Ensuring that Dates Display Correctly in Norwegian
For language codes no and nb, you need to perform a workaround to ensure that dates display correctly in Norwegian. The Date.js file contains no but not nb, however, the dmask value (dd/MM/yyyy) is not correct. For both no and nb, the format should be dd.MM.yyyy.
To ensure that dates display correctly in Norwegian:
-
Copy the file com/netiq/common/i18n/I18nDateTimeRsrc_en.properties, modifying the locale portion of the file name to match the desired locale (for example, I18nDateTimeRsrc_nb.properties).
-
Modify the format(s) in the file to match the desired format. There are four format types: short, medium, long and full. These formats correspond to the java.text.DateFormat.SHORT, .MEDIUM, .LONG and .FULL constants.
-
Add the file to the IDMProv.war under WEB-INF/classes/com/netiq/common/i18n using the jar utility (file must be placed in a directory tree corresponding to the above path).
jar uvf IDMProv.war
WEB-INF/classes/com/netiq/common/i18n/I18nDateTimeRsrc_nb.properties