2.4 Installing the Orchestrate Agent Only
You might need to install the PlateSpin Orchestrate Agent on many different kinds of machines in your data center.
-
Section 2.4.1, Installing the Orchestrate Agent Using the Product ISO
-
Section 2.4.2, Installing the Orchestrate Agent from the Administrator Information Page
-
Section 2.4.4, Installing the PlateSpin Orchestrate Agent on Other Supported Operating Systems
-
Section 2.4.5, Automatically Installing the Orchestrate Agent on a VM Host Using a Job
NOTE:To automatically install the Orchestrate Agent on a VM that you created in the VM Client, in the client, right-click a VM that has been shut down, then select . This launches a job that installs the Orchestrate Agent on the VM, regardless of its platform. The agent’s service is started the next time you provision the VM. For more information, see Installing the PlateSpin Orchestrate Agent on a VM
in the PlateSpin Orchestrate 2.5 VM Client Guide and Reference.
2.4.1 Installing the Orchestrate Agent Using the Product ISO
If you want to independently install the Orchestrate Agent to a node in your grid, you can do so, but the procedures for doing so vary depending on the platform where you are installing it.
Using the ISO to Install the Orchestrate Agent on SLES 10.x and 11.x Machines
Use the following procedure if you want to use the Add-on CD method to install just the Orchestrate Agent to a SLES machine.
NOTE:The Orchestrate Agent is supported on SLES 10 SP3 and SLES 11.
For more information about installing on SLES 11, see Using the ISO to Install the PlateSpin Orchestrate 2.5 Agent on SLES 11 Machines.
-
To verify that the device where you want to install the agent and client software fulfills the necessary requirements, review Section 1.0, Planning the Orchestrate Server Installation.
-
Download the appropriate PlateSpin Orchestrate Server ISO (32-bit or 64-bit) to an accessible network location.
-
(Optional) Create a DVD ISO (32-bit or 64-bit) that you can take with you to the machine where you want to install it.
-
Install PlateSpin Orchestrate Agent software:
-
Log in to the target SLES server as root, then open YaST2.
-
In the YaST Control Center, click , then click to display the Add-on Product Media dialog box.
-
In the Add-on Product Media dialog box, select the ISO media ( or ) to install:
-
(Conditional) Select , click , insert the DVD, then click .
-
(Conditional) Select , click, select the ISO Image check box, browse to and select the ISO in the file system, then click .
-
-
Read and accept the license agreement, then click to display YaST2.
-
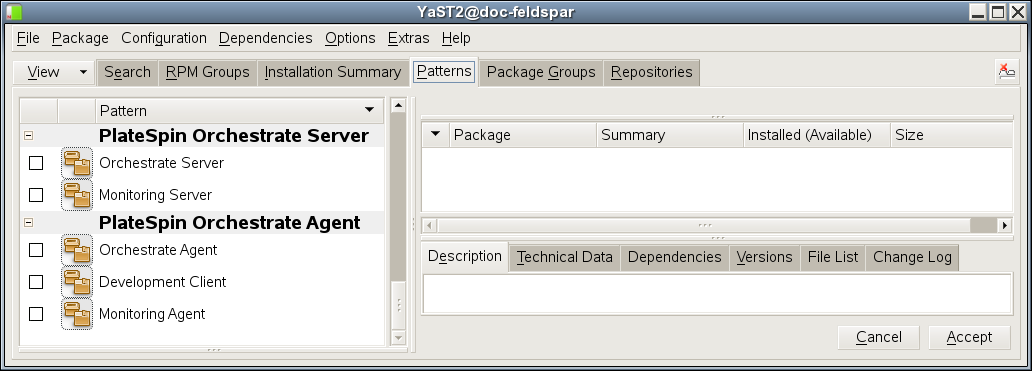
In YaST2, click the drop-down menu, then select to display the install patterns available on the PlateSpin Orchestrate ISO.
-
Select the PlateSpin Orchestrate installation patterns that you want to install:
-
Orchestrate Agent: Runs applications on all managed nodes under the management of the Orchestrate Server. An agent reports its status to the Orchestrate Server. Includes packages to help you configure the Orchestrate Agent.
-
Monitoring Agent: This pattern installs the Ganglia Agent (gmond) on each monitored node, which collects performance metrics and sends the data to the Orchestrate Monitoring Server. This pattern includes packages that help you configure the Monitoring Agent.
If you select the Orchestrate Agent pattern, the Monitoring Agent pattern is selected by default. This is only a recommended dependence (most users install both components together) and is not binding. The autoselection is made for your convenience.
Refer to the information in Section A.0, PlateSpin Orchestrate Components: Install Patterns for details on the installation data that you need to know.
-
-
Click to install the packages.
You must install PlateSpin Orchestrate components before you can configure them.
-
-
Configure the PlateSpin Orchestrate components that you have installed. You can use one of two methods to gather information for the configuration:
NOTE:The remaining steps in this procedure show the installation of the Orchestrate Agent as an example of component installation. Steps for installing any of the other components are similar. Refer to Section 2.3.2, PlateSpin Orchestrate Configuration Information for further information you might need to configure a component.
-
(Conditional) If you use the PlateSpin Orchestrate product configuration script, run it from the command line.
-
Make sure the product ISO is accessible. The script copies some files from the ISO.
-
Make sure you are logged in as root to run the configuration script.
-
Run the script, as follows:
/opt/novell/zenworks/orch/bin/config
When the script runs, the following information is initially displayed:
Welcome to PlateSpin Orchestrate.

This program will configure PlateSpin Orchestrate 2.5.0

Select whether this is a new install or an upgrade

i) install
u) upgrade
- - - - - -

Selection [install]:
-
Press Enter to select the default (install) and display the following text, depending on which components you installed previously:
Select products to configure # selected Item 1) no PlateSpin Orchestrate Monitoring Service (not installed) 2) no PlateSpin Orchestrate Server (not installed) 3) yes PlateSpin Orchestrate Agent Select from the following: 1 - 4) toggle selection status a) all n) none f) finished making selections q) quit -- exit the program Selection [finish]: -
Type f and press Enter to finish the selection of the Orchestrate Agent (for this example, only the Orchestrate Agent is installed).
-
Specify the name of the Orchestrate Agent on this node, then press Enter.
-
Specify the hostname or IP address of the Orchestrate Server, then press Enter.
-
Specify (yes or no) whether you want to use a certificate for verifying communication, then press Enter.
-
Specify (yes or no) whether this is a virtual machine, then press Enter.
-
Specify the port on the Orchestrate Server that you want to use for communication between this Agent and the Server, then press Enter.
-
(Optional) Specify a local bind address for the Agent, then press Enter.
-
Verify the configuration summary information, specify whether changes are needed, then (when all changes are made) press Enter to begin the configuration.
-
-
(Conditional) If you use the GUI Configuration Wizard, run it as follows:
-
Make sure the product ISO is accessible. The script copies some files from the ISO.
-
Make sure you are logged in as root to run the configuration wizard.
-
Run the wizard:
/opt/novell/zenworks/orch/bin/guiconfig
When the script runs, the following information is initially displayed:
IMPORTANT:If you have only a keyboard to navigate through the pages of the GUI Configuration Wizard, use the Tab key to shift the focus to a control you want to use (for example, a button), then press the spacebar to activate that control.
Default values are built into the script; most of these defaults are set to configure all of the product patterns that were installed using the Add-on Product Media utility in SLES 10 and in SLES 11.
-
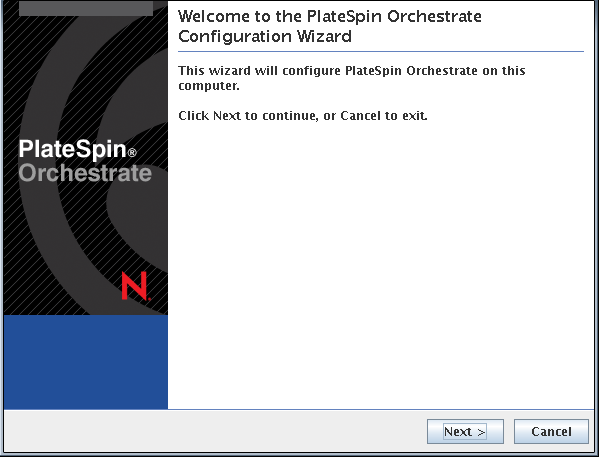
Click to display the license agreement.
-
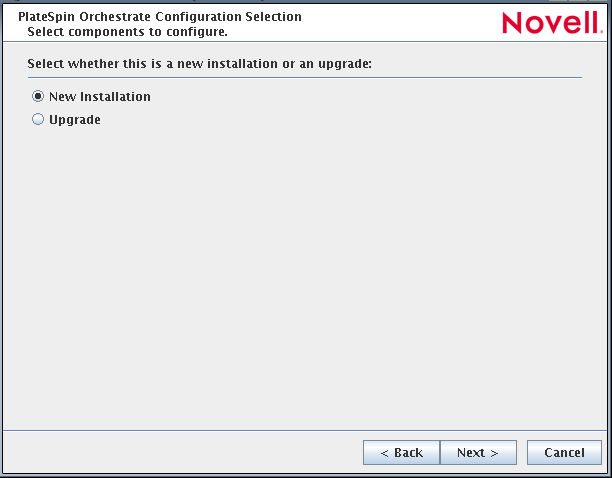
Select the option to accept the agreement, then click to open the installation type page of the wizard:
-
Select , then click to display the Orchestrate Components page of the wizard:

-
Confirm that the Orchestrate Agent is selected for configuration, then click to display the Orchestrate Agent Configuration page:

-
Check and if necessary change the name of the Orchestrate Agent and the Orchestrate Server.
If you select the check box in the wizard, you have the option of changing the default values. If you leave the check box deselected, the setting is configured with normal defaults. For information about the advanced settings see Section 2.3.2, PlateSpin Orchestrate Configuration Information.
-
Click Next to display the configuration wizard summary page:

IMPORTANT:Although this page of the wizard lets you navigate by using the Tab key and the spacebar, you need to use the Ctrl+Tab combination to navigate past the summary list. Click if you accidentally enter the summary list, and re-enter the page to navigate to the control buttons.
By default, the check box on this page is selected. If you accept the default of having it selected, the wizard starts the PlateSpin Orchestrate Agent and applies the configuration settings. If you deselect the check box, the wizard writes out the configuration file to /etc/opt/novell/novell_zenworks_orch_install.conf without starting PlateSpin Orchestrate or applying the configuration settings.
You can use this .conf file to start the Orchestrate Agent and apply the settings either manually or with an installation script. Use the following command to run the configuration:
/opt/novell/zenworks/orch/bin/config -rs
-
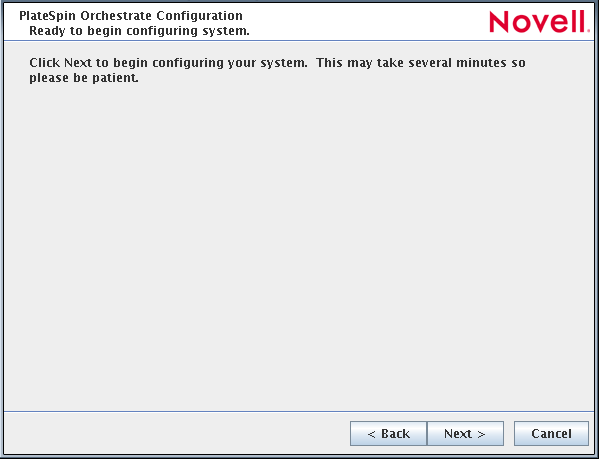
Click to display the following wizard page.
-
Click to launch the configuration script. When the configuration is finished, the following page is displayed:

-
Click to close the configuration wizard.
IMPORTANT:When the installation and configuration are complete, you need to register the resources to be managed by the PlateSpin Orchestrate system. Please refer to Section 3.0, First Use of Basic PlateSpin Orchestrate Components for detailed information about getting resources to manage in the PlateSpin Orchestrate system.
-
-
(Optional) Increase the heap size that the JVM handles to enable the console to manage a large number of objects.
-
Open the bash shell script at /opt/novell/zenworks/zos/server/bin.
-
Inside the script, find the following line where the JVM parameters are defined:
JVMARGS="-Xmx256m -Xms256m -Xmn64m -XX:NewSize=64m -XX:MaxNewSize=64m"
The -Xmx argument specifies the maximum heap size for the JVM. Increasing the heap size prevents a JVM out of memory condition.
-
Change the value in the -Xmx argument from 256 MB to 512 MB.
-
Using the ISO to Install the PlateSpin Orchestrate 2.5 Agent on SLES 11 Machines
PlateSpin Orchestrate 2.5 provides a separate ISO designated for SLES/SLED 11 installations of the PlateSpin Orchestrate Agent and Client.
Installation on SLES 11 is supported for the PlateSpin Orchestrate Agent only. Installation on SLED 11 is supported for the PlateSpin Orchestrate Clients only. Neither the PlateSpin Orchestrate Server nor the PlateSpin Orchestrate Monitoring Server are supported on SLED/SLES 11
NOTE:The Orchestrate Agent is also supported on SLES 10 SP3 and SLES 11. For more information, see Using the ISO to Install the Orchestrate Agent on SLES 10.x and 11.x Machines.
Use the following procedure if you want to use the Add-on CD method to install just the PlateSpin Orchestrate 2.5 Agent to a SLES 11 machine.
-
To verify that the device where you want to install the agent and client software fulfills the necessary requirements, review Section 1.0, Planning the Orchestrate Server Installation.
-
Download the appropriate PlateSpin Orchestrate Server SLES 11 ISO (32-bit or 64-bit) to an accessible network location.
-
(Optional) Create a DVD ISO (32-bit or 64-bit) that you can take with you to the machine where you want to install it.
-
Install PlateSpin Orchestrate Agent software:
-
Log in to the target SLES 11 server machine as root, then open YaST2.
-
In the YaST Control Center, click , then click to display the Add-on Product Media dialog box.
-
In the Add-on Product Media dialog box, select the ISO media ( or ) to install:
-
(Conditional) Select , click , insert the DVD, then click .
-
(Conditional) Select , click, select the check box, browse to and select the ISO in the file system, then click .
-
(Conditional) Select , click , enter the repository name of the ISO image, browse to the location of the ISO image, then click .
-
-
Read and accept the license agreement, then click to display YaST2.
-
In YaST2, click the drop-down menu, then select to display the install patterns available on the PlateSpin Orchestrate ISO.
-
Select the PlateSpin Orchestrate installation patterns that you want to install:
-
Orchestrate Agent: Runs applications on all managed nodes under the management of the Orchestrate Server. An agent reports its status to the Orchestrate Server. Includes packages to help you configure the Orchestrate Agent.
-
Monitoring Agent: This pattern installs the Ganglia Agent (gmond) on each monitored node, which collects performance metrics and sends the data to the Orchestrate Monitoring Server. This pattern includes packages that help you configure the Monitoring Agent.
If you select the Orchestrate Agent pattern, the Monitoring Agent pattern is selected by default. This is only a recommended dependence (most users install both components together) and is not binding. The autoselection is made for your convenience.
Refer to the information in Section A.0, PlateSpin Orchestrate Components: Install Patterns for details on the installation data that you need to know.
-
-
Click to install the patterns.
You must install PlateSpin Orchestrate components before you can configure them.
-
-
Configure the PlateSpin Orchestrate components that you have installed. You can use one of two methods to gather information for the configuration:
NOTE:The remaining steps in this procedure show the installation of the Orchestrate Agent as an example of component installation. Steps for installing any of the other components are similar. Refer to Section 2.3.2, PlateSpin Orchestrate Configuration Information for further information you might need to configure a component.
-
(Conditional) If you use the PlateSpin Orchestrate product configuration script, run it from the command line.
-
Make sure the product ISO is accessible. The script copies some files from the ISO.
-
Make sure you are logged in as root to run the configuration script.
-
Run the script, as follows:
/opt/novell/zenworks/orch/bin/config
When the script runs, the following information is initially displayed:
Welcome to PlateSpin Orchestrate.

This program will configure PlateSpin Orchestrate 2.5.0

Select whether this is a new install or an upgrade

i) install
u) upgrade
- - - - - -

Selection [install]:
-
Press Enter to select the default (install) and display the following text, depending on which components you installed previously:
Select products to configure # selected Item 1) no PlateSpin Orchestrate Monitoring Service (not installed) 2) no PlateSpin Orchestrate Server (not installed) 3) yes PlateSpin Orchestrate Agent Select from the following: 1 - 4) toggle selection status a) all n) none f) finished making selections q) quit -- exit the program Selection [finish]: -
Type f and press Enter to finish the selection of the Orchestrate Agent (for this example, only the Orchestrate Agent is installed).
-
Specify the name of the Orchestrate Agent on this node, then press Enter.
-
Specify the hostname or IP address of the Orchestrate Server, then press Enter.
-
Specify (yes or no) whether you want to use a certificate for verifying communication, then press Enter.
-
Specify (yes or no) whether this is a virtual machine, then press Enter.
-
Specify the port on the Orchestrate Server that you want to use for communication between this Agent and the Server, then press Enter.
-
(Optional) Specify a local bind address for the Agent, then press Enter.
-
Verify the configuration summary information, specify whether changes are needed, then (when all changes are made) press Enter to begin the configuration.
-
-
(Conditional) If you use the GUI Configuration Wizard, run it as follows:
-
Make sure the product ISO is accessible. The script copies some files from the ISO.
-
Make sure you are logged in as root to run the configuration wizard.
-
Run the wizard:
/opt/novell/zenworks/orch/bin/guiconfig
When the script runs, the following information is initially displayed:
IMPORTANT:If you have only a keyboard to navigate through the pages of the GUI Configuration Wizard, use the Tab key to shift the focus to a control you want to use (for example, a button), then press the spacebar to activate that control.
Default values are built into the script; most of these defaults are set to configure all of the product patterns that were installed using the Add-on Product Media utility in SLES 10 and in SLES 11.
-
Click to display the license agreement.
-
Select the option to accept the agreement, then click to open the installation type page of the wizard:
-
Select , then click to display the Orchestrate Components page of the wizard:
-
Confirm that the Orchestrate Agent is selected for configuration, then click to display the Orchestrate Agent Configuration page:
-
Check and if necessary change the name of the Orchestrate Agent and the Orchestrate Server.
If you select the check box in the wizard, you have the option of changing the default values. If you leave the check box deselected, the setting is configured with normal defaults. For information about the advanced settings see Section 2.3.2, PlateSpin Orchestrate Configuration Information.
-
Click Next to display the configuration wizard summary page:
IMPORTANT:Although this page of the wizard lets you navigate by using the Tab key and the spacebar, you need to use the Ctrl+Tab combination to navigate past the summary list. Click if you accidentally enter the summary list, and re-enter the page to navigate to the control buttons.
By default, the check box on this page is selected. If you accept the default of having it selected, the wizard starts the PlateSpin Orchestrate Agent and applies the configuration settings. If you deselect the check box, the wizard writes out the configuration file to /etc/opt/novell/novell_zenworks_orch_install.conf without starting PlateSpin Orchestrate or applying the configuration settings.
You can use this .conf file to start the Orchestrate Agent and apply the settings either manually or with an installation script. Use the following command to run the configuration:
/opt/novell/zenworks/orch/bin/config -rs
-
Click to display the following wizard page.
-
Click to launch the configuration script. When the configuration is finished, the following page is displayed:
-
Click to close the configuration wizard.
IMPORTANT:When the installation and configuration are complete, you need to register the resources to be managed by the PlateSpin Orchestrate system. Please refer to Section 3.0, First Use of Basic PlateSpin Orchestrate Components for detailed information about getting resources to manage in the PlateSpin Orchestrate system.
-
-
(Optional) Increase the heap size that the JVM handles to enable the console to manage a large number of objects.
-
Open the bash shell script at /opt/novell/zenworks/zos/server/bin.
-
Inside the script, find the following line where the JVM parameters are defined:
JVMARGS="-Xmx256m -Xms256m -Xmn64m -XX:NewSize=64m -XX:MaxNewSize=64m"
The -Xmx argument specifies the maximum heap size for the JVM. Increasing the heap size prevents a JVM out of memory condition.
-
Change the value in the -Xmx argument from 256 MB to 512 MB.
-
Using the ISO to Install the Orchestrate Agent on Windows Machines
The PlateSpin Orchestrate Agent is supported on Windows Server 2003 and Windows Server 2008, but not on Windows 7, Windows Vista, Windows XP, Windows 2000, or earlier releases (Windows ME, Windows 95, etc.). Use the following steps to download the PlateSpin Orchestrate component you want to install:
-
To verify that the device where you want to install the agent and client software fulfills the necessary requirements, review Section 1.0, Planning the Orchestrate Server Installation.
-
Download the appropriate PlateSpin Orchestrate Server ISO (32-bit or 64-bit) to an accessible network location.
-
Create a DVD from the ISO or use a tool that will mount the ISO.
-
Navigate to the directory path where the Windows packages reside.
-
Double-click the appropriate file (.exe) to launch an installation and configuration wizard. See Installing and Registering the SLES PlateSpin Orchestrate Agent from the Administrator Information page. in Installing the Orchestrate Agent from the Administrator Information Page for information about this wizard.
2.4.2 Installing the Orchestrate Agent from the Administrator Information Page
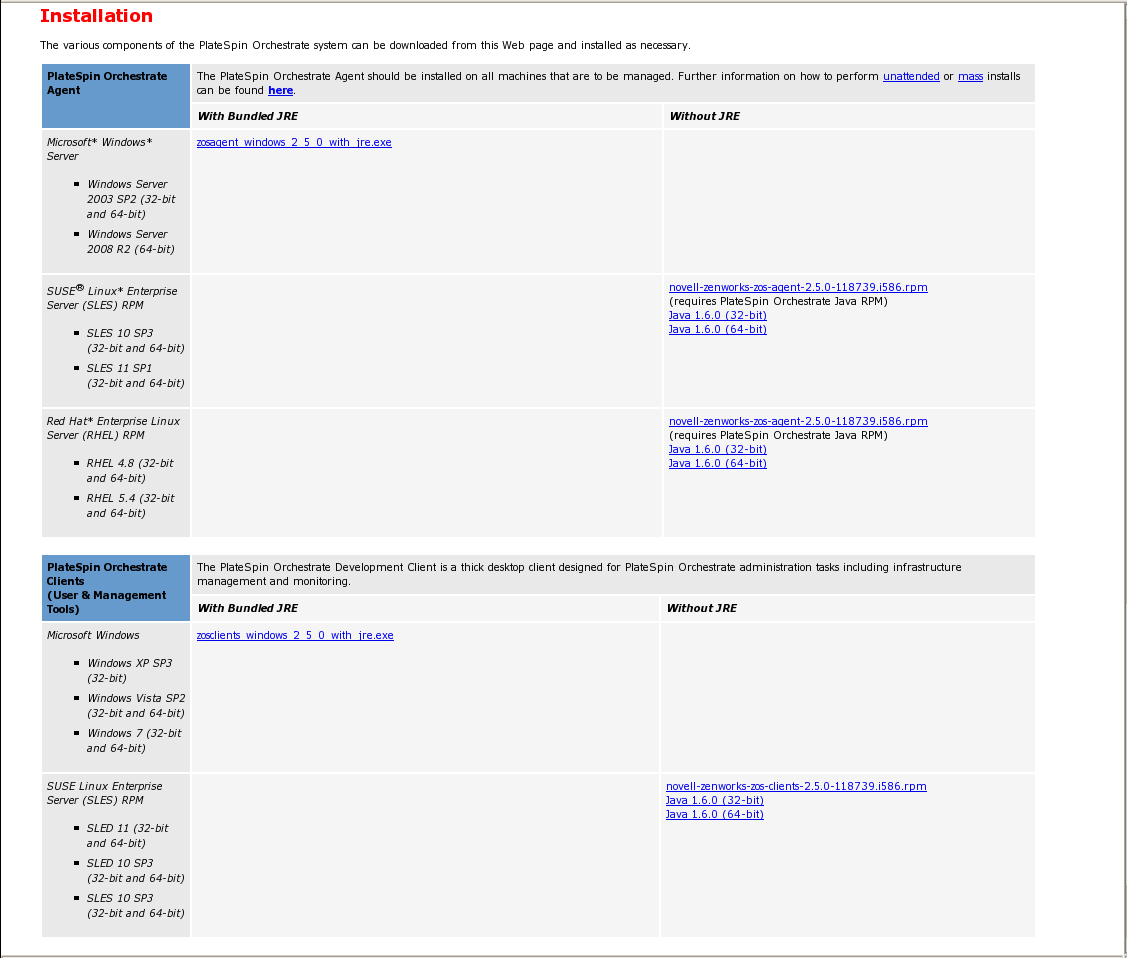
After you install the server for PlateSpin Orchestrate on the network, you can launch the PlateSpin Orchestrate Administrator Information page. The page has links to various installer programs that you can use to install required PlateSpin Orchestrate software on the computing resources that you will be utilizing in the grid system.
The following browsers support the PlateSpin Orchestrate Server Portal and PlateSpin Orchestrate Administrator’s Web page applications:
-
Internet Explorer version 6.0 or higher
-
Netscape Navigator version 6.0 or higher
-
Mozilla Firefox version 1.5 or higher
Using a supported browser, enter the following URL to access the Administrator Information page for PlateSpin Orchestrate from the server:
http://server_name_for_PlateSpin_Orchestrate:8001/
This URL is the DNS name (or IP address) of the server for PlateSpin Orchestrate. Be sure to use Port 8001 in the address to access and display the page, as shown in the following illustration:
The page includes links to information for PlateSpin Orchestrate administrators, including product documentation and the installers for the PlateSpin Orchestrate Development Client and the PlateSpin Orchestrate Agent.
This section includes the following information about installing the Orchestrate Agent from the Administrator Information page:
Installing and Registering the SLES PlateSpin Orchestrate Agent from the Administrator Information page.
PlateSpin Orchestrate requires computing resources in order to run applications. The PlateSpin Orchestrate Agent must be installed on each managed device to add that computing resource to the grid where the Orchestrate Server can manage it.
Use the following steps to install the agent on a SLES 10 SP3, SLES 11, RHEL 4 (latest update) or RHEL 5 (latest update) computing resource:
-
From the managed resource desktop, launch a browser to access the Web page for PlateSpin Orchestrate, as described above.
-
Scroll to the section of the page:
-
In the agent section of the PlateSpin Orchestrate Web page, identify the installer link for the operating system of the SLES Machine where you want to install the Orchestrate Agent.
-
Click the installer link to download the agent installer and the appropriate JRE (32-bit or 64-bit) to the SLES machine.
Although your SLES machine might have the JRE installed, we recommend that you install it again to make sure it is present.
-
In the PlateSpin Orchestrate Agent section, download:
-
novell-zenworks-zos-agent-2.5.0-<build_number>.i586.rpm
-
The Java 1.6.0 (32-bit) or Java 1.6.0 (64-bit) RPM
-
-
Install the Java 1.6.0 RPM by entering the one of the following commands (as applicable):
rpm -ivh novell-zenworks-zos-java-1.6.0_sun_update14-1.x86_64.rpm
or
rpm -ivh novell-zenworks-zos-java-1.6.0_sun_update14-1.i586.rpm
-
Install the Orchestrate Agent by entering the following command:
rpm -ivh novell-zenworks-zos-agent-2.5.0-<build_number>.i586.rpm
-
Edit /opt/novell/zenworks/zos/agent/agent.properties to set the value of zos.agent.server to the IP address of the PlateSpin Orchestrate Server where you want to register the agent.
-
Start the agent by entering the following command:
/etc/init.d/novell-zosagent start
-
Register the agent to the PlateSpin Orchestrate Development Client. For more information on how to register the agent, see Section 3.3, Walkthrough: Creating a Resource Account.
Agents can be automatically installed on multiple computing resources or groups of computing resources by using your favorite configuration management software.
Installing and Registering the Windows PlateSpin Orchestrate Agent from the Administrator Information Page
This section includes the following information about installing the Orchestrate Agent for Windows from the Administrator Information page:
-
On the computer where the PlateSpin Orchestrate Agent for Windows is to be installed, launch the PlateSpin Orchestrate Administrator Information page, as shown above.
-
Scroll to the section of the page:
-
In the agents section of the Web page, identify the zosagent_windows_2_5_0_with_jre.exe installer link.
-
Click the installer link to initiate the download of the Orchestrate Agent on the Windows computer.
-
At a Windows XP or Windows Vista location where you downloaded the client installer, double click the zosagent_windows_2_5_0_with_jre.exe icon to run the installer.
When you launch the installer on Windows XP or Windows Vista, a Security Warning for an Unknown Publisher is displayed. You can ignore this warning and run the installer without a problem.
The first page of the Orchestrate Agent Setup Wizard is displayed.

-
Click to display the Select Destination Directory dialog box.

-
Accept the default location, then click to display the Select Start Menu Folder page of the Setup Wizard.
-
Enter the path to the folder where you want the Wizard to set up shortcuts to the Agent or select to accept the default and to display the Windows Services page.

-
Select the services you want to install (at a minimum, you must select ), then click to display the Identify PlateSpin Orchestrate Server page.

-
Enter the PlateSpin_Orchestrate_Server_name in the field.
You might find it easier to click so that the installer searches for and finds the Orchestrate Server on the network. If the installer discovers several servers, make sure you select the server you previously associated with this agent.
-
Click Next to display the Agent Configuration page.

You can accept the defaults on this page of the setup wizard, or you can customize it according to your needs.
-
Click to run the Orchestrate Agent installation until the following page is displayed:

-
Click to exit the setup.
-
Register the agent to the PlateSpin Orchestrate Development Client. For more information on how to register the agent, see Section 3.3, Walkthrough: Creating a Resource Account.
2.4.3 Performing a Silent Install of the PlateSpin Orchestrate Agent on Multiple Network Resources
In a large data center, it might not be practical to perform an interactive configuration of the Orchestrate Agent on the multiple servers that you intend to use for PlateSpin Orchestrate resources. The information in this section provides information about performing a silent install and configuration.
Silent Install and Configuration of the Orchestrate Agent RPM
Use the following process to configure the Orchestrate Agent RPM (downloaded from the product ISO) on multiple servers:
-
Perform the product installation and manual configuration of the agent on a “seed” machine. The processes to do this are described in Section 2.3.1, Installation and Configuration Steps.
-
On the “seed” machine, copy the file found at /etc/opt/novell/novell_zenworks_orch_install.conf to a location where you can modify it locally.
-
Edit the local copy of novell_zenworks_orch_install.conf, updating the fields that require a password (for security purposes, when a configuration program runs, the passwords in the .conf file are deleted).
-
Edit any other fields as necessary for the configuration of the Orchestrate Agent.
-
Distribute the modified file to the machines where you want to perform a silent configuration.
-
At the machine where you distributed the .conf file, open YaST and perform the Add-on Installation of the RPMs as described in Step 1 through Step 4 in Section 2.3, Installing and Configuring All PlateSpin Orchestrate Components Together. Make sure that you do not configure the agent manually.
-
From the bash prompt on the machine where you are configuring the agent, run the following command:
/opt/novell/zenworks/orch/bin/config -s -C $CONF_FILEwhere CONF_FILE is the modified configuration file from Step 5.
The silent configuration runs, then the agent is displayed in the PlateSpin Orchestrate Console as registered with the server node.
Silent Install and Configuration of the Orchestrate Agent for Windows
The Windows Agent installer can be downloaded from the Administrator Information page, as documented in Section 2.4.2, Installing the Orchestrate Agent from the Administrator Information Page.
PlateSpin Orchestrate includes an installation help page that provides tips for installing the Windows Orchestrate Agent on many machines by using some sort of scripting or automation.
The page is accessed from the Orchestrate Server IP address:
http://IP_address:8001/install.html
Figure 2-1 PlateSpin Orchestrate Agent Silent Installation Help

2.4.4 Installing the PlateSpin Orchestrate Agent on Other Supported Operating Systems
When you have the Orchestrate Server installed and you have also installed the VM Client, you can install the PlateSpin Orchestrate Agent on a machine (virtual or physical) that is running a supported operating system in order to manage resources on that machine in the VM Client.
Supported Operating Systems and Hypervisors
PlateSpin Orchestrate supports creating and managing virtual machines, which must be installed on physical machines (VM hosts).VM hosts can be installed on the platforms listed in the table below.
For example, these operating systems might be running in VMware or on a physical machine.
The operating system must have a hypervisor supported by PlateSpin Orchestrate. The following table lists the supported hypervisors and host operating systems. For a listing of currently supported guest operating systems, refer to the host operating system vendor’s Web site.
Table 2-2 Supported Operating Systems and Corresponding Hypervisors
1Installing the Orchestrate Agent on your vCenter Server lets the Orchestrate Server manage the lifecycle of vCenter VMs inside your Orchestrate management clients. Unlike the case with Xen and Hyper-V, PlateSpin Orchestrate does not manage the VMs directly but rather uses the management interface provided by the vCenter Server.
With the hypervisor installed on one of the supported operating systems, the Orchestrate Server deploys the VMs to the host machine using the hypervisor-associated provisioning adapter to start and use the VMs for jobs. The provisioning adapters allow you to control various lifestyle operations of the VM. For a detailed explanation of the actions you can perform with a VM through its provisioning adapter, see Managing Virtual Machines
in the PlateSpin Orchestrate 2.5 VM Client Guide and Reference.
Other Supported Operating Systems (When Not Performing VM Lifecycle Operations)
For PlateSpin Orchestrate 2.5, additional supported operating systems for the Orchestrate Agent (if you are not planning to use VM lifecycle operations) include:
-
Microsoft Windows Server 2003 (32-bit and 64-bit)
-
Microsoft Windows Server 2008 R2 (64-bit)
-
RHEL 4 or 5 (latest update)
Installing the agent to these servers lets you to send jobs to these servers to perform various distributed computing tasks. The operating system where you install the agent can be on a physical machine or running in a VM. For a more complete description of PlateSpin Orchestrate jobs, see Jobs
in the PlateSpin Orchestrate 2.5 Administrator Reference.
Installing the Orchestrate Agent
The manual installation procedure for the Orchestrate Agent depends on the operating system. The installed Orchestrate Agent components are:
- novell-zenworks-monitor-gmond-3.0.4-50.x86_64.rpm
- novell-zenworks-orch-config-2.5.0-119.noarch.rpm
- novell-zenworks-orch-config-gui-2.5.0-<build_number>.noarch.rpm
- novell-zenworks-zos-agent-2.5.0-<build_number>.i586.rpm
- novell-zenworks-zos-java-1.6.0_sun_update14-1.x86_64.rpm
The Orchestrate Agent can be installed on the following operating systems:
NOTE:The Orchestrate Agent can be installed on VMware ESX 3.0.x /3.5.x VM hosts. Use the installation instructions for RHEL 4 or RHEL 5.
Microsoft Windows Server 2003 and Windows Server 2008
To install the Orchestrate Agent on Microsoft Windows Server 2003 and Microsoft Windows Server 2008:
-
Download the pertinent 32-bit or 64-bit Add-On ISO.
-
Create a CD from the ISO or use ISOBuster (or a similar tool) to mount the CD.
-
Browse to the Windows folder for the Orchestrate Agent.
-
Double-click the Orchestrate Agent icon and follow the wizard through the setup.
See Orchestrate Agent in Table 2-1 for an explanation of the configuration for the Orchestrate Agent.
NOTE:Installation of the Orchestrate Agent on a Windows machine does not install the Orchestrate Monitoring Agent (gmond).
For Monitoring Agent installation information, see Section B.0, Installing the Orchestrate Monitoring Agent On Windows Machines.
RHEL 4
To install the five packages of the Orchestrate Agent on RHEL 4:
-
Download the pertinent 32-bit or 64-bit Add-On ISO.
-
Mount the ISO as a loopback device.
For example, if you are mounting the 64-bit SLES 11 ISO, the command is:
$ mount -o loop PlateSpin_Orchestrate-2.5.0-SLE11.x86_64.iso /mnt
-
Change your working directory to the location of the RHEL package:
$ cd /mnt/RHEL4
-
Use the rpm command to install the packages:
$ rpm -Uvh *.rpm
-
Use the up2date command to download and install any missing dependencies.
For example, if you are missing libcap.so and libcap.so.1, you would enter:
$ up2date --solvedeps=libcap.so, libcap.so.1
-
Run the configuration script:
$ /opt/novell/zenworks/orch/bin/config
See Table 2-1 for an explanation of the configuration for the Orchestrate Agent.
RHEL 5
To install the five packages of the Orchestrate Agent on RHEL 5:
-
Download the pertinent 32-bit or 64-bit Add-On ISO from the DVD.
-
Mount the ISO as a loopback device.
For example, if you are mounting the 64 bit SLES 11 ISO, the command is:
$ mount -o loop PlateSpin_Orchestrate-2.5.0-SLE11.x86_64.iso /mnt
-
Change your working directory to the location of the RHEL package:
$ cd /mnt/RHEL5
-
Use the package manager included in RHEL to install the Orchestrate Agent packages. (Missing dependencies are met by using RHN):
$ yum localinstall *.rpm
-
Run the configuration script:
$ /opt/novell/zenworks/orch/bin/config
See Table 2-1 for an explanation of the configuration for the Orchestrate Agent.
VMware vCenter Server
to install the PlateSpin Orchestrate Agent on a vCenter server, use the Windows agent installation program to install the agent on the Windows server. For more information, see Microsoft Windows Server 2003 and Windows Server 2008.
2.4.5 Automatically Installing the Orchestrate Agent on a VM Host Using a Job
You can write a job to automatically install and configure the Orchestrate Agent on a host server. Such a job can be a script similar to the following, which is for an Apache VM:
"""
Search for a VM Grid objects using Constraints and run a VM operation on them.
"""
class test(Job):

   def job_started_event(self):

      # collect all VM Instances whose resource ID
      # starts with the string "apache"

      a = AndConstraint()

      e1 = EqConstraint()
      e1.setFact("resource.type")
      e1.setValue("VM")
      a.add(e1)

      e2 = EqConstraint()
      e2.setValue("apache*")
      e2.setMatchMode(EqConstraint.MATCH_MODE_REGEXP)
      e2.setFact("resource.id")
      a.add(e2)

      vms = getMatrix().getGridObjects(TYPE_RESOURCE,a,None)
      for vm in vms:
         vm.installAgent()
For information on developing jobs, see the PlateSpin Orchestrate 2.5 Developer Guide and Reference.