3.3 Walkthrough: Creating a Resource Account
After being installed on a computing node, having its credentials defined, and associating itself with the computing node, the Orchestrate Agent begins broadcasting the availability of its host as a potential computing resource. Before the Orchestrate Server can allow an agent to authenticate and establish ongoing communication, you need to create a resource account for the agent on the Orchestrate Server. When this account is created or “registered,” the agent’s host node can be discovered and recognized as a computing resource that can perform the jobs assigned to it.
It is also possible to create a resource account for an agent before that agent is actually installed on a computing node.You can also create a resource account on the Orchestrate Server and have it waiting in an offline state in anticipation of agent installation and login.
This section includes the information you need to create a resource account on the Orchestrate Server:
When resources are created, connected to the Orchestrate Server and online, you will see some jobs deploy and run on their own. For more information, see Section 3.4, Walkthrough: Observing Discovery Jobs.
3.3.1 Opening the Resources Monitor
Now that you have installed an Orchestrate Server and launched the PlateSpin Orchestrate Development Client, you can begin to create resource accounts.
-
Open the PlateSpin Orchestrate Development Client and click to open the Resources Monitor in the Workspace panel of the Development Client.
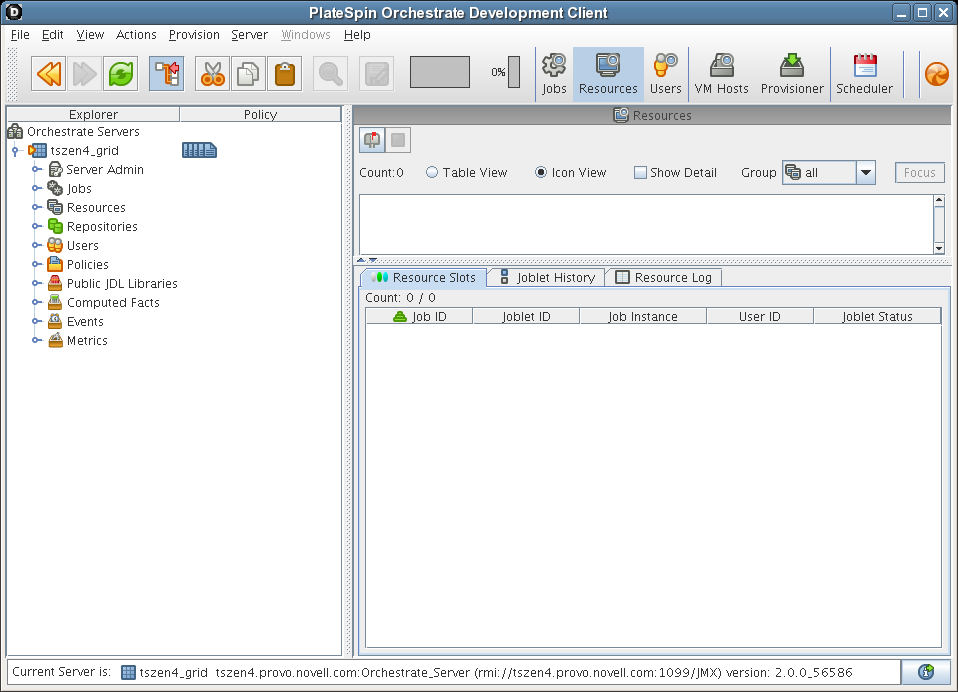
From this monitor, you can see the resources that are connected to the server and what they are doing in the grid.
If an agent is installed but has not been registered (that is, no account is created for it), it attempts a server login every 90 seconds. If this is the case (as in the figure above), the Resource Registration icon has a “flag up” ![]() status, meaning that an agent is waiting to register. If the icon has a “flag down”
status, meaning that an agent is waiting to register. If the icon has a “flag down” ![]() status, either no PlateSpin Orchestrate Agents have been installed in the network or all active agents are logged in, so none are waiting to register.
status, either no PlateSpin Orchestrate Agents have been installed in the network or all active agents are logged in, so none are waiting to register.
You can use the Development Client to register a resource automatically (see Automatically Registering a Resource) or to register a resource manually (see Manually Registering a Resource). You can also select which agents can log in to create accounts (see Section 3.3.4, Selecting a Resource for Manual Registration).
The Resources Monitor has many features to help you manage resources when they are registered, including the jobs and joblets assigned to individual resources. For more detailed information about the Resources Monitor, see “Monitoring Server Resources” in the PlateSpin Orchestrate 2.5 Administrator Reference.
3.3.2 Automatically Registering a Resource
If your network environment does not require a high level of security (such as in a development and testing environment) and you want a quick way to create a resource account, you can do so at the Development Client.
-
In the PlateSpin Orchestrate Development Client, select the grid object in the Explorer panel to open the page in the Client workspace.
-
In the section of the page, select the check box, then click the Save icon
 in the toolbar to save the setting.
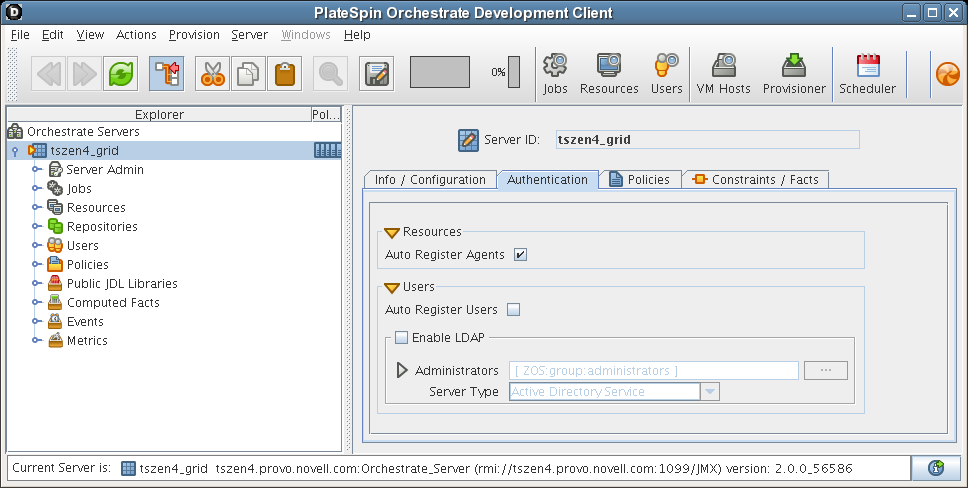
The resource object is created and registered in PlateSpin Orchestrate, although it is offline (the object is dimmed in the tree of the Explorer panel) until it the agent tries to log in.
The next time the agent tries to log in, it is automatically authenticated and PlateSpin Orchestrate creates a a new resource account.
When the resource is online, the Resources Monitor displays a labeled box representing the registered agent. This box includes information about the agent, including the number of available slots it has and a status color indicating its state of readiness for PlateSpin Orchestrate jobs.

The status color window can be white (inactive), green (available for use), or blue (in use). If the color changes from green to blue, a job is running on this resource. To find out what kind of job is running, you can click the monitor button on the toolbar.
3.3.3 Manually Registering a Resource
If you want a higher level of security between the agent and the server, you can manually create a resource account in the Development Client before the Orchestrate Agent is installed. This section walks through both stages of the procedure.
Use the Orchestrate Development Client to Create a Resource Account
Use the following steps to create a resource object in the PlateSpin Orchestrate Development Client.
-
Make sure that the check box on the grid object’s page is not selected (see Step 2).
-
(Optional) Create a new resource from the Explorer panel in the Development Client.
-
In the Explorer panel in the Development Client, right-click , then click to display the Create a new Resource dialog box.

-
Specify the name of the new resource you want to create in the field, then click .
-
-
(Optional) Create a new resource from the Main Menu in the Development Client.
-
In the Development Client, click > click to display the an expanded version of the Create a new Resource dialog box.
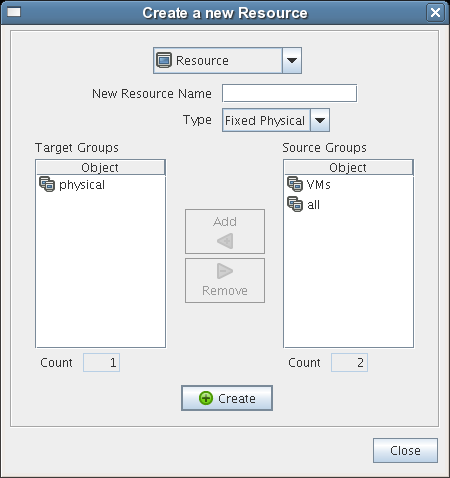
This dialog box includes a method for designating the resource as a fixed physical type or a virtual machine type. It also includes a method for including the resource in various resource groups. In this walkthrough, we will install an Orchestrate Agent on a fixed physical resource and include it in the resource group.
The Virtual Machine resource type is not available if you installed the High Performance Computing license only for PlateSpin Orchestrate.
-
Make sure is selected in the drop-down box, specify the new resource name in the field, then , then click .
The resource account is created, but is offline
 , as indicated by its object icon in the Explorer panel or in the Information view of each resource group to which it belongs. The resource is not online until an Orchestrate Agent matching the resource is installed.
-
Installing an Orchestrate Agent to Match the New Resource
This section demonstrates installing an Orchestrate Agent to be used as a resource in your PlateSpin Orchestrate grid. The information in this part of the walkthrough assumes that a resource account has already been created for the Orchestrate Agent being installed.
-
From the managed device desktop, launch a browser to access the Web page for PlateSpin Orchestrate, as described in Section 2.4.2, Installing the Orchestrate Agent from the Administrator Information Page.
-
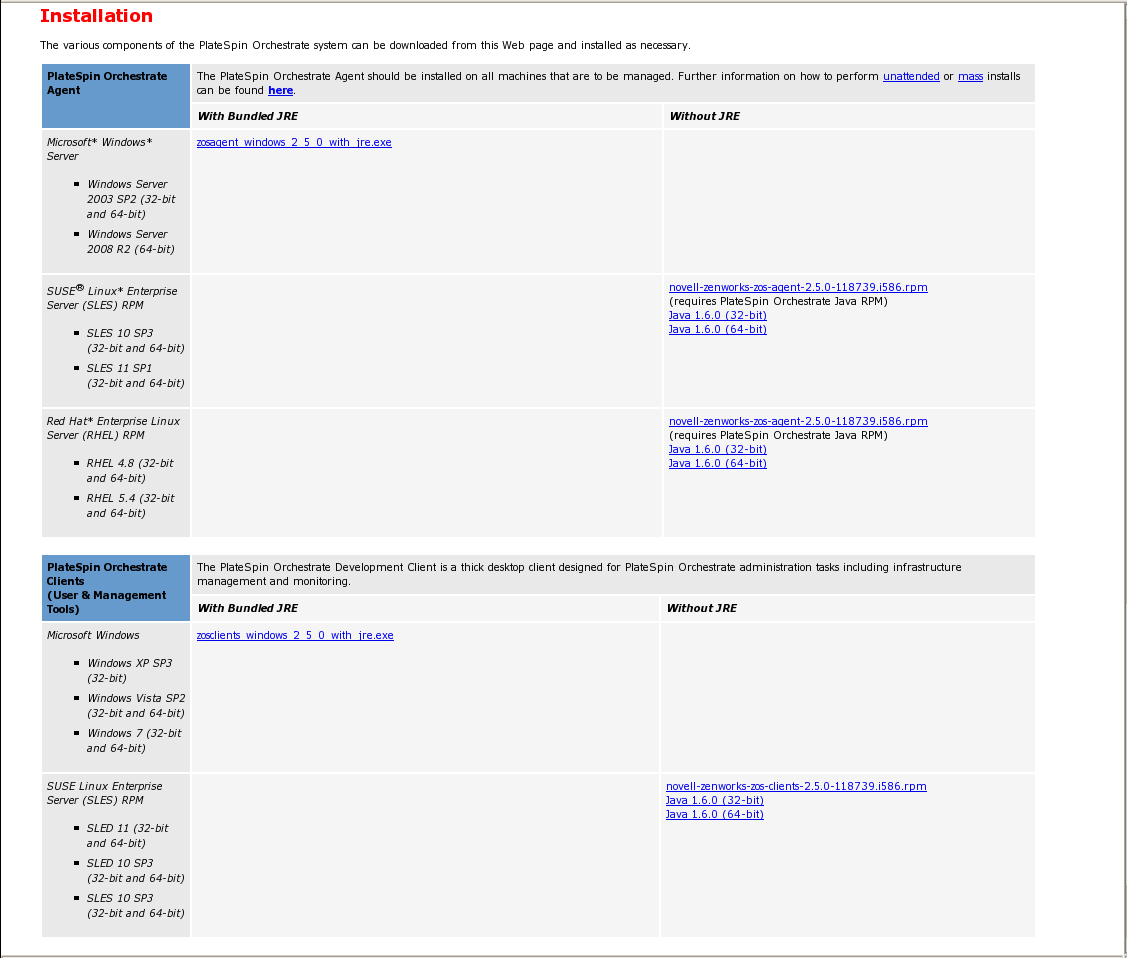
Scroll to the section of the page:
-
In the agent section of the Administrator Information page, identify the installer link for the operating system of the device where you want to install the agent. For this walkthrough, we will install the Windows agent on a Windows operating system.
-
Click the installer link to download the zosagent_windows_2_0_0_with_jre.exe version of the agent to the computing node where you plan to install it.
-
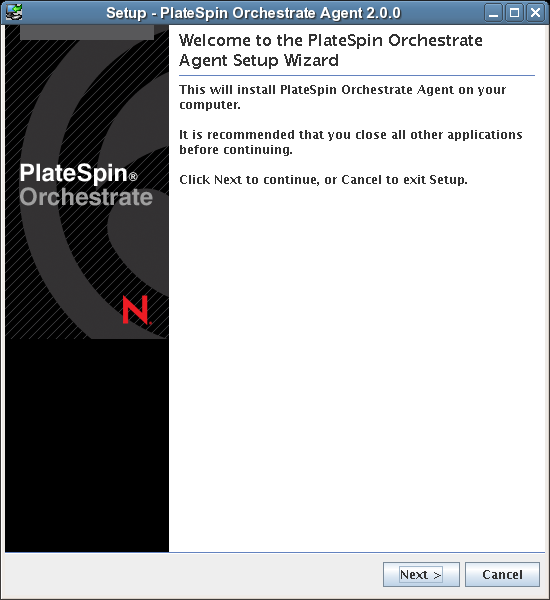
From the machine where you will install the agent (in this walkthrough, a Windows 2008 64-bit machine), open the desktop and navigate to the location where you saved the Orchestrate Agent file, then double-click the zosagent_windows_2_0_0_with_jre.exe icon to launch the PlateSpin Orchestrate Agent Setup Wizard.
-
Follow the prompts in the wizard until the page displays, then you need to ensure that you correctly enter the Platespin_Orchestrate_Server_name in the field.
IMPORTANT:Make sure that the name you give the agent during the installation matches the name of the resource account you created in Use the Orchestrate Development Client to Create a Resource Account.
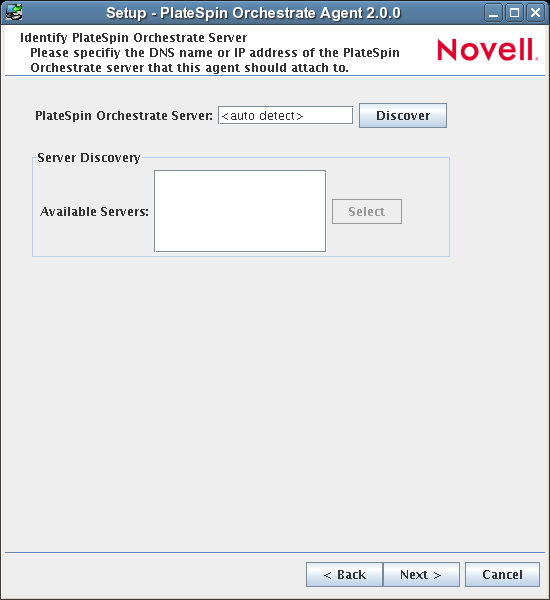
You might find it easier to click so that the installer searches for and finds the Orchestrate Server on the network.
-
Accept the remaining defaults on the wizard pages to complete the installation of the Agent.
-
When the installation is complete, click to exit the wizard.
-
In the PlateSpin Orchestrate Development Client, open the Resources Monitor to observe the resource object you created change from offline to online. When the object is no longer dimmed, the agent has logged in as a resource and is registered.
When the resource is online, the Resources Monitor displays a labeled box representing the registered agent. This box includes information about the agent, including the number of available slots it has and a status color indicating its state of readiness for PlateSpin Orchestrate jobs.

The status color window can be white (inactive), green (available for use), or blue (in use). If the color changes from green to blue, a job is running on this resource. To find out what kind of job is running, you can click on the monitor button on the toolbar.
3.3.4 Selecting a Resource for Manual Registration
If you do not select the check box on the grid object’s page, you have the option of explicitly accepting or denying the login attempts of a resource, thus preventing it from creating an account.
The following steps assume that you have already created a resource in your grid.
-
In the Resources Monitor, click the Resource Registration (mailbox) icon to open the Resource Registration Monitor dialog box.
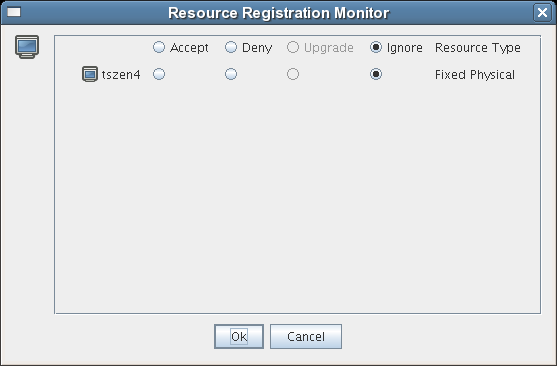
This dialog box lets you preview the Orchestrate Agents that are installed in the network and trying to log in to the server. The top row of radio buttons is a mass selector for all listed agents, allowing you the choice to accept, deny, or ignore automatic registration for all agents, both those currently listed and those that might try to log in later.
If you want to choose the agents that can be allowed to auto register, you can visually identify the agent by name and select how you want to handle that agent’s request for registration the next time it tries to log in.
-
For this example, select the radio button adjacent to the agent you want to register, then click .
-
From the PlateSpin Orchestrate Development Client, open the Resources Monitor to observe the resource object you created change from offline to online. When the object is no longer dimmed, the agent has logged in as a resource and is registered.
When the resource is online, the Resources Monitor displays a labeled box representing the registered agent. This box includes information about the agent, including the number of available slots it has and a status color indicating its state of readiness for PlateSpin Orchestrate jobs.

The status color window can be white (inactive), blue (in use), green (available for use), or blue (in use). If the color changes from green to blue, a job is running on this resource. To find out what kind of job is running, you can click on the monitor button on the toolbar.