10.1 Server Sync to a Virtual Target
-
Discover your source workload.
-
Create a target virtual machine by using one of the following methods:
-
Do an initial migration of your workload to a virtual machine. See Migrating a Workload to a VM Host (P2V, V2V) Using Migrate Client.
- OR -
-
Using your virtualization platform’s native interface, manually install a virtual machine with the same operating system profile as that of your source.
NOTE:When you are creating a virtual target for Server Sync, you should also manually install the appropriate virtualization enhancement tools, such as VMware Tools or XenServer Tools.
- OR -
-
(Windows only) Capture your workload to a PlateSpin Image, and deploy it to a virtual machine on your virtualization platform. See Capturing a Workload to a PlateSpin Image and Deploying a PlateSpin Image.
-
-
(Conditional; Hyper-V changes to Hyper-V 2008 R2 only) Because the Server Sync option is disabled for a Hyper-V VM, it is necessary to use the following steps, as documented in KB 7010748:
NOTE:Hyper-V 2012 and Hyper-V 2012 R2 automatic server sync is available.
-
After booting the target VM with the LRD ISO ((bootofx.x2p.sles11sp4.iso) wait for the Migrate Server URL prompt, Then press Alt+F7 to launch the debug console.
-
From the debug console, run the following command to determine which devices are /, /boot and swap:
fdisk -l
-
Using the information obtained from the debug console, mount the appropriate devices as under:
mount /dev/%root device% / mount /dev/%boot device% /boot -
Press Alt+F1 to switch to the server command line.
-
At the command line, provide the required information at each individual prompt:
-
PlateSpin Server: Use the following format:
http:// server_host /platespinmigrate
Replace server_host with the actual PlateSpin Server host’s name or IP address.
-
Credentials (User Name/Password): Enter the name of an admin-level user on the PlateSpin Server host, including the domain or machine name. For example: domain\username, or localhost\Administrator. Provide a valid password for the specified user.
-
Network Card: Select the network card that is active, then either enter a temporary static IP address for this card or press the Enter key to use a DHCP server.
-
Temporary hostname: Provide a temporary VM name for PlateSpin Migrate Client to use to list the newly registered VM. The workload’s target hostname you select in the migration job overwrites this name.
-
SSL encryption: If your PlateSpin Migrate is installed on a host with SSL encryption enabled, enter Yes. If not, enter No.
-
PlateSpin Migrate Network: Unless you have defined your own PlateSpin Migrate Network in PlateSpin Migrate Client, press the Enter key. If you are working with a non-default PlateSpin Migrate Network, type its name, then press the Enter key.
A controller on your target virtual machine communicates with PlateSpin Server and registers the virtual machine as a physical target for a migration job.
-
-
-
In the Servers view, drag your source workload and drop it on the required target (Server Sync target or discovered physical machine under control).
The system validates the selected source and target and, if it detects matching operating systems on them, provides you with two options, and :
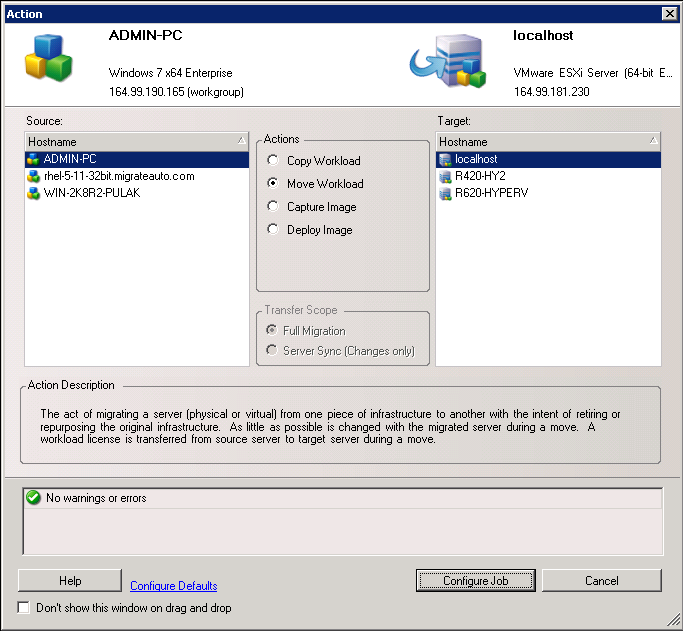
-
Select the option, then click .
-
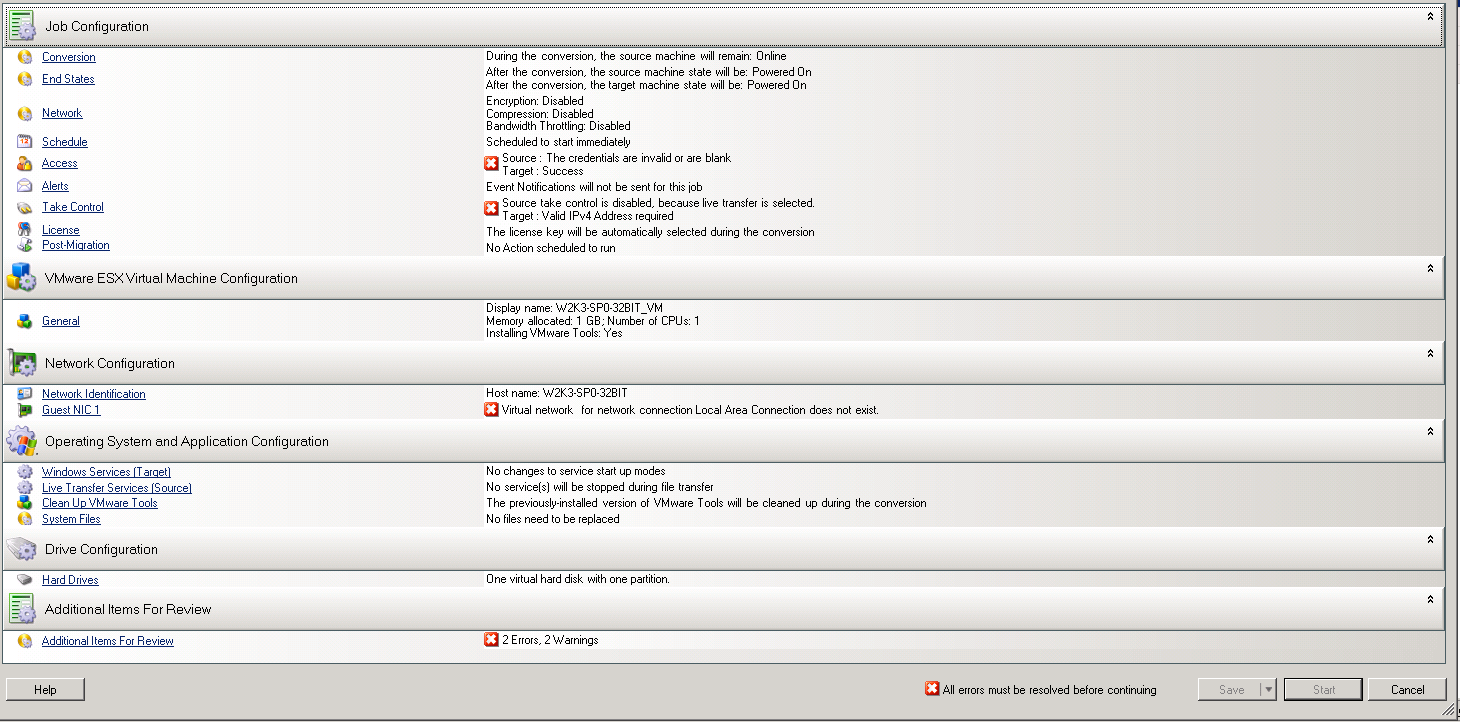
In the job configuration window, specify the parameters of the job as dictated by the purpose of the operation, address any warnings and errors, and make sure that you map the required volumes on the source to those on the target (see Volume Configuration in Server Sync).
When you have finished, click .
PlateSpin Migrate starts the job and lists it in the Jobs view.