3.10 EMC SMARTS
Create an adapter for each instance of EMC SMARTS on the network (see Section 2.1, Creating an Adapter). See the integration information in the following sections and then modify the adapter properties (see Section A.11, EMC SMARTS).
The following topics provide information on integrating to EMC SMARTS:
3.10.4 Discovery of EMC SMARTS Elements
The EMC SMARTS adapter automatically performs element discovery synchronization that includes:
-
Discovery of all the technology elements from the InCharge database and populates the Operations Center object model
-
Discovery of classes, instances, and relations between objects for use in the Service Views
-
Relationship mapping between object for n‑deep nested class/instance/relation sets
-
Subscriptions to event notifications
-
Management of instances (when available)
-
Element property mapping and property pages for elements
-
Automatic adapter updates for InCharge instance create and delete notifications
Figure 3-6 Explorer Pane: InCharge objects are listed under the adapter element
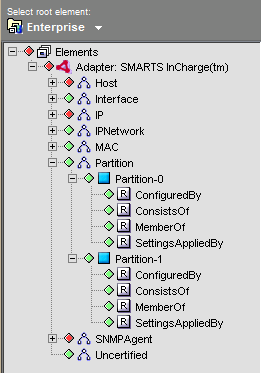
The specific objects are implemented as proxy objects of the actual InCharge objects. When values (or other data) are queried in Operations Center, the adapter requests the data on‑demand from the InCharge server. The adapter caches some common data values for efficiency.
Table 3-10 describes the InCharge object icons.
Table 3-10 InCharge Objects
|
Icon |
Description |
|---|---|
|
|
The Root Element represents an instance of a Domain Manager |
|
|
Class Element |
|
|
Instance Element |

|
Relation Element |


Elements in Operations Center are identified by a unique key value. The key value consists of a concatenation of up to 3 string values delimited by “:”. This key value is used to uniquely identify the element instance in the Operations Center element repository.
Operations Center aggregates all data from various consoles into the element hierarchy. When comparing the Operations Center element hierarchy tree to the InCharge console, typically more relation instances are displayed in Operations Center than in a single InCharge console. This is because the InCharge console only shows the relations applicable to the console.
Parent a single element to multiple spots in the element hierarchy by using a key value that consists of concatenating the root hierarchy key and all element keys for each of its parents.
-
Class instance key values are simply the class name. For example, Host.
-
Instance key values are the concatenation of the class with the instance name. For example, Host:server.mosol.com.
-
Relation instance key values are the concatenation of the class, instance, and relation name. For example, Host:server.mosol.com:ComposedOf.
Normally, the default condition algorithm determines the condition of a Operations Center element. The default condition algorithm sets the element condition equal to the most critical severity of any alarm attached to the element or to its children. The exception is for relation elements, which do not propagate up their condition.
For information on changing the default algorithm, see the Using Algorithms to Calculate Element State in the Operations Center 5.6 Server Configuration Guide.
Table 3-11 outlines the ACL permission on various element menu operations.
Table 3-11 EMC SMARTS—ACL Permissions on Element Operations
|
Element |
Operation |
ACL Permission |
|---|---|---|
|
Adapter (top-level) |
Define |
|
|
Manage |
||
|
Define |
||
|
Define |
||
|
Manage |
||
|
Define |
||
|
Define |
||
|
Instance |
Manage |
|
|
Manage |
||
|
Define |
3.10.6 Creating and Managing Instances
Managed instances are monitored by InCharge. Unmanaged elements are probed and associated information is stored in the InCharge inventory, but InCharge does not monitor the element.
Adding elements to or deleting elements from the Domain Manager from another client sends to the adapter notification about the event. The adapter automatically creates (or delete) the appropriate class and instance elements, allowing for a lazy discovery of object relations.
Creating an Instance
To create an instance:
-
In the pane, expand .
-
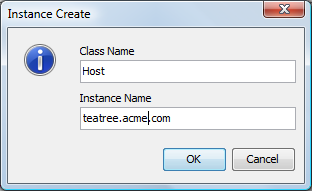
Right-click the EMC SMARTS adapter element, then click to open the Instance Create dialog box:
-
Specify the following:
Class Name: Name of the class.
Instance Name: Name of the instance.
-
Click to create the instance.
Deleting an Instance
Deleting by Right-Clicking
To delete an instance by right-clicking:
-
Right-click the instance element in the pane, then select .
-
Click when prompted for confirmation.
The instance and its children are deleted.
Deleting Using a Dialog Box
To delete an instance using a dialog box:
-
In the pane, expand .
-
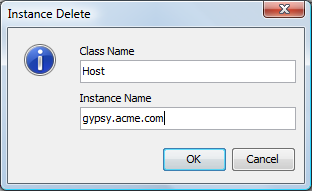
Right-click , then click to open the Instance Delete dialog box:
-
Fill in the fields:
Class Name: Name of the class.
Instance Name: Name of the instance.
-
Click to delete the instance.
Managing an Instance
To start managing an instance:
-
In the pane, expand > and a class element.
-
Right-click a manageable instance element, then click .
Unmanaging an Instance
To unmanage an instance:
-
In the pane, right-click the instance element, then click .
Running Instance Operations
To run an operation on a particular instance:
-
Right-click an instance element in the pane, then click to open the Status property page.
-
In the left pane, click to display all operations available for the instance.
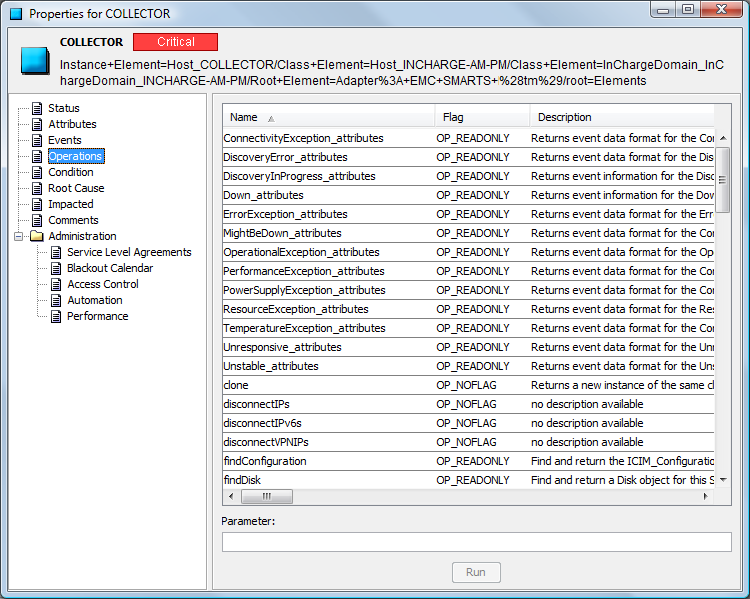
The following are descriptions of the operation flag types:
OP_CONST: Operation does not change the object’s state.
OP_READONLY: Operation has no side effect on the object.
OP_IDEMPOTENT: Operation returns the same value if called repeatedly, with no other actions on the object.
OP_NOFLAG: No other flags apply to the operation.
-
Select an operation.
The selected operation is highlighted.
-
Enter a parameter value in the Parameter text file if the operation supports it.
-
Click .
The result (if any) of the operation is written to the Operations Center log file as a DEBUG message.
3.10.7 Saving and Restoring the Element Repository
Restore the inventory of the InCharge server or save it to a file on the InCharge server machine:
Saving the repository
To save the repository:
-
In the pane, expand .
-
Right-click , then click to open the Repository Save dialog box:
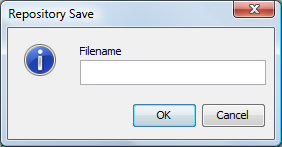
-
Specify a file name and then click .
Repository information saves to the SM_BASEDIR/smarts/repos directory. The preferred file name extension is .rps.
Restoring the repository
To restore the repository:
-
In the pane, expand .
-
Right-click , then click to open the Repository Restore dialog box:
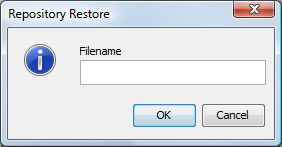
-
Specify a file name and click to restore repository information from the SM_BASEDIR/smarts/repos directory from the specified file.
3.10.10 Subscribing to Events
Use the EMC SMARTS adapter to correlate and subscribe to events. The adapter provides the ability to subscribe or unsubscribe to event notifications during startup or during run time.
Event subscriptions reside in a file in the /OperationsCenter_install_path/database directory on a per-adapter instance. The file name consists of concatenating SmartsConfig and the adapter name. If the file does not exist, a default subscriptions file is created.
During adapter startup, reading and parsing this subscription file occurs, and a request is sent to InCharge for each entry.
Setting Up Subscriptions Globally
To set up subscriptions globally:
-
In the pane, expand .
-
Do one of the following:
-
Right-click the adapter element, then click .
-
Do the following:
-
Right-click the adapter element, then click to open the Status property page.
-
In the left pane, click to open the Subscriptions property page:
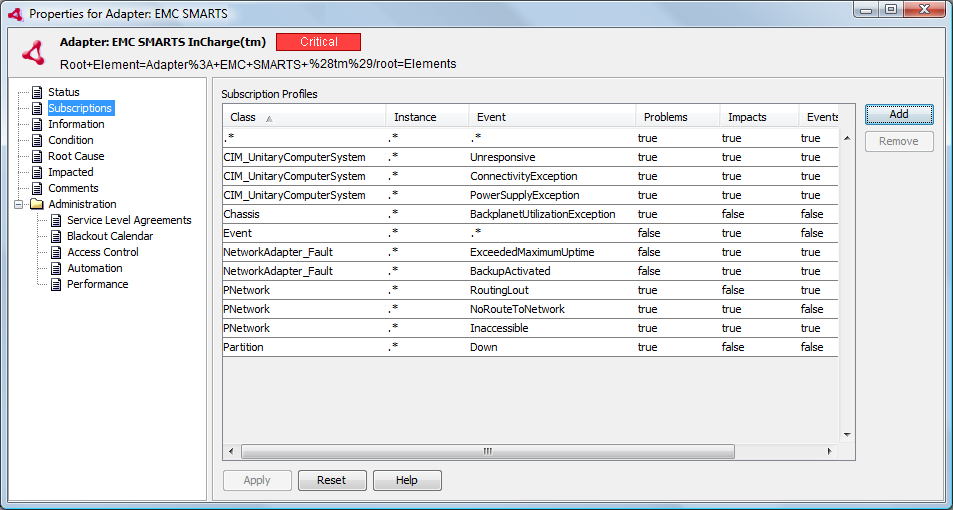
-
Click .
-
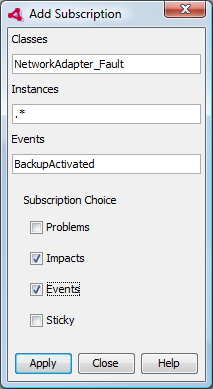
The Add Subscription dialog box is displayed:
-
-
Specify a value or an expression for Classes, Instances, and Events. Valid syntax includes specific classes, instance, and events or regular expression syntax that matches a specified pattern.
The example shown in the Add Subscription dialog box (see Step 2) subscribes to all classes of events. It is also possible to subscribe to a specific class of events such as Switch. Refer to the EMC SMARTS filter properties files for additional information.
By default, event subscriptions only apply to existing instances. They do not apply to new instances that are added later, unless the option is selected when the subscription is created.
-
Select one or more subscription options:
Problems: Notifications that pinpoint the exact cause of a failure.
Impacts: Notifications indicating an exceptional condition.
Events: Notifications that identify one or more failures that occurred on the same element. These notifications list the symptoms or problems that affect the element.
Sticky: Applies this event notification subscription to all instances created before and after this subscription.
-
Click to initiate the property subscription.
Subscribing or Unsubscribing to Events at the Instance Level
To subscribe or unsubscribe to events at the instance level:
-
In the pane, expand > and a class element.
-
Right-click an instance element, then click to open the Status property page.
-
In the left pane, click to open the Events property page.
-
Do one of the following:
-
To subscribe to selected events, click the events and then click .
-
To subscribe to all events, click.
-
To unsubscribe to selected events, select the events and then click .
-
To unsubscribe to all events, click .
-
Subscribing to Events Directly from an Alarm
To subscribe to events directly from an alarm, right-click an event in the view and then click or .
The Subscribe and Unsubscribe operations are enabled or disabled on the menu depending on whether the event represented by the alarm is subscribed to. For example, if the event is subscribed to, the Subscribe operation is disabled and the Unsubscribe operation is enabled.
3.10.11 Correlating Events
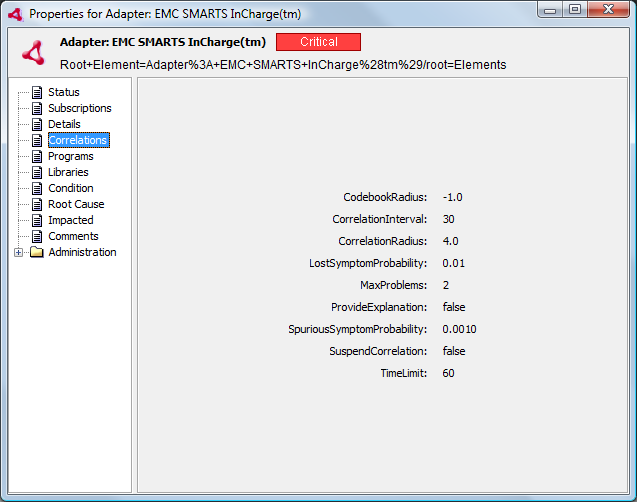
The Correlation property page for the EMC SMARTS adapter element displays various correlation metrics.
Figure 3-7 Adapter Property Pages: The Correlation page displays event correlation metrics for a EMC SMARTS element
To correlate immediately:
-
In the pane, expand .
-
Right-click the adapter element, then click .
The Domain Manager starts the event correlation process which runs in the background until it finishes.