6.5 Exploring CI Relationships
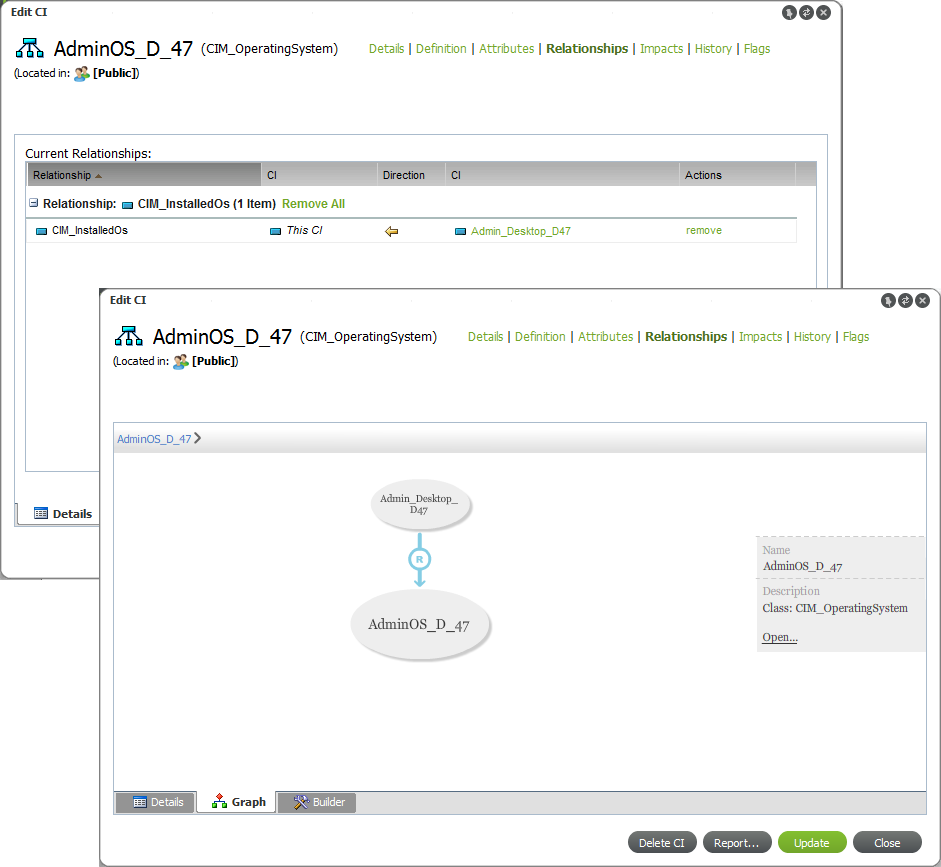
A CI rarely exists independently from other assets in your environment. In fact, the goal of a CMBD is often to be able to quickly identify how and what a certain CI might affect. Relationships show all CIs or communities that a CI is related to. Figure 6-1 illustrates viewing relationships in list format (Details tab) or browse them visually (Graph tab):
Figure 6-1 Details Tab and Graph Tab Views
The following sections provide details on viewing and adding relationships:
6.5.1 Viewing All Relationships for a CI
Note that some relationship types are reserved and do not show in relationships. For more information about reserved types, see Section 3.2.2, Reserved Association Types.
To view CI relationships:
-
From the search results or the pinboard, right-click the CI, then select to open the Edit CI dialog box.
Clicking , under a CI item in search results, opens a viewer. To access the listing for CI Relationship, you must use the option on a CI.
-
Click .
-
Do any of the following:
-
To view a list of relationships, click the tab.
-
To browse a visual representation, click the tab.
-
-
To define additional relationships, click the tab.
For more information, see Section 6.5.2, Adding Additional CI Relationships.
6.5.2 Adding Additional CI Relationships
Relationships with other CIs are usually defined when the CI is first registered. However, additional relationships can be defined for the CI at any time. There are 3 ways to relate CIs:
-
Drag and drop one or more CIs from onto a CI on the pinboard. For more information, see Relating CIs Using Drag and Drop.
-
Right-click a CI, then select . For more information, see Relating CIs Using Item Right-Click Menus.
-
Edit the CI details and use the Relationship Builder. For more information, see Relating CIs from CI Details.
Relationships can also be defined through the Operations Center console. For steps on defining relationship from the MO console, see Section 3.6, Managing CMS Elements from Operations Center.
Use the following methods to relate CIs:
Relating CIs Using Drag and Drop
To add relationships using Drag and Drop:
-
Verify the desired CI is available on the pinboard that has one endpoint of the relationship.
-
From search results, a report or the pinboard, select one or more CIs to relate and drag them over to the other CI on the pinboard. The following menu options display:
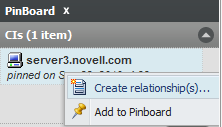
-
Click to display the Available Relationship dialog box:
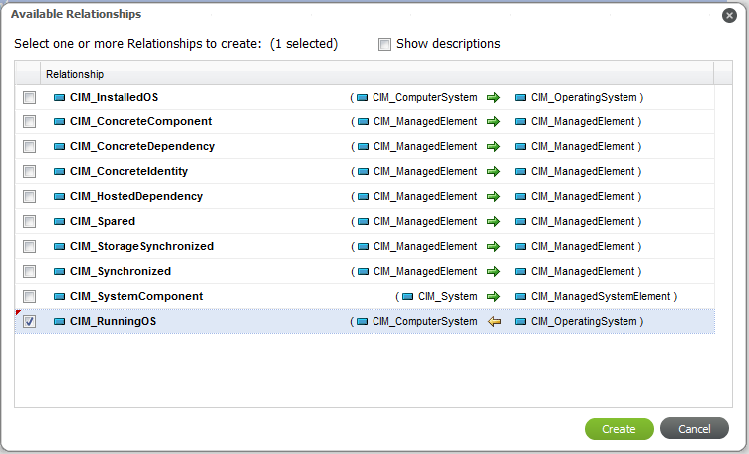
-
Select the check box to view the CIM descriptions of the various item classes.
-
Select the check boxes for the desired relationships between the selected elements.
-
Click .
The relationships are created.
Relationship rules can be broken when creating relationships with this method. To fix any broken or incomplete relationships, edit the CI and use the notifications provided. To see how to fix incomplete relationships, see the procedure in Section 6.1, Registering CIs.
If relationship rules exist, such as a one to one relationship between CI types, and additional relationships are created between the same types, the relationship viewer only shows valid relationships. None of the relationships that cause the rule to be invalidated are shown.
Relating CIs Using Item Right-Click Menus
To add relationships from a CI:
-
From the pinboard or search results, right-click a CI, then select .
The Relationship Builder opens:
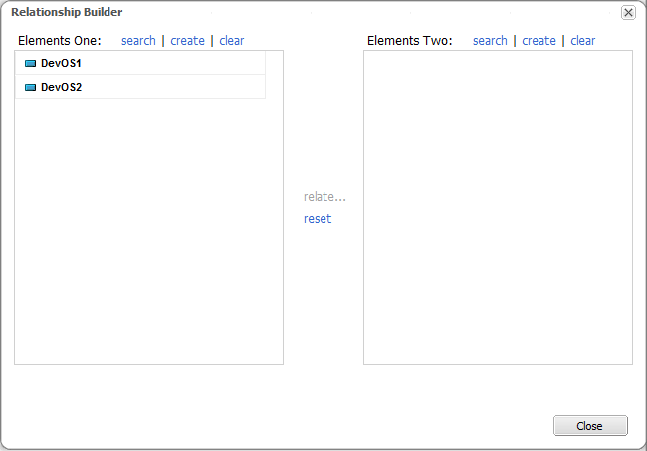
Selected CIs show in the left pane.
-
Use any of the following tasks to select elements to relate:
-
Drag and drop any CI listed to the opposite pane to switch endpoints.
-
Drag and drop any CIs from the pinboard or search results into either element panes.
-
Click either link to search for elements to relate.
-
Click either link to create a new CI.
-
Click the associated link to remove any CIs from either element pane.
-
Click the link to remove any CIs from both element panes.
-
-
Click the link to view, then select the relationships to create.
The Available Relationship dialog box displays:
-
Select the check box to view the CIM descriptions of the various item classes.
-
Select the check boxes for the desired relationships between the selected elements.
-
Click .
The relationships are created.
Note that relationship rules can be broken when creating relationships with this method. To fix any broken or incomplete relationships, edit the CI and use the notifications provided. To see how to fix incomplete relationships, see the procedure in Section 6.1, Registering CIs.
If relationship rules exist, such as a one to one relationship between CI types, and additional relationships are created between the same types, the relationship viewer only shows valid relationships. None of the relationships that cause the rule to be invalidated are shown.
Relating CIs from CI Details
To add relationships by editing a CI:
-
From search results, a report or the pinboard, double-click the desired CI or right-click the CI, then select from the drop-down list.
The Edit CI dialog box opens, showing flag icons at the top under the CI’s name.
-
Click any of the flag icons or click .
The list displays showing all current relationship definitions.
It is always a good idea to check on the tab to see if there are any relationship rules that have not been defined. If there are, there will be a link. Clicking that link walks you through the process to fix those.
For steps on using this method to define relationships, see Section 6.1, Registering CIs.
-
Click the tab.
-
From the drop-down list, select the type of new relationship to define.
A new relationship item is added to the pane.
-
If an extra relationship is added by mistake or is invalid, click
 ().
().
-
To select an elements to relate to the relationship rule:
-
Click to assign one or more existing CIs to the open endpoint.
-
Click to create a new CI to assign to the open endpoint.
-
-
When the relationship is fully defined, click to add the relationship.
The relationships displays on the tab of the section.