21.4.1 Designer
The following preferences categories appear as Designer sub-pages:
DS Trace
This setting lets you configure DS Trace settings.
Table 21-15 DS Trace Preferences
|
|
Specifies the size of the DS Trace window buffer, in lines (or entries). When the number of DS Trace entries exceeds the Window Size, DS Trace drops the oldest entry for each new entry it captures. |
|
|
Enables auto-scrolling of the live DS Trace window so that the latest log entries are always on screen. Whenthis option is deselected, you must manually scroll down the list of log entries. |
JavaScript Validation
Designer automatically validates the JavaScript as it is typed into the UI. By default, it is enabled.
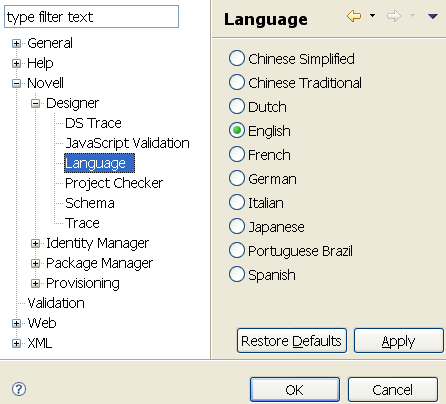
Language
When you installed Designer, you selected a language to display Designer’s UI. This setting enables you to change the language.
-
Select a language, then click .
You must restart Designer for the language change to take effect.
-
Restart Designer.
NOTE: reads the config.ini file, detects the previous language setting, and then defaults to that setting. When the changed property is written back to the .ini file, all comments are removed from the file. To preserve these comments, Designer copies the original config.ini to config.ini.bak and uses the backup to determine the default setting.
Project Checker
This settings lets you configure the Project Checker.
Table 21-16 Preferences: Novell > Designer > Project Checker
|
|
Allows you to limit the number of items displayed in the Project Checker. The default value is 100. |
|
|
Allows you to receive a prompt asking you to save your project before running the Project Checker. By default, this is enabled. |
Schema
Allows you to manage the Identity Vault and managed system’s schema.
Table 21-17 Preferences: Novell > Designer > Schema
|
|
Allows you to turn off this warning prompt, which appears during the import or export of the schema. |
|
|
Allows you to turn off this warning prompt, which appears during the export of the schema. |
|
|
Allows you to turn off the information message that appears when managing the application schema. |
Trace
The Trace view is useful in the following situations:
-
To trace internal errors and messages, so that you can find out why something might not work as expected.
-
To provide information for Novell Support, engineers, or other consulting resources.
All Designer-specific trace messages go to the Trace view if this view is open. Otherwise, no trace messages are sent.
Warnings and error messages are sent to the .log file, found in the run-time workspace metadata directory. Use the Error view to view this information.
Table 21-18 Parameters: Novell > Designer > Trace
|
|
Writes events to the Trace view. By default, tracing is off. To increase performance, disable tracing when you don’t need it. |
|
|
Provides separate traces. Dumps the entire stack where an internal exception occurs, so that you can see in the code where the internal exception is failing. |
|
|
Provides separate traces that detail all of the processing of XML documents. This trace can become quite verbose. |
|
|
In the Trace view, displays names of plug-ins where tracing has occurred. This is useful if you are tracing more than one plug-in. |
|
|
Automatically brings up the Trace view if a trace is trying to be logged. By default, this setting is On. |
|
|
Increases the buffer to show more characters. As the buffer increases in size gets higher, performance might degrade, depending on your system. |
|
|
Lists all Designer plug-ins (in their simple name form). Select plug-ins that you want to trace. |
|
|
Enables tracing in all Designer plug-ins. |
|
|
Disables tracing in all Designer plug-ins. |
Version Control
This setting determines how often Version Control polls the SVN server for updates. The polling interval is in seconds.
21.4.2 Identity Manager
The following preferences categories appear as Identity Manager sub-pages:
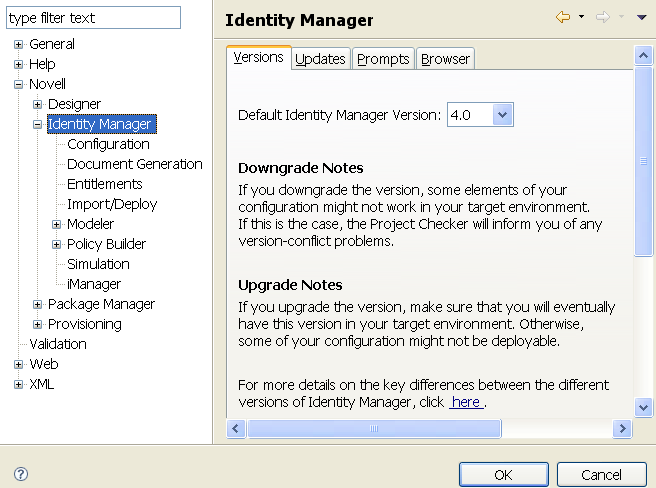
Identity Manager
The Identity Manager option contains multiple tabs:
Versions
Specifies the Identity Manager version running on a server.
Updates
Table 21-19 Preferences: Novell > Identity Manager > Updates
|
|
Prevents Designer from checking for updates on startup. Hides the Designer Updates dialog box. |
|
|
Displays a prompt each time you run Designer. You can disable this prompt. |
|
|
Always checks for updates. If you disable the prompts that appear on startup, select this option. |
|
|
Displays a message when you select to check for updates. |
Prompts
Table 21-20 Preferences: Novell > Identity Manager > Prompts
|
|
Prompts you when you select an earlier server version for a project. If you downgrade, some elements of your configuration might not work in your target environment. |
|
|
Prompts you when you select a later server version for a project. If you upgrade, some of your configuration might not be deployable unless you have this later server version in your environment. |
|
|
Warns you that your project might be erased from your workspace. The prompt occurs when overwriting a file in the file system for notification templates and policies. |
|
|
Confirms that you want to delete the selected items. |
Browser
You can use Designer to open a Web browser. After you enter the URL, Designer stores it. To change the URL, type a new one in , then click .
Configuration
Each driver has a startup parameter. If it is disabled, the driver never starts until you change the setting. By default, Identity Manager drivers are disabled when you create them in the Modeler or start Designer. You must start them manually.
For more information, see Section 4.5, Configuring Driver Sets.
General
These general settings specify how drivers start up and how their global configuration values (GCVs) act on specified target servers. The default state uses and .
Table 21-21 Preferences: Novell > Identity Manager > Configuration > General Tab Settings
|
|
The driver automatically starts after you create it or whenever you start or load Designer. |
|
|
You must start the driver manually. |
|
|
The driver never starts. |
|
|
Copies the GCVs from one driver/driver set to multiple targets of the same type. For example, you might configure GCVs on one driver and then copy them to multiple drivers. You also have the option of overwriting the target GCVs or merging your source GCVs with the existing target driver GCVs, if they exist. |
|
|
Overwrites existing GCVs when they are copied to the server. |
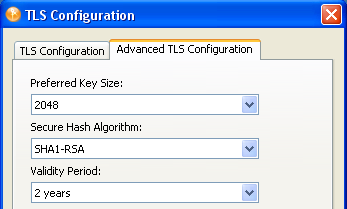
eDir-to-eDir SSL/TLS
This setting configures how two eDirectory drivers communicate with each other over a secure channel. For more information, see Section 18.7, Configuring TLS for eDir-to-eDir Drivers.
Table 21-22 Preferences: Novell > Identity Manager > Configuration > eDir-to-eDir SSL/TLS Tab Settings
|
|
Specifies the preferred key size that is generated when drivers are encrypted and stored in eDirectory: 512, 768, 1024, or 2048 bytes. |
|
|
Specifies the preferred hash algorithm to use when encrypting drivers: SHA1-RSA, MD2-RSA, or MD5-RSA. |
|
|
Specifies the validity period for a driver certificate, ranging from 6 months to 10 years. |
|
|
Specifies that existing driver certificates are overwritten with each deployment. If you select this option, Designer deletes existing certificates and creates new ones. The new certificates are then good for another two years (assuming the default value is two years, as defined in the field.) If you select > , Designer deletes old certificates and creates new ones. |
|
|
Specifies that only expired driver certificates are overwritten with each deployment. This is the default setting. The default expiration length is two years. If a certificate expires, SSL/TLS stops working. If a certificate is expired, Designer deletes it and creates a new one. |
|
|
Never overwrites driver certificates. |
|
|
Restarts drivers after certificates have been updated or created. |
When you create certificates, Designer reads the preferences, including Preferred Key Size, Preferred Secure Hash Algorithm, and Preferred Validity Period. These options are also available through > .
NOTE:Designer reads these preferences after you first set them. If you subsequently change the preferences by using the driver’s configuration page, those changes override the settings in Preferences.
After you change default settings and click , that configuration information is recorded. When you deploy the driver, Designer creates the certificates, or deletes and creates new certificates with a new time stamp.
Prompts
These settings specify how users are prompted to manage driver certificates on the target server. All are selected in the default state.
Table 21-23 Preferences: Novell > Identity Manager > Configuration > Prompts Tab Settings
|
|
Prompts the user to provide new certificates. |
|
|
Prompts the user to merge or overwrite when copying GCVs to the target server. |
|
|
Prompts the user to create certificates after configuring a secure connection. |
|
|
In the Driver Configuration Wizard, prompts the user whether to reset (overwrite) all driver settings and policies. |
|
|
Turns on and turns off a warning dialog box associated with policy operations. The dialog box appears when you move policies in a pre-3.5 environment and the move operation affects multiple policy sets. |
|
|
Any time you perform a live action on a driver (such as starting or stopping the driver) it prompts you to specify the server associated with the driver. |
|
|
Designer validates the policies you create against the Identity Manager DTDs. This helps you verify that the policies you create are valid. |
Document Generation
The Document Generator comes with the following settings:
Table 21-24 Preferences: Novell > Identity Manager > Document Generation
|
|
If you have a PDF reader installed on your workstation, the rendered file automatically opens in the reader. If you have enabled the RTF format and have a TRTF reader installed, the rendered file automatically opens in the reader. The default is On. |
|
|
Displays a warning when generating documents on out-of-version styles. The default is On. |
|
|
Displays a warning when overwriting previously generated files. |
|
|
Allows you to save documents to RTF format. The default is Off. |
|
|
Generates XML files as part of the document generation process. |
|
|
With this option selected, parent objects and direct child objects are included to give context to the document. Deselecting this option excludes direct children of the selected item. The default is On. |
|
|
Allows you to select a language other then English in which to generate documents. Languages include Chinese Simplified, Chinese Traditional, Dutch, English, French, German, Italian, Japanese, Portuguese Brazil, and Spanish. The default is English. |
|
|
Allows you to select the font you want to use for document generation. This selection adds double-byte font support. The default is the Arial font. |
Entitlements
Controls whether or how often you receive a prompt whenever you add the DirXML-EntitlementRef attribute to a driver filter. The default is , but because this attribute is added only if it doesn’t already exist on the driver filter, you can select to not see the pop-up window.
You can also never add the attribute. However, the DirXML-EntitlementRef attribute is added only if it doesn’t already exist in the driver filter. If the attribute already exists, the options have no effect.
Import/Deploy
The Import/Deploy preferences window contains three tabs: , , and . The following tables describe their options.
Behaviors
There are multiple sections in the tab.
Table 21-25 Preferences: Novell > Identity Manager > Behaviors (Import Settings)
|
|
Displays the prompt. If you select to the prompt, you must then enter information in required fields while configuring the driver. If you select , you temporarily disable this setting and can skip required fields. |
|
|
Imports the eDirectory application schema when you select this option. You might not want to import all the associated data. The default is Off. See Section 12.5.3, Importing a Schema. |
Table 21-26 Preferences: Novell > Identity Manager > Behaviors (Deploy Settings)
|
|
If you want driver set and server associations when deploying, select this option. The default is Off. |
|
|
With this option selected, you are prompted to deploy both sides on the connection. With both drivers deployed, Deploy is integrated with the creation of eDir-to-eDir certificates, if the certificates are created in Designer. Deploy adheres to the settings set in The default is On. This is the recommended setting. |
|
|
Restarts the driver after it is deployed. The default is On. |
Table 21-27 Preferences: Novell > Identity Manager > Behaviors (Summary Dialog)
|
|
Allows you to view what’s being imported in a summary screen. The default is On. |
|
|
Allows you to view what’s being deployed in a summary screen. The default is On. |
|
|
Select this box if you want to filter passwords out of summary and compare dialog boxes. |
Table 21-28 Preferences: Novell > Identity Manager > Behaviors (Export Settings)
|
|
Selected by default, this option saves you the trouble of manually inputting cross-driver policy references. |
Prompts
Table 21-29 Preferences: Novell > Identity Manager > Prompts Tab Settings
|
|
Selected by default. If you do not want to see a dialog box about these references, deselect the option. |
|
Show a warning dialog when overwriting a driver set/server association |
Warns that the driver set being deployed has a different server association than the server that you are about to deploy to. The association in the deployed driver set overwrites the existing server association. |
|
|
This is the default, and it is also the recommended setting. With this option selected, you are prompted to deploy both sides of the connection. |
|
|
Selected by default. If you do not want to see a dialog box about these references, deselect the option. |
Trace
Table 21-30 Preferences: Novell > Identity Manager > Trace Tab Settings
|
|
Deselected by default. If you need to troubleshoot an import or a deploy, select this option, then open the Trace view to inspect the import or deploy. |
|
|
Deselected by default. If you need to generate debug messages, select this option. |
|
|
Deselected by default. If you need to generate verbose debug messages, select this option. |
|
|
Deselected by default. If you need to time how long it takes to import or deploy an object, select this option. |
Modeler
The Modeler preferences window contains seven tabs: , , , , , , and . The following tables describe their options.
Additionally, the following preferences categories appear as Modeler sub-pages:
Table 21-31 Preferences: Novell > Identity Manager > Modeler > Behaviors Tab Settings
|
|
Automatically creates a server for a driver set when you connect a driver to a different driver set. |
|
|
Launches the driver’s Properties page. |
|
|
Displays the driver’s Policy Flow diagram in the Outline view. |
Table 21-32 Preferences: Novell > Identity Manager > Modeler > Display Tab Settings
|
|
Shows labels below applications (in both modes) and above Identity Vaults (Architect mode only). |
|
|
Displays a driver icon  on the line that represents a driver in the Modeler. on the line that represents a driver in the Modeler.
|
|
|
Displays a password sync icon  below a driver icon in the Modeler. below a driver icon in the Modeler.
|
|
|
Causes Identity Vaults to expand to accommodate objects that you place in them. |
|
A |
Causes Identity Vaults to shrink when you remove objects from them. |
|
|
Enables vaults to expand horizontally, to accommodate long titles. Otherwise, the titles concatenate after approximately 20 characters. |
|
|
Increases or decreases cells in the Modeler’s grid. To access the grid, select the Modeler, then click > . |
Table 21-33 Preferences: Novell > Identity Manager > Modeler > Guidance Tab Settings
|
|
Creates an Identity Vault when you drag or drop an application from the palette into the Modeler. |
|
|
Prompts you to connect a line directly between the end driver sets when you set up an eDir-to-eDir relationship. |
|
|
Sets policy and schema settings to defaults when you set data flows in architect mode. To edit the settings, use the Developer mode. |
|
|
Requires you to save a project before you can save a dataflow to disk. |
Table 21-34 Preferences: Novell > Identity Manager > Modeler > Layouts Tab Settings
|
|
Specifies the default layout for application objects when you import a project into Designer. |
To arrange an existing project in a particular layout:
-
In the Modeler, right-click a driver set.
-
Select .
-
Select a layout.
Table 21-35 Preferences: Novell > Identity Manager > Modeler > Pages Tab Settings
|
|
Determines whether the Architect, Dataflow, and Table pages display as tabs at the bottom of the Modeler. The Developer mode is always enabled. |
Table 21-36 Preferences: Novell > Identity Manager > Modeler > Prompts Tab Settings
|
|
Launches the Driver Configuration Wizard when you drag or drop an application in the Modeler. |
|
|
Provides a Yes/No prompt for you to choose whether you want to delete the driver and its policies. |
Table 21-37 Preferences: Novell > Identity Manager > Modeler > Themes Tab Settings
|
|
Specifies the theme for Developer mode. Themes define the colors used for background, text, line, domain group background, and domain group title in the Modeler. |
|
|
Specifies the theme for Architect mode. Themes define the colors used for background, text, line, domain group background, and domain group title in the Modeler. |
Dataflow Page
Specifies the number of columns per page that the Dataflow editor saves in the HTML reports.
To view or use the Dataflow editor, select the tab in the Modeler.
Palette Page
The Palette page includes the following settings:
Table 21-38 Preferences: Novell > Identity Manager > Modeler > Palette
|
|
Displays folders (for example, Database) in the palette and places applications in appropriate folders. |
|
|
Places all applications into one folder in the palette, and lists the applications alphabetically. |
Policy Builder
The Policy Builder preferences page includes the following settings:
Additionally, the following preferences categories appear as Policy Builder sub-pages:
Table 21-39 Preferences: Novell > Identity Manager > Policy Builder
|
|
Translates the names of policy actions, conditions and tokens into the selected Designer language. When this option is not selected, policy actions, conditions and tokens display in English. |
|
|
Includes project name in the title. |
|
|
Automatically expands rules in the Rules pane when you open the Policy Builder. |
|
|
Adds additional fields in the Rule Inline editor (available when you double-click a rule.) Designer adds the information from these fields to the policy. |
Policy Description
The Policy Description preferences page includes the following settings:
Table 21-40 Preferences: Novell > Identity Manager > Policy Builder > Policy Description
|
|
Automatically expands the field. You can hide the field by selecting the check box. |
|
|
Determines how many rows to display in the field. The default is 10. |
|
|
Places the field above or below the Rules pane. |
Simulation
The Simulation preferences page includes the following settings:
Table 21-41 Preferences: Novell > Identity Manager > Simulation
|
|
Enables you to simulate policies that contain references to external Java extensions. Specify the .jar file or the directory where the .jar file is located to add it to the class path.
You can specify multiple Java extensions. |
|
|
A reference directory table and a new configuration option to specify the current working directory have been added in the Simulation preferences page.You can add directories through this table when they need to be included in the Simulator's classpath. The configuration or reference files in the directory are available at runtime while simulating the policy. |
|
|
Automatically clears the log file. If you don’t enable this setting, Designer displays a icon that you can use. If you do many simulations in succession, you might want to disable this option. The log file then captures and displays the events of all the tests, until you click . |
|
|
Displays a prompt when the Simulator generates a query. It simulates what the engine would do when a query is required to process the policy. |
|
|
Notifies a user when the Policy Simulator must convert the Application schema to the ID Vault schema, or vice versa. This is typically necessary when changing the input document’s simulation point. |
iManager
The iManager preferences page includes the following settings:
Table 21-42 Preferences: Novell > Identity Manager > iManager
|
|
The IP address and port for the iManager server. |
|
|
Prompts you for the URL to the iManager server after you select . If the URL is missing or incorrect, iManager is unable to launch. |
21.4.3 Package Manager
The following options allow you to manage packages in Designer.
Auto Imports
This setting allows you to change how Designer imports package updates into the package catalog. When there are updates to packages that have not been imported into the package catalog, select how you want Designer to handle these updates.
Table 21-43 Preferences: Novell > Package Manager > Auto Imports
|
|
Designer does not prompt you to import updated packages into the package catalog. If there are package updates that need to be imported, you must manually import these packages before they can be installed. For more information, see Section 6.4.1, Importing Packages into the Package Catalog. |
|
|
If there are package updates, every time you open the project, you are prompted to import the package updates into the package catalog. |
|
|
If there are package updates, every time you open the project, Designer automatically imports the package updates into the package catalog. |
Custom Shims
Allows a developer to specify information about a custom driver shim. The information is used as a template so that a developer does not need to specify this information repeatedly when creating a package.
Table 21-44 Preferences: Novell > Package Manager > Custom Shims
|
|
Displays the driver name and version in the driver manifest. This name can change with each release of the driver. |
|
|
Associates the driver with the shim file in the driver manifest. This ID never changes. |
|
|
This ID associates the driver shim with a certain types of drivers. This allows you to group packages together. For example, if your driver palette ID associates your custom driver with the JDBC driver, your packages are available for installation if the customer has a JDBC base package installed. |
To add a custom shim:
-
Click the icon  .
.
-
Specify the display name for the driver shim.
-
Specify the shim ID for the driver shim.
-
Specify the driver palette ID for the drivers you want this custom shim to be associated with.
-
Click .
License Defaults
If you have a license for packages you are developing, you can specify that information in this preference page, so that each time you create a new package you don’t need to specify that information again.
To add a license:
-
Click , then browse to and select your license file.
-
Click .
Locations Defaults
This option allows you to specify your package development directories so that you don’t need to specify this information each time you create a new package.
Table 21-45 Preferences: Novell > Identity Manager > Package Manager > Location Defaults
|
|
This directory is where you build packages. |
|
I |
This directory contains all imported packages. |
|
|
This directory contains all of the packages that are localized. |
|
|
This directory contains all packages ready to publish. |
Online Updates
The following settings configure how packages are updated online:
Table 21-46 Preferences: Novell > Package Manager > Online Updates
|
|
Designer does not automatically check for updates. With this option selected, you need to manually check for updates by clicking > in Designer’s toolbar. |
|
|
Designer prompts you to check for package updates when it starts. |
|
|
Designer checks for any package updates when it starts.
NOTE:This options fails if a custom site requires authentication and the authentication information has not been added in Designer.
You add the authentication information into > > > . For more information, see Section 21.2.6, Network Connections.
|
|
|
If there are no package updates, Designer returns a message stating that no updates are available. |
|
|
Lists the URLs where Designer checks for package updates. Partners can add their own URLs for custom packages. For more information see, Section 6.5.11, Publishing Packages. |
|
|
Allows you to add the vendor’s name and URL for publishing custom packages. For more information, see Section 6.5.11, Publishing Packages. |
|

|
Allows you to edit the vendor’s name and URL for publishing custom packages. |
|

|
Deletes the select URL from the list of URLs. |
|
|
Restores all settings to their default values. |
To add a URL:
-
Click the icon .
-
Specify the vendor of the package and the URL where packages are available for download.
-
Click .
Vendor Information
Allows you to specify your vendor information for your packages in one location, instead of specifying the information each time you create a package. For more information, see Section 6.5.2, Creating Packages.
Table 21-47 Preferences: Novell > Package Manager > Vendor Defaults
|
|
Specify the vendor name. If this is for internal consumption, specify the name of your company. |
|
|
Specify the address for the vendor or your company. |
|
|
Specify the URL of the vendor your company. |
|
|
Specify an e-mail for the vendor or your company. |
|
|
If there is a specific contact person for this package, specify the name. |
|
|
If there is a specific e-mail address for the contact person, specify it in this field. |
21.4.4 Provisioning
You can customize some Provisioning view behaviors by setting preferences. You access the preferences page through . The following table explains the settings on Provisioning preferences main page.
Table 21-48 General Preferences
|
|
When this option is selected and you delete a User Application from the Modeler, Designer asks whether to delete the provisioning objects on disk as part of the delete operation. By default, the provisioning objects are left on disk, even if the User Application is deleted. |
|
|
When you delete an object in the Provisioning view or the directory abstraction layer editor, you are prompted to confirm the deletion. This preference determines whether the check box labeled in the confirmation dialog box is selected by default.
Selecting this preference means the default is to delete the Identity Vault object. The local object is always deleted. |
|
|
Select this option if you want Designer to launch the Provisioning view when you create a new User Application driver or import an existing User Application driver. |
|
|
Select this option to enable (the default) tooltips in the Provisioning view. |
|
|
Select this option so Designer displays provisioning request definitions organized by category. You specify the category in the Overview panel. Categories are defined in the Provisioning Category list defined in the directory abstraction layer. |
|
|
Select this option so Designer displays all localized e-mail templates as selectable options in the tab. The Java language code is appended to the name of the e-mail template. For example, cn=Provisioning Notification Activity_es, cn=Default Notification Collection,cn=security indicates this is the Spanish language version of this template.
When you select a localized template, that language is used regardless of the user’s default language. When you select the default template (the template without a locale code), the e-mail is in the user’s default language (if the default is a supported language). |
|
|
Select this option if Designer should validate display names. It ensures uniqueness of the display name within a locale, and that a display name is supplied (not blank) for each locale.
Applies to display names defined by using the directory abstraction layer editor, provisioning request editor, or provisioning teams editor. |
|
|
When this option is selected, and you click , Designer informs you that the query can take a long time to execute. It prompts to run the query or not. If this option is not selected, Designer runs the query and does not prompt you. |
|
|
The amount of time (in milliseconds) for Designer to connect to the Identity Vault. When it is set too low, you might encounter an error when setting Trustee Rights on a provisioning request definition or when trying to access the Identity Vault through the ECMA expression builder. |
The following sections explain the additional preferences settings for provisioning:
Import/Deploy Preferences
Table 21-49 Import/Deploy Preferences
|
> |
Select this option for Designer to delete local objects if the corresponding Identity Vault objects were deleted. This ensures that the Identity Vault and local files are in sync. Deselect this option if you want to leave the local files alone. |
|
> |
Select this option if you are importing the driver from a test environment and want to deploy to a production environment. The User Application driver runtime relies on objects stored in the driver that you are not able to access in Designer. If you deploy a driver that does not contain these objects, it does not work properly. Deselect this option if you are importing the driver, modifying it, and deploying it back to the same driver set because the driver already has the runtime configuration objects. |
|
> |
Select this option if you want to deploy objects that fail validation checks. At deployment, Designer validates the definitions being deployed following the validation rules outlined in Validating Provisioning Objects in the User Application: Design Guide. Deselect this option to prevent deployment of definitions that fail validation.
WARNING:Deploying objects that fail validation can result in errors in the User Application runtime.
|
Migration Preferences
Table 21-50 Migration Preferences
|
|
When you select , Designer displays a dialog box warning you that schema changes (needed to support new features) must be made before you can deploy the migrated driver. If the updates have not been made, cancel the migration until they are complete. If you don't want to see this warning when you select , deselect this option. |
|
|
Applies to User Application drivers that have not been deployed to the Identity Vault (for example, User Application drivers imported from a driver configuration file). When you migrate an undeployed User Application driver, Designer prompts you to deploy the driver. Select the option if you always want Designer to deploy the User Application driver, and do not want the dialog box displayed. |
|
|
When you select the command, Designer warns you that all editors will be closed. Select this option if you don’t want this warning displayed each time you choose the command. |
Novell Integration Manager
The Novell Integration Manager is used by the User Application workflow engine to provide Integration Activity support.
Validation Mask Preferences
Table 21-51 Validation Mask Preferences
|
|
Use this to define the validation masks available to form controls. Validation masks are regular expressions and must follow regular expression syntax.
Designer provides a default set of validation masks. If they do not display validation masks in the form controls property sheets, enable them by clicking , then clicking . |
Workflows Preferences
Table 21-52 Workflow Preferences
|
|
Use this dialog box to remove or preview existing form templates. |
|
|
: Select this preference when you want the tab of the provisioning request definition editor to display the Activity IDs for each activity in the flow. Activity IDs are used by the ECMA expression builder and are written to the User Application’s error logs.
: Select this preference when you want the tab of the provisioning request definition editor to display the Flow Path Types for each activity in the flow. Flow Path Types are used by the ECMA expression builder and are written to the User Application’s error logs. |