6.5 Developing Packages
Creating packages involves a different set of tasks that managing packages.
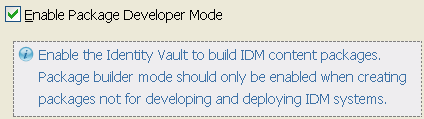
6.5.1 Enabling the Package Development Mode
Packages can only be created and modified when the Identity Vault is running in the development mode.
-
Either in the Outline view or the Modeler, right-click the Identity Vault, then click .
-
Select , then click .
6.5.2 Creating Packages
Packages are the delivery mechanism for Identity Manager content. They can be created for Identity Vaults, driver sets, and drivers. When you create a package, you are creating the framework for delivering the content. Creating the content for a package is different than creating the package. This section explains how to create the package, then Section 6.5.3, Adding Content to Packages explains how to add the content to the package.
Packages are stored in package categories and package groups. If you have these items created, skip to Step 5 to create the package. If you don’t have a package category or a package group created, start with Step 1.
-
In the Outline view, right-click the package catalog, then click .
-
Specify the name of the category, then click .
-
Right-click the package category that you created in Step 2, then click .
-
Specify the name of the package group, then click .
-
Right-click the package group that you created in Step 4, then click .
-
Use the following information to create the package:
-
Name: Specify a name for the package.
-
Short Name: Specify a unique short name for the package. This name must be unique in the Identity Vault.
-
Version: Specify a version for the package.
-
Description: Specify a description for the package.
-
Type: Determines where a package is installed. Select whether the package is installed on an Identity Vault, a driver set, or a driver.
-
Base Package: Select this option if you want to allow other packages to be installed when this package is installed.
-
Category: Select the package category for this package.
-
Group: Select the package group for this package.
-
-
Click .
-
Use the following information to define the package constraints:
-
IDM Compatibility: Select the minimum and maximum versions of Identity Manager that this package is compatible with.
-
Application Compatibility: Select the minimum and maximum versions of the managed application that this package is compatible with.
-
Driver Type: Select the driver or drivers that this package is compatible with.
-
-
Click .
-
Use the following information to define the vendor of the package:
-
Vendor Name: Specify the vendor name. If this is for internal consumption, specify the name of your company.
-
Vendor Address: Specify the address for the vendor or your company.
-
Vendor URL: Specify the URL of the vendor or your company.
-
Vendor eMail: Specify an e-mail for the vendor or your company.
-
Contact Name: If there is a specific contact person for this package, specify his or her name.
-
Contact eMail: If there is a specific e-mail address for the contact person, specify it in this field.
-
-
Click .
-
Review a summary of the information you specified, then click .
6.5.3 Adding Content to Packages
After you have created a package, you must add Identity Manager content to the package for the package to have value. This section explains how to add, remove, and update content in a package.
-
Verify you have a package created. If not, follow the steps in Section 6.5.2, Creating Packages to create a package.
-
Drag and drop an application from palette into the Modeler to launch the Package Installation Wizard.
The Package Installation Wizard does not show any packages if the catalog is empty.
-
Cancel out of the Package Installation Wizard.
This creates an empty driver.
-
Right-click the empty driver, then click .
-
Click to install the package on the driver.
In order to start package development, you first must install the package on the driver.
-
Click the icon
 to display the packages to be installed on this driver.
The package list is initially filtered by the driver types. To see all the driver packages, deselect .
-
Click the box next to the package to install, then click .
The package is now displayed in the Operations column with a pending operation of Install.
-
Click on the properties page to install the package.
Because the package is empty, the Package Installation Wizard displays the summary page indicating which packages are installed.
-
Click to install the package.
-
After the package is installed, create the new package content on the driver. See Table 6-1 for a list of items that can be contained in packages.
For example:
-
Right-click the driver in the Outline view, then click > .
-
Specify a name for the policy, then click .
-
Edit the policy by adding rules, actions, and conditions, then close the Policy Builder.
In this example, the policy is created and can be added to the package at this point.
-
-
Right-click the content item you created, then click .
For this example, right-click the policy.
-
In the list of packages installed on the driver, select the package where the policy is going to be added, then click .
IMPORTANT:Only packages that are created in Designer are displayed in the list. Any packages that are imported into Designer are not displayed in the list. You can only add content to a package you create. You cannot add content to a package you have imported.
The policy is added to the package and can be viewed in the package catalog. You can now build and release your package. When users install the package, what ever language Designer is using, this is the language that the package is installed in.
6.5.4 Editing Content in the Packages
After content is added to a package, you can make changes to the content, by right-clicking the object and selecting one of the following options:
-
Package Properties: Displays the properties of the package the content is part of, without accessing the package in the package catalog.
-
Remove from Package: Removes the object from a package. Right-click the object you want to remove from a package, then click .
-
Sync to Package: Make the changes to the content through Designer as if the object is not part of a package, then right-click the edited object and click . The changes made to the content are synchronized to the package.
-
Revert Customization: You can remove the changes to the package, if you decide you don’t want them. Right-click the object, then click . This removes the changes and reverts the package back to its original state.
6.5.5 Creating Package Prompts
You can configure the package content when it is installed, if you add prompts to the package. Prompts perform the same function as the Driver Configuration Wizard when a driver configuration file is imported. The prompts can set values in GCVs and configure specific features of the driver such as using entitlements or synchronizing passwords.
The prompts are stored as Resource objects in the package. Each Resource object can contain a page of prompts, which is displayed to the user before he or she clicks .
To add prompts to a package:
-
Verify that you have a package created with content. Otherwise, follow Section 6.5.2, Creating Packages and Section 6.5.3, Adding Content to Packages to create a package with content.
-
Right-click the package in the package catalog, then click .
You are presented with up to four options, depending on the type of package you created.
-
Select the appropriate option for your needs:
Driver Name: This option is only available if you are creating a base package. This option creates a Resource object that contains the prompts and parameters to create a name for a driver.
Initial Settings: Creates all of the default attributes required to create a driver object.
Upgrade Settings: Creates a Resource object that contains style sheets that maintain the package settings so that they are not overwritten when the new package is installed. Select this option if the package you are creating is an upgrade to an existing package.
Remote Loader: This option is only available if you are creating a base package. This option creates a Resource object that contains the prompts and parameters to enable the driver for a Remote Loader connection.
You now have default package prompts created and you can edit and change these prompts for your own needs. You can also create custom prompts by creating GCV Resource objects. For more information, see the Global Configuration Value Definition Editor
in the Policies in Designer 4.0.1.
6.5.6 Editing Package Prompts
You can edit properties of the Resource object to change the default package prompts to meet your needs. You can add new prompts, edit the existing prompts, or add default values for the prompts that are displayed when the package is installed.
Adding Prompts
-
In the Outline view, right-click the Prompt Resource object in the package, then click
-
Click , then click .
-
Fill in the following fields to create the prompt:
Name: Specify a name for the prompt.
Display Name: Specify a display name for the prompt. This is the name displayed when users are presented with the prompt.
Description: Specify a description for the prompt. This information is displayed in the information icon next to the prompt. This information helps users know what to enter into the field.
Type: Select the type of the prompt.
-
Click , then click to save the changes and close the page.
Editing Existing Prompts
-
In Outline view, right-click the Prompt Resource object in the package, then click .
-
Click .
-
Select the prompt, then click .
-
Make the desired changes, then click .
Setting Default Values for the Prompts
-
In the Outline view, right-click the Prompt Resource object in the package, then click .
-
Click .
-
Specify the default value in each prompt, then click to save the changes.
-
Click to close the Prompts page.
6.5.7 Versioning Packages
You can create a new version of a package to provide bug fixes or enhancements to released packages. Versioned packages contain the same unique global identifier to support upgrading and downgrading package installations.
-
Verify that you have a package created with content. Otherwise, follow Section 6.5.2, Creating Packages and Section 6.5.3, Adding Content to Packages to create a package with content.
-
In the package catalog, right-click the package you want to version, then click .
-
Set the version of the package higher than the current version. All of the other fields stay the same when you are changing the version.
-
Click .
-
Use the following information to define the package constraints:
-
IDM Compatibility: Define the minimum and maximum versions of Identity Manager that the package supports.
-
Application Compatibility: Define the minimum and maximum versions of the managed application that the package supports.
-
Driver Type: Select the drivers that the package supports.
-
-
Click .
-
Use the following information to define the vendor of the package:
-
Vendor Name: Specify the vendor name. If this is for internal consumption, specify the name of your company.
-
Vendor Address: Specify the address for the vendor or your company.
-
Vendor URL: Specify the URL of the vendor or your company.
-
Vendor eMail: Specify an e-mail for the vendor or your company.
-
Contact Name: If there is a specific contact person for this package, specify their name.
-
Contact eMail: If there is a specific e-mail address for the contact person, specify it in this field.
-
-
Review the summary of the new package version, then click .
The new package with the new version number is created in the package catalog. You can now build and release your package. When users install the package, what ever language Designer is using, this is the language that the package is installed in.
6.5.8 Copying Packages
Copying packages gives you the same content, but it contains a different global identifier. This allows you to create a new package based on content of an existing package.
-
Verify that you have a package created with content. Otherwise, follow Section 6.5.2, Creating Packages and Section 6.5.3, Adding Content to Packages to create a package with content.
-
Right-click the package in the package catalog you want to version, then click .
-
Use the following information to create a copy of the package:
-
Name: Change the name of the package, if desired.
-
Short Name: Change the unique short name for the package. This name must be unique in the Identity Vault.
-
Version: By default, the package version is set to 1.0.0, which you can change.
-
Description: Specify a description for the package.
-
Type: This field cannot change. The package type is determined when you create a package, not when you copy a package.
-
Base Package: This option cannot change. Whether the package is a base package or not is determined when you create a package, not when you copy a package.
-
Category: Change the package category for this package, if desired.
-
Group: Change the package group for this package, if desired.
-
-
Click .
-
Use the following information to define the package constraints:
-
IDM Compatibility: Define the minimum and maximum versions of Identity Manager that the package supports.
-
Application Compatibility: Define the minimum and maximum versions of the managed application that the package supports.
-
Driver Type: Select the drivers that the package supports.
-
-
Click .
-
Use the following information to define the vendor of the package:
-
Vendor Name: Specify the vendor name. If this is for internal consumption, specify the name of your company.
-
Vendor Address: Specify the address for the vendor or your company.
-
Vendor URL: Specify the URL of the vendor or your company.
-
Vendor eMail: Specify an e-mail for the vendor or your company.
-
Contact Name: If there is a specific contact person for this package, specify their name.
-
Contact eMail: If there is a specific e-mail address for the contact person, specify it in this field.
-
-
Review the summary of the new package version, then click .
The copy of the package is created in the package catalog. You can now build and release your package. When users install the package, what ever language Designer is using, this is the language that the package is installed in.
6.5.9 Localizing Packages
You can localize the strings in the packages you create. This allows you to provide packages in multiple languages for your customers. Designer generates the properties files that contain the strings that you can have localized.
You must do the following procedure for a package before the package is built.
To localize a package:
-
In the Outline view, right-click the package in the package catalog, then click > .
-
Click , then browse to and select the directory that will store the properties files.
-
Click .
-
Take the properties files and have them localized.
-
After the properties files are localized, place them in local directory on the machine that is running Designer.
-
Open your project, then right-click the package in the package catalog.
-
Click > .
-
Click , then browse to the directory that contains the localized properties files.
-
Click twice.
You can now build and release your package. When users install the package, what ever language Designer is using, this is the language that the package is installed in.
6.5.10 Building Packages
After you have created your custom packages, you can build and release these packages for consumption.
-
In the Outline view, right-click the package in the package catalog you want to build, then click .
-
Click , then browse to and select the directory where the package will be built.
-
Click .
-
(Conditional) Select , if you are ready to release the package.
After you release a package, it becomes read-only and you cannot make any modifications to it. However, you must release a package to publish it.
-
Review the summary information, then click .
6.5.11 Publishing Packages
After you have built and released your packages, you can publish the packages so users can consume them. Only packages that have been built can be published.
-
Verify the package has been built and released by completing Section 6.5.10, Building Packages.
The option is not available until you have released the package.
-
Right-click the built and released package, then click .
-
Click, then browse to and select the directory to place the published package.
-
Click .
-
Click , then browse to and select the directory where you built the package.
-
Click twice.
You can publish the packages to your own Web server and have users configure Designer to point to your Web server for package updates.
To configure Designer for additional package update sites:
-
In the toolbar, click > .
-
Click > > .
-
Click the icon
.
-
Specify a name for the Vendor and the URL for the Web server, then click .
-
Click to close the Online Updates page.