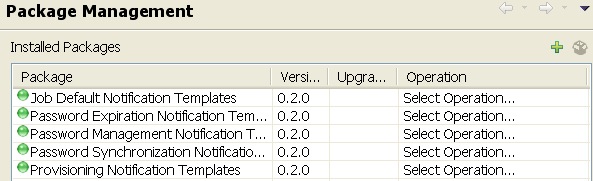
6.4 Package Administration
Use the following list of tasks to manage packages.
6.4.1 Importing Packages into the Package Catalog
Packages are stored in the package catalog, which is only visible in Designer. You must import the packages into the package catalog before you can install and use the packages.
The package catalog is created when you create or import a project. If you have an existing project, the package catalog is created when you open the project after it is converted.
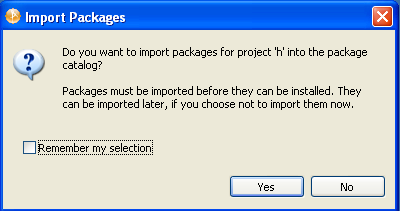
When the package catalog is created, Designer automatically prompts you to import packages into it. You are presented with the following screen:
Figure 6-2 Importing Packages
The option automatically imports updated packages into the package catalog. If you do not select this option, use the following procedure to import a package into the package catalog.
-
Right-click the package catalog object in the Outline view, then click .
-
Select one or more packages from the list.
or
Click , then browse to and select a package on the file system.
If all of the available packages are already imported, the list is empty.

-
Click to import the packages.
-
Review the import message, then click .
After the packages are imported, you must install the packages before they can be used. Continue with Section 6.4.2, Installing Packages for instructions.
6.4.2 Installing Packages
You can install packages on Identity Vaults, on driver sets, or on drivers. You can verify the packages have been imported by following the instructions in Section 6.4.1, Importing Packages into the Package Catalog.
There are three different types of packages based on the package are installation target, ie., Identity vault packages, driver set packages and driver package.
Driver packages are further grouped as:
-
Driver Base Configuration Packages: Contains the base functionality for a driver. You must install a driver base configuration package first.
-
Mandatory Features Packages: If there is a feature that is required for a driver to function, but is not included in the driver base configuration package, it is added to a mandatory features package.
-
Optional Features Packages: Contains features for a driver that aren’t mandatory for the driver to function.
To install packages on an existing Identity Vault, driver set, or driver, see Section 6.4.3, Adding Packages.
To install packages to create a new driver, use the following procedure:
-
Drag and drop an application from the Palette into the Modeler.
or
Right-click the driver set in either the Outline view or in the Modeler, then click > .
-
Click the check box next to the base package you want install, then click .

You can only select one base package at a time.
-
(Conditional) If there are mandatory features for the base packages you selected, click the check box next to those packages; otherwise, continue to Step 4.
-
Click .
-
(Conditional) If there are optional features for the base packages you selected, click the check box next to those packages; otherwise, continue to Step 6.

By default, most options are selected because they are recommend for the driver. The optional features are displayed by groups and you can expand the group to see the packages that are installed in the group. You must select the group to install the package.
-
Click .
-
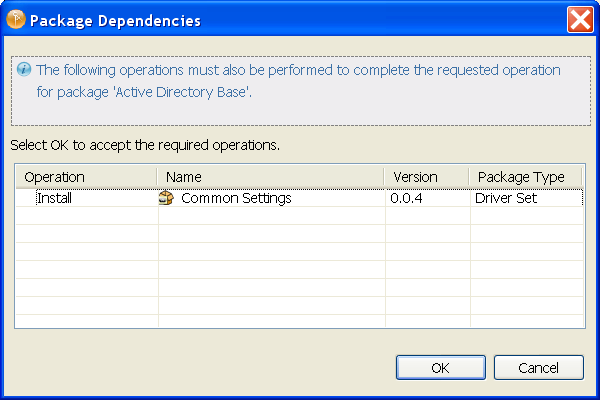
(Conditional) Select the dependent package, then click .
If there are dependent packages that are not installed, you are prompted to install the dependent package.
-
(Conditional) Install each dependent package, if there is more than one dependency.
-
Respond to the prompts, then click .
The prompts are specific for each driver. Each driver guide contains the specific instructions for that driver. See the Identity Manager driver guides Web site for the specific driver information.
-
Review the installation summary, then click .
After the packages are installed, the driver contains the new functionality that is included in the packages.
6.4.3 Adding Packages
You can add new functionality to an existing driver by adding new packages to an existing Identity Vault, driver set, or driver.
-
Right-click the Identity Vault, driver set, or driver, then click .
-
Click , then click the icon
 .
.
-
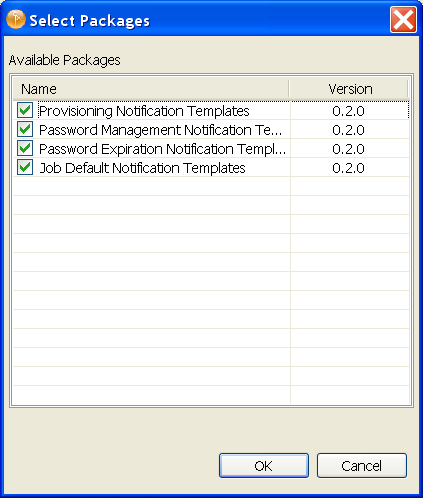
Select the packages to install. If the list is empty, there are no available packages to install.
-
(Optional) Deselect the option, if you want to see all available packages.
This option is only displayed on drivers. By default, only the packages that can be installed on the selected driver are displayed.
-
Click .
-
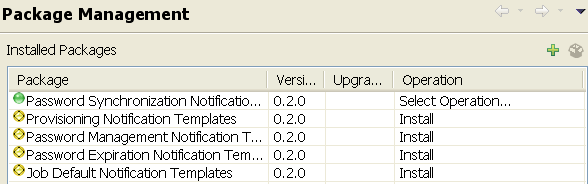
Click to install all of the packages listed with the Install operation.
-
(Conditional) Fill in the fields with appropriate information to install the package, then click .
Depending on which package you selected to install, you might have fields that you must fill in. For detailed information about the fields, see the specific driver guide at the Novell Driver Guides documentation Web site.
-
Read the summary of the installation, then click .
-
Click to close the Package Management page after you have reviewed the installed packages.
-
Repeat Step 1 through Step 9 for each Identity Vault, driver set, and driver where you want to add the new packages.
6.4.4 Uninstalling Packages
-
Right-click the Identity Vault, driver set, or driver where the package is installed that you want to uninstall, then click .
-
Click , select the package you want to uninstall, then click the cell.
-
Click from the drop-down list.
-
Click to uninstall the package, then click to close the Package Management page.
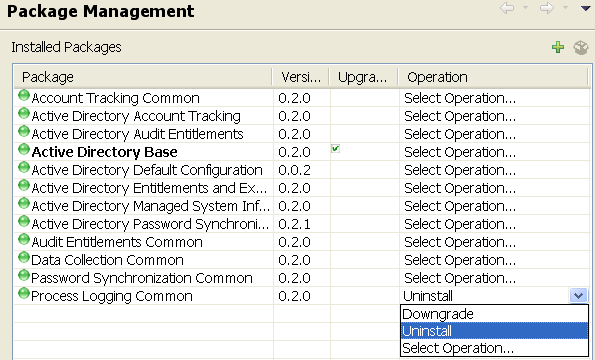
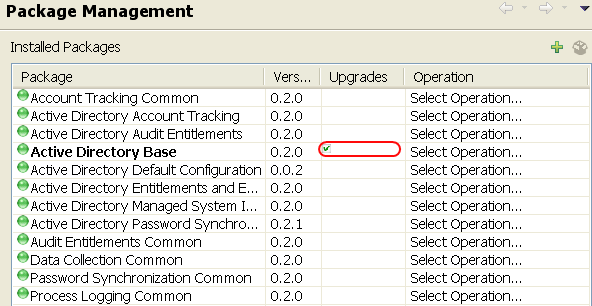
6.4.5 Upgrading Installed Packages
You can upgrade any package that is installed if there is a newer version of the package available.
-
Right-click the Identity Vault, driver set, or driver where the package is installed that you want to upgrade, then click .
-
Click .
If there is a newer version of a package, there is check mark displayed in the Upgrades column.
-
Click for the package that indicates there is an upgrade available.
-
From the drop-down list, click .
-
Select the version that you want to upgrade to, then click .
All versions that are available to upgrade to are listed.
-
Click .
-
(Conditional) Fill in the fields with appropriate information to upgrade the package, then click .
Depending on which package you selected to upgrade, you might have fields that you must fill in to upgrade the package. For detailed information about the fields, see the specific driver guide at the Novell Driver Guides documentation Web site.
-
Read the summary of the installation, then click .
-
Review the upgraded package, then click to close the Package Management page.
6.4.6 Downgrading Installed Packages
You can downgrade any package that you have upgraded. This allows you to revert the driver back to a known state for troubleshooting purposes.
-
Right-click the Identity Vault, driver set, or driver where the package is installed that you want to downgrade, then click .
-
Click , then click the option for the package you want to downgrade.
-
From the drop-down list, select .
-
Select the version that you want to downgrade to, then click .
All versions that are available to downgrade to are listed.
-
Click , then click to downgrade the package.
6.4.7 Deleting Packages from the Package Catalog
You can delete packages from the package catalog if the package is currently not in use. If you try to delete a package that is in use, you get an error message.
-
Verify that the package is currently not installed:
-
Right-click the package in the package catalog, then click .
-
Click .
This page lists all of the objects where the package is currently installed in your project.
-
Click to close this page.
-
If the package is currently installed, follow the instructions in Section 6.4.4, Uninstalling Packages to uninstall the package. After the package is uninstalled, continue with this procedure.
-
-
Right-click the package in the package catalog, then click .
6.4.8 Customizing Package Content
The content that the packages deliver can be customized just like the content delivered in driver configuration files. You can change the content at any time through the tools (such as Policy Builder) provided in Designer.
There are no additional steps required to make changes to the package content. You use Designer as you would in the past to change a policy, filter, or any other object that is delivered in a package.
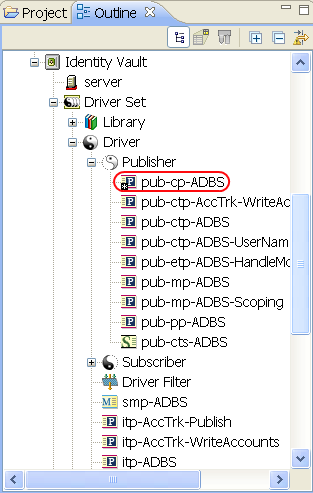
Each package has a checksum file, so that when you make changes to the content delivered in the packages, Designer keeps track of those changes. Designer adds an icon to content that is customized. In the figure below, the pub-cp-ADBS policy has changed, where all of the other policies have not changed since the package was installed.
Figure 6-3 Changed Policy
If there is a new package available and you have customized the package, Designer prompts you to keep your changes or overwrite the customization with the new package content.
You can also revert the customization that you made to any package at anytime.
-
In the Outline view, select an object that has changed.
-
Right-click the selected object, then click .
The content is reverted back to the state it was when the package was first installed. The Revert Customization option is like an Undo option.
6.4.9 Running a Driver in Factory Mode
Designer also provides an option to remove any customization from a driver, but Designer saves package configuration values and parameters. This allows you to test the driver if you are having problems. You can remove the customizations and see if the driver works. If the driver does work, you know it is a problem with the customization.
To run the driver without customization is called Factory mode. The Factory mode allows you to remove customizations from the driver through one procedure instead of removing customizations from each package.
To run a driver in Factory mode:
-
In the Outline view or in the Modeler, right-click the driver, then click .
-
Click , then select .
-
Select how Package Manager handles the customizations and custom configuration of your driver. The options are:
-
Strict: Package Manager removes all customizations and custom configuration from your driver.
-
Relaxed: Package Manage removes all customizations but no custom configuration from your driver.
-
-
Click to save the selected change.
-
(Optional) Click the icon
 to change the selected option.
-
Click or to make the change active.
6.4.10 De-activating Factory Mode
When you turn off Factory mode on the driver, Package Manager does the following:
-
Restores all package customizations
-
Restores custom configuration if you selected Strict
-
Preserves package configuration values and parameters
To de-activate Factory mode:
-
In the Outline view or in the Modeler, right-click the driver, then click .
-
Click , then deselect .
-
(Optional) Select to permanently reset the driver to factory defaults. When you select this option, the following tasks are performed:
-
All package customizations are deleted
-
Custom configuration are deleted (only if you are in strict mode)
-
Package configuration values and parameters are preserved
-
-
(Optional) Select to create a driver configuration file that contains the currently values, parameters, and customization.
-
Click .
-
Click or to make the change active.