NetIQ Identity Manager 4.7 Service Pack 2 Release Notes

January 2019

NetIQ Identity Manager 4.7 Service Pack 2 provides new features, improves usability, and resolves several previous issues. Many of these improvements were made in direct response to suggestions from our customers. We thank you for your time and valuable input. We hope you continue to help us ensure that our products meet all your needs. You can post feedback in the Identity Manager Community Forums on NetIQ Communities, our online community that also includes product information, blogs, and links to helpful resources.

The documentation for this product and the latest release notes are available on the NetIQ Web site on a page that does not require you to log in. If you have suggestions for documentation improvements, click comment on this topic at the bottom of any page in the HTML version of the documentation posted at the Identity Manager Documentation Web site.

1.0 What’s New?

Identity Manager 4.7.2 provides the following key features, enhancements, and fixes in this release:

1.1 New Features

This release provides the following key features:

Platform Support

In addition to the existing operating systems, this service pack supports Remote Loader on Windows Server 2019 (64-bit) platform.

Support for Open Source JDK

This release supports Azul Zulu OpenJDK 1.8.0_192. Azul Zulu OpenJDK replaces Oracle JRE.

Managing Entities in Identity Applications

This release allows you to manage entities in your organization through Identity Applications. Identity Manager Dashboard allows you to list the configured entities under the Entities tab. For more information, see Managing Entities and Entity Settings in the Identity Applications Administrator guide.

1.2 Enhancements

This release introduces the following enhancements:

Universal CEF Collector Supports Auditing in Common Event Format (CEF) Format

From this release onwards, Identity Manager uses Universal CEF collector to support auditing on Sentinel Log Management for Identity Governance and Administration (IGA) component. The collector allows you to process audit events from different CEF enabled applications with minimal customization and maintenance. To log events with Universal CEF collector, ensure that the collector is upgraded to 2011.1r2 version at a minimum and Sentinel is running 8.2 at a minimum. For information about the list of events supported in this release, see Identity Manager CEF Auditing Events.

With this release, the custom CEF events are supported. You can specify any CEF key names in the Identity Manager policies and the specified key names will be reflected in the custom CEF event. For more information about updating the Identity Manager policies, see Identity Manager Policy Designer Guide.

If you want to modify the custom CEF events, you can modify the Universal CEF collector to service the events:

  1. Download and extract the latest Universal CEF collector from the Sentinel plug-ins website.

  2. From the extracted folder, modify the following files:

    • NetIQ_IDM_taxonomy.map

    • NetIQ_Identity.Manager.map

    • idm.js

For more information, follow the steps mentioned in Sentinel plug-ins documentation.

You can download the Sentinel plug-ins from the Sentinel download page. For more information about upgrading an existing collector, see Upgrade Procedures.

Enhancements in Designer

This release introduces the following enhancements in Designer:

Ability to Configure the Limit of Displaying Results in the Identity Vault Browser in Designer

Identity Manager 4.7.2 allows you to configure the limit for displaying results while browsing the Identity Vault. For example, if you are defining a security equivalence for a driver, the Browse Identity Vault window displays the number of users or groups based on the configured limit.

Perform the following steps to configure the display results limit:

  1. Launch Designer.

  2. Go to Windows > Preferences.

  3. Expand Netiq > Identity Manager and select Import/Deploy.

  4. Select General.

  5. In Identity Vault browser max results to return, set the value to display the results in the Identity Vault browser.

    The default value is 7000.

  6. Click Apply.

Ability to Select Used by Team-Management Option for Custom and User Entities

Identity Manager 4.7.2 introduces a new option Team User Lookup Entity under Configurations to enable the Used by Team-Management option for all entities.

  1. Launch Designer.

  2. Go to Configuration > Team User Lookup Entity and select an entity.

  3. Click Save.

The Used by Team-Management option is enabled for the entity selected in the Team user Lookup Entity field. By default, the User entity is selected.

1.3 Component Updates

This section provides details on the component updates.

Identity Manager Component Versions

This release adds support for the following components in Identity Manager:

  • Identity Manager Engine 4.7.2

  • Identity Manager Remote Loader 4.7.2

  • Identity Manager Fanout Agent 1.2.2

  • Identity Applications 4.7.2

  • Identity Reporting 6.0.1.2

  • Identity Manager Designer 4.7.2

Updates for Dependent Components

This release adds support for the following dependent components:

  • NetIQ eDirectory 9.1.2

    For considerations about upgrading eDirectory, see Supported Update Paths.

  • NetIQ iManager 3.1.2

    You must install iManager 3.1.2 to support eDirectory 9.1.2. Ensure that you update your existing plug-ins to the latest versions for the iManager version you are using.

  • NetIQ Self Service Password Reset (SSPR) 4.3.0 or later

  • NetIQ One SSO Provider (OSP) 6.3 or later

  • Sentinel Log Management for Identity Governance and Administration 8.2 or later

Third-Party Component Versions

  • Azul Zulu 1.80_192

  • Apache Tomcat 8.5.32

  • PostgreSQL 9.6.10

  • Microsoft SQL Server 2017

    NOTE:You must use mssql-jdbc-6.2.2.jre8.jar  with Microsoft SQL Server 2017.

1.4 What’s Discontinued?

The following list includes the components that are discontinued from this release:

Oracle Java Runtime Environment

Oracle Java Development Kit (JDK) or Java Runtime Environment (JRE) is discontinued from this release. Azul Zulu OpenJDK is installed with this version to fulfill the Java requirements of Identity Manager.

Identity Manager Collector for CEF Auditing

CEF auditing with Identity Manager Collector for the Identity Manager components is discontinued from this release.

This change is not applicable for NSure Audit. However, NetIQ recommends you to use Universal CEF collector to support auditing in CEF format because NSure Audit will be discontinued in the next major release.

Refer to the following links to see the details about features or functionalities discontinued in the previous releases:

1.5 What’s Deprecated for Removal?

Auditing using Platform Agent, NSure Audit, and XDAS is deprecated from this release and will be discontinued in the next major release (Identity Manager 4.8). NetIQ recommends that you move to CEF auditing before upgrading to 4.8.

Refer to the following links to see the details about features or functionalities deprecated in the previous releases:

1.6 Software Fixes

NetIQ Identity Manager includes the following software fixes for Identity Manager.

Identity Manager Engine

NetIQ Identity Manager includes the following software fixes that resolve several previous issues in the Identity Manager engine:

Simulator Runs Successfully if Policy Contains a Query

The simulator runs successfully without any errors in the error log when a policy is added. (Bug 1096036)

Improved Navigation for DTD Documents

The DTD document describes the structure and usage of XDS documents based on nds.dtd as used in Identity Manager Engine. (Bug 932819)

Ability to Handle Timestamps as a Signed or Unsigned Integer Through a New ECV

Adding, modifying, or migrating a date attribute does not change the value of the attribute. The new Interpret Time as Signed Integer ECV is introduced for each driver. All the functions treat the timestamp in the same way. (Bug 1092089)

Parsing Issues in syslog Events

This issue is fixed with Identity Manager 4.7.2 CEF events. (Bug 1095560)

Socket Read Timeout Value of Thirty Seconds Added to the sendmail Function

A timeout value of thirty seconds has been added to the sendmail function to ensure that the Identity Manager drivers do not hang while sending emails when using the do-send-email-from-template action with the default email notification templates. (Bug 1099636)

Triggering a Driver Monitoring Operation Does Not Hold Memory when the DirXML-JavaEnvironmentParameters Attribute Is Empty

When you trigger an Identity Manager driver status monitoring operation by doing an LDAP search on cn=drivers,cn=driverSet_Stats,cn=IDM,cn=monitor and the DirXML-JavaEnvironmentParameters attribute is not set, the Identity Manager engine does not report any open contexts and therefore makes the memory available for other operations. (Bug 1103516)

32-Bit pwfilter.dll File Is Available

You can now install the password filter on a 32-bit domain controller. (Bug 1113793)

Identity Applications

NetIQ Identity Manager includes the following software fixes that resolve several previous issues in the Identity Applications:

Ability to Configure the Workflow Activity Timeout Interval

The default workflow tasks notification timeout interval that is added to the value defined in the workflow definition has been changed from five seconds to one second. You can change this value by using the com.novell.activity.timer.addTimeOutMilliSeconds property in the ism-configuration.properties file. (Bug 1090357)

Export Results Option Is Newly Added to the Dashboard

The Identity Manager Dashboard includes the Export Results option that allows you to export information about all users or specific users based on the user query. This option is useful when you perform a directory search operation on users. (Bug 1117011)

Save Search Option Is newly Added to the Dashboard

The Identity Manager Dashboard includes the Save Search option while performing an advanced directory search operation. (Bug 1106035)

Support for JGroups 4.0.12

Identity Applications now uses the latest JGroups version (4.0.12). (Bug 1044449)

JGroups 4.0.12 introduces a new configuration for TCP and UDP protocols and deprecates some of the existing parameters. It includes the following changes for TCP and UDP protocols:

TCP:

TCP(bind_addr=idmapps;bind_port=$bindport):TCPPING(initial_hosts=$host_details;port_range=5):MERGE3(min_interval=10000;max_interval=30000):FD_SOCK:FD(timeout=2500;max_tries=5):VERIFY_SUSPECT(timeout=1500):BARRIER:pbcast.NAKACK2(use_mcast_xmit=false):UNICAST3:pbcast.STABLE(desired_avg_gossip=50000;max_bytes=4M):pbcast.GMS(print_local_addr=true; join_timeout=2000):MFC(max_credits=2M;min_threshold=0.4):FRAG2(frag_size=60K):pbcast.STATE_TRANSFER

UDP:

UDP(mcast_addr=$host;mcast_port=$port):PING:FD(timeout=10000;max_tries=5):VERIFY_SUSPECT:pbcast.NAKACK2:UNICAST3:pbcast.STABLE:FRAG:pbcast.GMS

To eliminate any disruption in the clustered setups, the Identity Applications upgrade program persists the existing host and port specifications. However, you can manually change them to match the new configuration after the upgrade.

Controlled Edit Operation of a Logged User

A new setting, Edit Profile, is included in General > Profile to control the edit operation of a logged in user. This setting limits the logged in user to edit the user’s own profile. (Bug 1117007)

Querying the Organizational Chart Attributes Returns Correct Results

The organizational chart query is enhanced to query only the required attributes. It no longer obtains the details of other DNLookup attribute values. (Bug 1117012)

Ability to Configure Navigation Access Permissions with Identity Manager Dashboard or Administrator

You can now restrict user to custom landing items and permissions added in to the Applications page from the Client Settings page. When a custom landing item is added by a user with appropriate permission, the item is displayed in the Access section of the Client Settings page and a new Add Trustee option is enabled to restrict the access. (Bug 1111074)

Correct Resource Assignments After the Child Roles Are Changed in the Business Roles

When resource is mapped to an entitlement, the resource assignment works correctly even when the child roles are changed in the business roles. (1117521)

Improved Performance During Extensible Search in Identity Manager Dashboard

Creating a compound index with all the searchable attributes and setting the default searchable attributes to offline in iManager for multiple search attributes, improves the performance during extensible search in Dashboard. (Bug 1088922)

Improved Performance While Searching for ‘Delegate for’ or Creating Delegation for a Team

The response time for creating a delegation and for searching ‘delegate to’ and ‘delegate for’ operations has improved. (Bug 1107673)

Creating, Listing, Modifying, and Deleting DAL Entities in the Identity Manager Dashboard

You can now list, create, modify, and delete entries in the Identity Manager Dashboard. (Bug 1107651)

Ability to Display Profile Image Normally

Identity Manager Dashboard used to display the newly added photo attribute in My Profile in a binary format. This is resolved and the photo attribute is displayed as an image. (Bug 1110751)

Successfully Translates All Text In the Configured Language

All text in the browser is successfully translated to the language set in the Identity Applications and the browser. (Bug 1105008)

REST Endpoint Successfully Requests Details of a Specific Role

On requesting details for a specific Role, REST Endpoint does not display any error. (Bug 932318)

Consistent Cursor Behavior in Search Option Throughout the User Interface

The cursor now remains active and there is no delay when typing in the search string in the user interface. (Bug 1107471)

Ability to Request Roles Residing in Team Subcontainers

The team manager can successfully request for roles created under a subcontainer and also for other users in the team. (Bug 1110023)

Rectified Danish Translation in the idmdash war file

The incorrect Danish translation that appeared in the idmdash war file is rectified. (Bug 1111431)

Assignments Are Correctly Listed in the Assignments Overview Page

All the created users, roles, and administrator assignments are correctly listed in the Administrator Assignments Overview page. (Bug 1107980)

Date Is Correctly Populated in the Approval Form

The Approval form now populates the correct date and time when a server (hosting the operating system) configured to use Daylight Savings Time (DST) uses a date outside it. (Bug 1095322)

Values of Attributes Are Correctly Displayed When the Attribute Name Begins with the Same String

The attribute values are now displayed correctly even though the attribute name begins with the same string. (Bug 1107626)

Identity Manager Dashboard Correctly Displays Connector Entitlements When Creating a Resource

Identity Manager Dashboard correctly displays only the configured connector entitlements when Resource is created with entitlements. (Bug 1101236)

Mutual Authentication Works Properly in Workflows

Identity Applications include the latest wwsdk.jar file that resolves the mutual authentication issue reported while approving the workflows. (Bug 1104804)

Identity Manager Dashboard Displays the Value of the Time Attribute in Correct Format

While adding an attribute to a user, the value of the time attribute is displayed in a readable format in the User Details and Manage Users pages. (Bug 1111022)

Ability to Search for Individual Members While Selecting Assignments for a Team

You can now search for individual team members from a selected team. The Provisioning Dashboard displays the names of the selected members in the Recipients field. (Bug1024010)

Minimal CPU Utilization for nrfrequests Objects Whose nrfstatus Equals Zero

The CPU is minimally utilized for nrfrequests objects that are approval configured and have an nrfstatus of zero. (Bug 1106219)

Designer for Identity Manager

NetIQ Identity Manager includes the following software fixes that resolve several previous issues in Designer:

PRDs Are Generated With Unique Name

Multiple copies of a PRD were randomly duplicated with the same workflow name. Designer now generates each PRD with a unique name and eliminates duplication of PRDs. (Bug 1073135)

Ability to Open the ECMAScript Editor When the Outline View Is Closed.

Designer is enhanced to allow you to open the ECMAScript editor when the Outline view is closed without reporting any error. (Bug 1099671)

Ability to Deploy drivers or driverset when the IDM-Common Services Trace plug-in is Enabled

You can now deploy drivers or driverset, with or without the IDM-common services trace plug-in enabled. (Bug 1091244)

Allows you to Set a Preference Value on the Number of Objects Displayed in the Identity Vault Browser

The Identity Vault browser now displays the objects based on the number set in the preference value. (Bug 1091588)

Ability to Import the Latest Package Version on an Existing Connector

Driver packages are successfully updated to the latest version. (Bug 1090459)

Allows You to select "Used by Team-Management" for Entities

Designer now allows you to select the “Used by Team-Management” option for both custom and default entities. (Bug 1116178)

Allows You to Import/Export Using the “Localize” Option in the Provisioning view

Designer now supports importing/exporting by using the Localize option in the Provisioning view. (Bug 1095400)

Designer Directly Imports Schema from the eDirectory 9.1.1 Server

LDAP schema compare window now displays “equal” status as Designer directly imports the schema from the eDirectory 9.1.1 server. (Bug 1097087)

Supports Project Names Without Space

Designer applies the restriction of no spaces in project names. (Bug 1112988)

Named Passwords Are Obtained by the ECMAScript Editor

Designer now fetches the named passwords with the ECMA script editor. (Bug 1092215)

2.0 Installing or Updating to This Service Pack

Log in to the NetIQ Downloads page and follow the link that allows you to download the software.

The following files are available:

Filename

Description

Identity_Manager_4.7.2_Linux.zip

Contains files for Identity Manager Server (Identity Manager Engine, Remote Loader, Fanout Agent), Identity Applications, and Identity Reporting for Linux platform.

NOTE:This file also contains JDBC Fanout and Managed System Gateway driver files.

Identity_Manager_4.7.2_Windows.zip

Contains files for Identity Manager Server (Identity Manager Engine, Remote Loader, Fanout Agent), Identity Applications, and Identity Reporting for Windows platform.

NOTE:This file also contains JDBC Fanout and Managed System Gateway driver files.

Identity_Manager_4.7.2_Linux_Designer.tar.gz

Contains Designer for Linux

Identity_Manager_4.7.2_Windows_Designer.zip

Contains Designer for Windows

Identity_Manager_4.7.2_MacOSX_Designer.dmg

Contains Designer for MacOS 10.13 (High Sierra)

SentinelLogManagementForIGA8.2.0.0.tar.gz

Contains Sentinel Log Management for Identity Governance and Administration (IGA) files.

NOTE:This installation is supported only on Linux.

For more information about the order of upgrading the components, see Update Order.

2.1 Supported Update Paths

You need to be on Identity Manager 4.7 to update to Identity Manager 4.7.2. If you are currently on Identity Manager 4.6.2 or a prior version, you must first upgrade to 4.7 and then update to 4.7.2 version.

The update process requires you to update Identity Manager components in a specific order. NetIQ recommends that you review this information from the release notes for your current version.

Base Version

Updated Version

Identity Manager engine and eDirectory


Identity Manager 4.7 or 4.7.1 with eDirectory 9.1 or 9.1.1

Identity Manager 4.7.2 with eDirectory 9.1.2

Remote Loader


Identity Manager 4.7 or 4.7.1 with Remote Loader 4.7

Identity Manager 4.7 with Remote Loader 4.7.2

Identity Manager 4.7.2 with Remote Loader 4.7

Identity Manager 4.7.2 with Remote Loader 4.7.2

Identity Manager Designer

Identity Manager Designer 4.7, 4.7.0.1, 4.7.1, or 4.7.1.1


Identity Manager Designer 4.7.2


Identity Applications


Identity Applications 4.7 or 4.7.1

Identity Applications 4.7.2


Identity Reporting


Identity Reporting 4.7 or 4.7.1

Identity Reporting 4.7.2

2.2 Update Order

You must update the components in the following order:

  1. Identity Vault

  2. Identity Manager Engine

  3. Remote Loader

  4. Fanout Agent

  5. iManager Web Administration

  6. Identity Applications (for Advanced Edition)

  7. Identity Reporting

  8. Designer

  9. Sentinel Log Management for IGA

  10. One SSO Provider (OSP)

    NOTE:Standalone update of OSP is supported only on Windows.

  11. Self-Service Password Reset

2.3 Updating the Identity Manager Components on Linux

This service pack includes a Identity_Manager_4.7.2_Linux.zip file for updating the Identity Manager components on Linux platforms.

Updating the Identity Vault

  1. Download and extract the Identity_Manager_4.7.2_Linux.zip file from the download site.

  2. Locate the IDVault/setup directory in the extracted folder.

  3. Run the following command:

    ./nds-install

Updating the Identity Manager Components

You can update the following components interactively or silently:

  • Identity Manager Engine

  • Identity Manager Remote Loader Service

  • Identity Manager Fanout Agent

  • iManager Web Administration

  • Identity Applications

  • Identity Reporting

NOTE: Before updating the Remote Loader, ensure that the following components are stopped:

  • Identity Vault

  • Driver instances running with the Remote Loader

  • Remote Loader instances

  • Remote Loader console

Interactive Update

  1. Download and extract the Identity_Manager_4.7.2_Linux.zip file from the download site.

  2. Run the following command from the extracted directory:

    ./install.sh
  3. Select Y, then choose the components to update from the list of available components.

    NOTE:You can update only one component at a time.

    If you want to update the Identity Vault, select N and follow the steps from Updating the Identity Vault.

Silent Update

Locate the silent.properties file in the extracted directory and modify the file to update the required components.

  • To update to the Identity Vault, set IDVAULT_SKIP_UPDATE=False

  • To update the Engine, set INSTALL_ENGINE = true

  • To update the Remote Loader, set INSTALL_RL = true

  • To update the Fanout Agent, set INSTALL_FA = true

  • To update iManager, set INSTALL_IMAN=true

  • To update the Identity Applications, set INSTALL_UA = true

  • To update Identity Reporting, set INSTALL_REPORTING = true

NOTE:

  • You must set the value to True for only one component at a time.

  • When you update iManager, it will automatically update the iManager plug-ins (if any).

Perform the following actions to update the components silently:

  1. Download and extract the Identity_Manager_4.7.2_Linux.zip file from the download site.

  2. Modify the file to update the required components.

  3. Run the following command:

    ./install.sh -s -f silent.properties

Performing a Non-Root Update

Perform this action only if you have installed Identity Manager engine as a non-root user.

  1. Run the following command from the extracted directory:

    ./install.sh

    NOTE:Do not use the idm-nonroot-install script located under /<Linux zip file extracted location>/IDM/ directory to perform a non-root installation. If you use that script, the netiq-zoomdb-1.1.0-0.noarch.rpm and novell-IDMCEFProcessorx-1.0.0-0.x86_64.rpm will not be installed.

  2. Select Identity Manager Engine and press Enter.

  3. Specify the non-root install location for Identity Vault.

    For example, /home/user/eDirectory/.

  4. Specify Y to complete the update.

Post-Update Tasks

Perform the following actions after applying service pack. This section is applicable when updating from 4.7 to 4.7.2.

Extending the Identity Vault Schema

This section applies if you have performed a root installation of Identity Manager Engine.

To extend the Identity Vault schema, perform the following steps:

  1. Navigate to /opt/novell/eDirectory/bin directory.

  2. Run the following command:

    ./idm-install-schema
Post-Update Steps for Identity Applications
  • Ensure that you clear the browser cache after you update the Identity Applications.

  • Perform this action only if the following conditions are true:

    • Identity Applications are installed silently.

    • NETIQ_DATABASE_CONFIG_ADMIN is different than NETIQ_DATABASE_ADMIN. For example, idmadmin and postgres.

    If the schema does not update properly, run the liquibase command with NETIQ_DATABASE_CONFIG_ADMIN credentials.

This command is located in the /var/opt/netiq/idm/log/idmconfigure.log file. Ensure that you modify the parameters as per your need. For example,

/opt/netiq/common/jre/bin/java -Dwar.context.name=IDMProv -Ddriver.dn="cn=User Application Driver,cn=driverset1,o=system" -Duser.container="o=data" -jar /opt/netiq/idm/apps/UserApplication/liquibase.jar --databaseClass=liquibase.database.core.PostgresDatabase --driver=org.postgresql.Driver --classpath=/opt/netiq/idm/postgres/postgresql-9.4.1212.jar:/opt/netiq/idm/apps/tomcat/webapps/IDMProv.war --changeLogFile=DatabaseChangeLog.xml --url="jdbc:postgresql://:5432/idmuserappdb?compatible=true" --contexts="prov,newdb,updatedb" --logLevel=debug --username=***** --password=**** update >> /var/opt/netiq/idm/log/db.out

Performing a Standalone Update of SSPR

NOTE:Use this method if SSPR is:

  • Installed on a different server than the Identity Applications server.

  • Installed in a Standard Edition.

Perform the following steps to update SSPR:

  1. Download and extract the Identity_Manager_4.7.2_Linux.zip file.

  2. Locate the sspr directory in the extracted file.

  3. Run the following command:

    ./install.sh

Updating PostgreSQL

(Conditional) If you are using PostgreSQL as your database, this service pack requires you to update your existing PostgreSQL database version to 9.6.10.

The following considerations apply when you update PostgreSQL:

Update PostgreSQL used with Identity Manager 4.7: The PostgreSQL update program backs up the existing PostgreSQL home directory and appends the existing PostgreSQL version number. For example, the existing PostgreSQL directory is renamed from /opt/netiq/idm/postgres to /opt/netiq/idm/postgres9.6.6. The new PostgreSQL is installed in the /opt/netiq/idm/postgres directory.

  1. Download and extract the Identity_Manager_4.7.2_Linux.zip file from the download site.

  2. Navigate to the Identity_Manager_4.7.2_Linux/common/scripts directory in the extracted file and run the pg-upgrade.sh script.

    NOTE:If you want to specify a different directory apart from the existing directory, then you need to run the SPECIFY_NEW_PG_DATA_DIR=true ./pg-upgrade.sh command.

    The upgrade script performs the following actions:

    • Takes a backup of the existing postgres to a different folder. For example, from /opt/netiq/idm/postgres to /opt/netiq/idm/postgres-201810221903-backup.

    • Updates the existing Postgres directory. For example, /opt/netiq/idm/postgres.

  3. Specify the following details to complete the installation:

    Existing Postgres install location: Specify the location where PostgreSQL is installed. For example, /opt/netiq/idm/postgres.

    Existing Postgres Data Directory: Specify the location of the existing PostgreSQL data directory. For example, /opt/netiq/idm/postgres/data.

    Existing Postgres Database Password: Specify the PostgreSQL password.

2.4 Updating the Identity Manager Components on Windows

This service pack includes a Identity_Manager_4.7.2_Windows.zip file for updating the Identity Manager components on Windows platforms.

Updating the Identity Vault

  1. Download and extract the Identity_Manager_4.7.2_Windows.zip file.

  2. Locate the IDVault directory in the extracted file.

  3. Run the eDirectory_912_Windows_x86_64.exe file:

    NOTE:The Identity Vault update process restarts the Identity Vault (eDirectory) server.

    Tree Name

    Specify a tree name for Identity Vault.

    Server FDN

    Specify a server FDN.

    NOTE:Though Identity Vault allows you to set the NCP server object's FDN up to 256 characters, NetIQ recommends that you restrict the variable to a much lesser value because Identity Vault creates other objects of greater length based on the length of this object.

    Tree Admin

    Specify an administrator name for Identity Vault.

    Admin Password

    Specify the administrator password.

  4. In the Install Location field, specify the location where Identity Vault is installed.

  5. In the DIB Location field, specify the location where the DIB files are located.

  6. Select the NICI check box.

  7. Click Upgrade.

Updating the Identity Manager Engine and Remote Loader

  1. Download and extract the Identity_Manager_4.7.2_Windows.zip file.

    NOTE:This file also contains JDBC Fanout and Managed System Gateway driver files.

  2. Stop the Identity Vault and Remote Loader instances.

    1. Stop all drivers.

    2. Stop all Remote Loader instances.

      NOTE:You must close the Remote Loader console before upgrading the Remote Loader.

    3. Stop the Identity Vault.

  3. Locate the IDM directory in the extracted file.

  4. Install the updates by interactive or silent mode of installation.

    • For interactive mode: Run <patch_path>\install.bat and select the component that you want to update from the list.

      To update Identity Manager Engine, select Metadirectory Engine.

      To update the 32-bit Remote Loader, select 32-Bit Remote Loader Service.

      To update the 64-bit Remote Loader, select 64-Bit Remote Loader Service.

      To update the .NET Remote Loader, select .NET Remote Loader Service.

    • For silent mode: Run <patch_path>\install.bat -i silent -f patchUpgradeSilent.Properties.

    When you update the Identity Manager engine, the JDBC Fanout and Managed Service Gateway drivers are also updated.

  5. (Conditional) If you added a custom trusted root certificate to the existing Java keystore (C:\NetIQ\idm\jre\lib\security\cacerts), import the certificate to the new keystore.

    keytool -importkeystore -srckeystore <Old-cacerts> -destkeystore C:\NetIQ\idm\jre\lib\security\cacerts -srcstoretype JKS -deststoretype JKS -srcstorepass <storePassword> -deststorepass changeit -srcalias <mycertAlias>

    Run this command for each custom certificate created. Alternatively, copy the keystore to the new location.

    For example, the old cacerts files are backed-up in the following locations on Windows:

    • \backup location\cacerts.32 from 32-bit JRE

    • \backup location\cacerts.64 from 64-bit JRE

Manually Updating the Fanout Agent

IMPORTANT:The update program does not detect the already installed Fanout Agent on your computer. Therefore, it does not provide an option for updating this component.

  1. Replace the existing FanoutAgent.jar and fanout_web.war, files in C:\NetIQ\IdentityManager\FanoutAgent\lib folder from the \Identity_Manager_4.7.2_Windows\IDM\patch\Windows\FanoutAgent\lib folder in the Identity_Manager_4.7.2_Windows.zip file.

  2. (Conditional) Add the IDMCEFProcessor.jar and zoomdb.jar files from\Identity_Manager_4.7.2_Windows\IDM\patch\Windows\FanoutAgent\lib to C:\NetIQ\IdentityManager\FanoutAgent\lib and use the latest JDBC 4.2.0.0. Fanout driver.

  3. Restart the Fanout Agent.

  4. Restart the Identity Vault.

Updating Identity Applications

  1. Download and extract the Identity_Manager_4.7.2_Windows.zip file.

  2. Locate the IdentityApplications directory in the extracted directory.

  3. Perform one of the following actions:

    GUI: install.exe

    Silent: install.exe -i silent -f silent.properties

    The Identity Applications update program will update User Application, OSP, SSPR, Tomcat, and JRE.

  4. On the Introduction page, click Next.

  5. Review the Deployed Applications page, then click Next.

    This page lists the currently installed components with their versions.

  6. On the Available Patches page, click Next.

    This page lists the available updates for the installed components.

  7. To restore the certificates for communication between the identity applications and the LDAP server, specify the JRE truststore password and then click Next.

    For example, if your certificate is located in C:\netiq\idm\jre\lib\security\cacerts, specify the password to access the certificate.

    The identity applications need certificates (cacerts or custom keystore) for communicating with the Identity Manager server.

  8. Review the required disk space and available disk space for installation in the Pre-Install Summary page, then click Install.

    The installation process might take some time to complete.

    Before applying the service pack, the installation process automatically stops the Tomcat service.

    The process also creates a back-up of the current configuration for the installed components.

    In case, the installation reports any warnings or errors, see the logs from the Service Pack Installation/Logs directory.

    For example, C:\netiq\idm\apps\Identity_Apps_4.7.2.0_Install\Logs. You must fix the issues and manually restart the Tomcat service.

  9. Start the Tomcat service.

  10. (Optional) To verify that the service pack has been successfully applied, launch the upgraded components and check the component versions.

Updating Identity Reporting

  1. Download and extract the Identity_Manager_4.7.2_Windows.zip file.

  2. Stop Tomcat.

  3. Create a backup directory outside of the Tomcat installation path.

  4. Locate the C:\NetIQ\idm\apps\tomcat\webapps directory in the extracted file and copy the following files to the backup directory you created in Step 3.

    • IDMRPT-CORE.war

    • IDMRPT.war

    • idmdcs.war

    • IDMDCS-CORE.war

    • dcsdoc.war

  5. Delete the following files from these directories:

    • IDMRPT-CORE, IDMRPT, idmdcs, IDMDCS-CORE, and dcsdoc folders from the C:\NetIQ\idm\apps\tomcat\webapps directory.

    • localhost folder from the C:\NetIQ\idm\apps\tomcat\work\Catalina directory.

    • All files and folders from the C:\NetIQ\idm\apps\tomcat\temp directory.

    • cache and plugins folders from the C:\NetIQ\idm\apps\IdentityReporting\reportContent directory.

  6. Locate the Reporting directory in the extracted file in Step 1.

  7. Copy the following files to the C:\NetIQ\idm\apps\tomcat\webapps directory.

    • IDMRPT-CORE.war

    • IDMRPT.war

    • idmdcs.war

    • IDMDCS-CORE.war

    • dcsdoc.war

  8. (Conditional) Delete or take a back-up of the existing logs from the C:\NetIQ\idm\apps\tomcat\logs directory.

  9. Clear your browser cache before accessing Identity Reporting.

  10. Start Tomcat.

Post-Update Tasks

Perform the following actions after applying this service pack. This section is applicable when updating from 4.7 to 4.7.2.

Extending the Identity Vault Schema

To extend the Identity Vault schema, navigate to the C:\NetIQ\eDirectory\ directory and run the following command:

ice -l <schema_update_log> -C -a -S SCH -f <Identity_Manager_4.7.2_Windows.zip Extracted location>\Identity_Manager_4.7.2_Windows\IDM\patch\Windows\engine\schema\edirectory-schema.sch -D LDAP -s <eDirectory DNS name/IP> -p <LDAP port> -d <eDirectory_admin_dn> -w <eDirectory_admin_password>

where,

-C -a updates the destination schema.

-f indicates the schema file (sch).

-p indicates the port number of the LDAP server. The default port is 389. For secure communication, use port 636. Secure communication needs an SSL Certificate.

-L indicates a file in DER format containing a server key used for SSL authentication.

-s indicates the DNS name or IP address of the LDAP server.

For example,

ice -l schemaupdate.log -C -a -S SCH -f C:\Identity_Manager_4.7.2_Windows\IDM\patch\Windows\engine\schema\edirectoryschema.sch -D LDAP -s idmorg.com -p 636 -d cn=admin,ou=idm,o=microfocus -w password -L cert.der

Post-Update Steps for Identity Applications
  • Clear the browser cache.

  • If the LDAP server name in the LDAP server certificate subject is different from what is used in the Identity Applications, change the name of the LDAP server in the Identity Applications configuration to the name of the LDAP server available in the LDAP server certificate subject.

    Identity Manager 4.7.2 upgrades Java to 1.8.0_192. Java has enabled endpoint identification on LDAPS connections from JRE 1.8.0_181. This requires you to use the same server name for connecting to the Identity Manager server that was provided with the LDAP server certificate subject. Otherwise, the connection fails.

    To change the name of the server in the Identity Applications configuration:

    1. Open the ConfigUpdate utility (configupdate.sh or configupdate.bat).

    2. Navigate to the User Application tab, click Identity Vault server, and change the name of the server to what is provided with the LDAP server certificate subject.

      This action updates the DirectoryService/realms/jndi/params/AUTHORITY property in the ism-configuration.properties file.

  • (Conditional) Perform this action only if the following conditions are true:

    • Identity Applications are installed silently.

    • NETIQ_DATABASE_CONFIG_ADMIN is different than NETIQ_DATABASE_ADMIN. For example, idmadmin and postgres.

    If the schema does not update properly, run the liquibase command with NETIQ_DATABASE_CONFIG_ADMIN credentials to update it.

    The command can be found in the C:\netiq\idm\apps\UserApplication\NetIQ-Custom-Install file. Ensure that you modify the parameters as per your need.

    For example:

    "C:\netiq\idm\apps\jre\bin\java" -Xms256m -Xmx256m -Dlog4j.configuration=file:C:\netiq\idm\apps\tomcat\conf\userapp-log4j.xml -Dwar.context.name=IDMProv -Ddriver.dn="cn=UserApplication,cn=Driver Set,o=system" -Duser.container="o=data" -jar "C:\netiq\idm\apps\UserApplication\liquibase.jar" --databaseClass=liquibase.database.core.PostgresDatabase --driver=org.postgresql.Driver --classpath="C:\NetIQ\idm\apps\postgres\postgresql-9.4.1212.jdbc42.jar;C:\netiq\idm\apps\tomcat\webapps\IDMProv.war" --changeLogFile=DatabaseChangeLog.xml --url="jdbc:postgresql://:5432/idmuserappdb?compatible=true" --contexts="prov,newdb,updatedb" --logLevel=info --username=******** --password=******** update >> C:\netiq\idm\apps\UserApplication\db.out

Updating the PostgreSQL Database

(Conditional) If you are using PostgreSQL as your database, this service pack requires you to update your existing PostgreSQL database version to 9.6.10.

  1. Stop and disable the PostgreSQL service.

  2. Rename the postgres directory from C:\Netiq\idm\apps.

    For example, rename postgres to postgres9.6.10.

  3. Remove the old PostgreSQL service by running the following command:

    sc delete "postgres_service_name"

    For example, sc delete "postgresql-x64-9.6"

  4. Download and extract the Identity_Manager_4.7.2_Windows.zip file.

  5. Navigate to the Identity_Manager_4.7.2_Windows\common\packages\postgres directory and run the NetIQ_PostgreSQL.exe file.

  6. Stop the newly installed PostgreSQL service. Go to Services, search for PostgreSQL version service, and stop the service.

    NOTE:Appropriate users can perform stop operations after providing valid authentication.

  7. Change the permissions for the newly installed PostgreSQL directory by performing the following actions:

    Create a postgres user:

    1. Go to Control Panel > User Accounts > User Accounts > Manage Accounts.

    2. Click Add a user account.

    3. In the Add a User page, specify postgres as the user name and provide a password for the user.

    Provide permissions to postgres user to the existing and newly installed PostgreSQL directories:

    1. Right click the PostgreSQL directory and go to Properties > Security > Edit.

    2. Select Full Control for the user to provide complete permissions.

    3. Click Apply.

  8. Access the PostgreSQL directory as postgres user.

    1. Login to the server as postgres user.

      Before logging in, make sure that postgres can connect to the Windows server by verifying if a remote connection is allowed for this user.

    2. Delete the data directory from the new postgres install location.

      For example, C:\NetIQ\idm\apps\postgres9.6.10\data.

    3. Open a command prompt and set PGPASSWORD by using the following command:

      set PGPASSWORD=your pg password

    4. Change to the newly installed PostgreSQL directory.

      For example, C:\netiq\idm\apps\postgresql9610\bin.

    5. Execute initdb as postgres database user from the new PostgreSQL bin directory.

      initdb.exe -D <new_data_directory> -E <Encoding> UTF8 -U postgres

      For example, initdb.exe -D C:\NetIQ\idm\apps\postgres9.6.10\data -E UTF8 -U postgres

  9. Upgrade PostgreSQL from new PostgreSQL bin directory. Run the following command and click Enter:

    pg_upgrade.exe --old-datadir "C:\NetIQ\idm\apps\postgres9.6.9\data" --new-datadir

    "C:\NetIQ\idm\apps\postgres9.6.10\data" --old-bindir

    "C:\NetIQ\idm\apps\postgres9.6.9\bin" --new-bindir

    "C:\NetIQ\idm\apps\postgres9.6.10\bin"

  10. After successful upgrade, replace the pg_hba.conf and postgresql.conf files located in the new postgres data directory (C:\NetIQ\idm\apps\postgres\data) with the files from old postgres directory (C:\NetIQ\idm\apps\postgres9.6.9\data).

  11. Start the upgraded PostgreSQL database service.

    Go to Services, search for the upgraded PostgreSQL service, and start the service.

    NOTE:Appropriate users can perform start operations after providing valid authentication.

  12. (Optional) Delete the old data files from the bin directory of the newly installed PostgreSQL service.

    1. Log in as postgres user.

    2. Navigate to the bin directory and run analyze_new_cluster.bat and delete_old_cluster.bat files.

      For example,C:\NetIQ\idm\apps\postgresql9610\bin

2.5 Installing and Upgrading Designer

You can install Identity Manager Designer using an executable file, binary file, or in text mode, depending on the target computer. For more information on the files available, see Installing or Updating to This Service Pack.

Installing Designer on Linux

  1. Download the Identity_Manager_Linux_Designer.tar.gz from the NetIQ Downloads website.

  2. Navigate to a directory where you want to extract the file.

    tar -zxvf Identity_Manager_Linux_Designer.tar.gz

  3. Run one of the following commands to install Designer.

    Console: ./install -i console

    GUI: ./install -i gui

    or

    ./install

  4. Follow the prompts and complete the installation.

Installing Designer on Windows

  1. Download and extract the Identity_Manager_4.7.2_Windows_Designer.zip from the NetIQ Downloads Website.

  2. Run the install.exe file.

  3. Follow the steps in the wizard until the installation process completes.

Installing Designer on MacOS 10.13 (High Sierra)

NetIQ provides Identity_Manager_4.7.2_MacOSX_Designer.dmg file for installing Designer on MacOS 10.13.

Regardless of the method of installation, ensure that the computer on which you are installing Designer meets the following system requirements:

  • Processor: 1 GHz

  • Disk space: 1 GB

  • Memory: 1 GB

Perform the following actions to install Designer from the Identity_Manager_4.7.2_MacOSX_Designer.dmg file:

  1. Download Identity_Manager_4.7.2_MacOSX_Designer.dmg from NetIQ Downloads Web Site.

    NOTE:Sometimes quarantine attributes such as com.apple.quarantine are included in the Designer application that prevents you from launching Designer. To resolve this issue, see Unable to Launch Designer Application on Macon NetIQ Designer for Identity Manager Administration Guide.

  2. From the pop-up window that appears, drag and drop the Designer folder into the location where you want to install it.

    By default, Mac prompts you to download Designer into the Applications folder. If you choose to install Designer in this folder, Mac creates a Designer shortcut on the launchpad.

    IMPORTANT:The following considerations apply to installing two instances of Designer on your operating system:

    • Install the instances in two different folders.

    • Install the new instance in a folder that has an existing instance of Designer. In this case, ensure that you rename the first instance before placing a new instance of Designer.

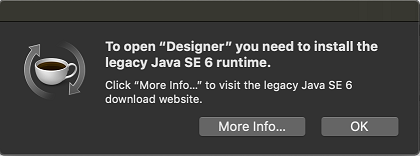
  3. If you are launching Designer for the first time and see the following message, you must run the updateInfoPlistScript.py script. It updates the Info.plist files of the Designer and Azul Zulu JDK applications with missing capabilities in absence of which you see this message.

    If you do not see this message, directly go to Step 4.

    Figure 1 Install legacy Java SE 6 message

    NOTE:In case you do not have the Azul Zulu JDK version 1.8.0_192 installed in the system, install it from <jdk>.dmg file only before you run the updateInfoPlistScript.py script.

    Perform the following actions:

    1. Open a browser and specify the following URL: https://nu.novell.com/designer/IDM-Designer-MacOSX/.

    2. Download the updateInfoPlistScript.py file.

    3. Launch a terminal window and run the following command from the directory where you have downloaded the updateInfoPlistScript.py file:

      sudo python updateInfoPlistScript.py

    4. Specify the value corresponding to the Azul Zulu JDK version 1.8.0_192.

    5. From the list of Designer versions displayed, specify the value corresponding to the required Designer version.

      The Info.plist file is updated.

  4. Launch Designer by clicking the Designer icon on the launchpad or the Designer application from the installed folder.

    For more information about using Designer, see NetIQ Designer for Identity Manager Administration Guide.

Uninstalling Designer

To uninstall Designer, right click the Designer folder and select Move to trash.

After Designer is uninstalled, the shortcut is automatically removed from the launchpad.

For troubleshooting Designer, see Troubleshooting Designer in NetIQ Designer for Identity Manager Administration Guide.

Upgrading to Designer 4.7.2

For information about the supported upgrade paths, see Supported Update Paths.

For instructions on upgrading Designer, see Installing and Upgrading Designer.

2.6 Updating Azul Zulu OpenJRE 1.8.0_192 for Analyzer

This service pack updates Analyzer to support Azul Zulu OpenJRE 1.8.0_192 (32-bit).

  1. On the server where you installed Analyzer, create a directory for Java 1.8.

    For example, opt/netiq/jre1.8.0_192.

  2. Download and install the Java 1.8 files in this directory.

  3. Open the Analyzer.ini file located in the Analyzer installation directory.

  4. Update the Java path in the Analyzer.ini file.

2.7 Support for Integration with Identity Governance

Identity Governance 3.5 uses OSP JSON Web Tokens (JWT). For integrating Identity Governance with Identity Manager 4.7.2, you must configure OSP to create JWTs.

To configure OSP for JWTs, see Configuring Identity Manager for Integration.

2.8 Updating Sentinel Log Management for IGA

This service pack includes a SentinelLogManagementForIGA8.2.0.0.tar.gz file for updating the Sentinel Log Management for Identity Governance and Administration (IGA) component. For update instructions, see the steps listed in the Sentinel Readme file.

  1. Download the SentinelLogManagementForIGA8.2.0.0.tar.gz file to the server where you want to install this version.

  2. Run the following command to extract the file:

    tar zxvf SentinelLogManagementForIGA8.2.0.0.tar.gz

  3. Navigate to the SentinelLogManagementforIGA directory.

  4. To install SLM for IGA, run the following command:

    ./install.sh

2.9 Enabling CEF Audit for SSPR

For more information on enabling CEF audit for SSPR, see Auditing for Self Service Password Reset in Self Service Password Reset Administration Guide.

3.0 Known Issues

NetIQ strives to ensure our products provide quality solutions for your enterprise software needs. The following issues are currently being researched. If you need further assistance with any issue, please contact Technical Support.

3.1 Cannot Import Multiple Driver Plug-ins in iManager

Issue: Importing multiple driver plug-ins fails and displays a blank page on iManager due to out of memory issue. (Bug 1118426)

Workaround: Increase the Java heap size between 512 MB to 1024 MB for iManager.

  1. On Linux, set the max heap size in the CATALINA_OPTS section of the Tomcat configuration file located by default at /etc/opt/novell/tomcat8/tomcat8.conf.

    For example, CATALINA_OPTS=-Xms512m –Xmx1024m;

    where -Xms is the minimum or initial size of your heap and -Xmx is the maximum size.

  2. On Windows, set the max heap size in the CATALINA_OPTS section of the catalina.bat file.

    For example, CATALINA_OPTS=-Xms512m –Xmx1024m;

  3. Restart Tomcat.

3.2 Designer Performance is Affected When Running Compare of User Application Drivers

Issue: The performance of Designer becomes very slow when running a compare of User Application drivers. (Bug 1099198)

Workaround: Have minimal projects in the workspace. Ensure to close or disable the projects with User Application Driver on which you are not working on.

3.3 Identity Manager Auditing Events are Not Generated

Issue: Identity Manager auditing events are not generated intermittently. (Bug 1118585)

Workaround: Enable CEF auditing and configure it.

  1. Configure the Identity Applications to generate the CEF events. For more information, see Configuring Identity Applicationsin the NetIQ Identity Manager - Configuring Auditing in Identity Manager.

  2. Enable CEF auditing by logging into Identity Applications and navigate to Configuration > Logging and specify the required details. For more information, see Configure Auditing Service Settings in NetIQ Identity Manager - Administrator’s Guide to the Identity Applications.

    NOTE:If the User Application is unable to connect to the auditing server, the events are stored in the backup folder (mentioned in Intermediate event store directory field).

  3. Restart Tomcat.

3.4 Japanese email not Sent While Creating a Role Request in a Japanese Environment

Issue: While creating a role request in a Japanese environment, an English email (template:"Role Request Notification_en") is sent instead of a Japanese email (template:"Role Request Notification_ja"). (Bug 1115715)

Workaround: Change the User Application default locale to Japanese.

  1. In Designer, right click on the User Application driver and navigate to Configure > Default Locale.

  2. Change the default locale from English to Japanese.

  3. Deploy the driver.

  4. (Conditional) Perform the following steps if an error occurs while deploying the driver:

    1. Select the User Application Driver.

    2. Navigate to Directory Abstraction Layer > Entities > User and select CN.

    3. Click the Localize Display Label icon beside the Display Label field.

    4. Enter the string (example CN) in the field to specify the default language.

    5. Configure the dashboard preferences and deploy the User Application Driver.

  5. Restart Tomcat.

3.5 Designer Fails to Publish Packages Having Underscore in the Package Shortname

Issue: Designer is unable to publish the packages correctly, if the package shortname has underscore in it.(Bug 1118418)

Workaround: You must not create package names with underscore (_).

3.6 Sentinel Limits The Reason for an Error to 256 Characters

Issue: In Sentinel, if an error occurs when an Identity Manager event is triggered, then the message in the Reason field is truncated if it has more than 256 characters. (Bug 1116629)

Workaround: There is no workaround at this time.

3.7 Administrator is Unable to Create a New User With a Mandatory Image Attribute of Data Type as String and Format Type as Image URL

Issue: An administrator is unable to create a new user having a mandatory image attribute of Data Type as String and Format Type as image-url a mandatory field. (Bug 1117611)

Workaround: You must not mark an attribute with Data Type as String, and Format Type as image-url as mandatory.

3.8 Error is Displayed While Performing Search Operation using Date

Issue: A 489 exception message is displayed when the search operation is performed using date. Identity Applications does not support this operation.(Bug 1119708)

Workaround: There is no workaround at this time.

3.9 Designer Release Notes Is Not Displayed on RHEL Platform

Issue: While installing Designer on RHEL platforms, the Release Notes is not displayed and instead "cannot load libgnomevfs-2.so" message is displayed on the console window. (Bug 1117452)

Workaround: There is no workaround at this time. This error does not cause any functionality loss.

3.10 Warning Message Appears After Changes Are Made in The Tomcat Service File During User Application Upgrade

Issue: After upgrading User Applications, the following warning message appears if any changes are made to the Tomcat service file: (Bug 1120071)

Warning: netiq-tomcat.service changed on disk. Run 'systemctl daemon-reload' to reload units.

Workaround: Perform the following actions:

  1. Run the systemctl daemon-reload command.

  2. Restart tomcat using the systemctl start netiq-tomcat and systemctl stop netiq-tomcat or systemctl restart netiq-tomcat commands.

3.11 Forget Password Option is Missing in the Login Page Post Upgrade

Issue: The Forget Password option is unchecked after upgrade which results in missing option in the login page.(Bug 1120032)

Workaround: On running the configupdate.sh utility and setting Forgot password, only the com.netiq.idm.sspr.edit.show-forgotten-username is set to True in the configupdate.properties file. The com.netiq.idm.forgot-pwd-url is not set to https://xxxxx/sspr/public/ForgottenPassword in the same file. In order to add this parameter, you must run the configupdate.sh utility again.

3.12 Parsing Fails for 3152C- User Message CEF Event Through Sentinel Universal Collector

Issue: The CEF event 3152C - User Message fails to parse through the Sentinel Universal collector when the event message contains custom string values starting with “{“.(Bug 1120730)

Workaround: When adding log activity in the PRD, the message provided in the property window should not start with “{“.

3.13 Existing Customized Values Are Overwritten When Identity Manager is Upgraded to 4.7.2 on a System Integrated with Identity Governance and Identity Manager using jwt on Windows

Issue: When Identity Manager is upgraded to 4.7.2 on a system with Identity Governance 3.5 and Identity Manager 4.7.1 integrated using JWT on Windows, the existing customized values are overwritten.(Bug 1121186)

Workaround: Edit the C:\netiq\idm\apps\tomcat\conf\ism-configuration.properties file and change the following property value to jwt:

com.netiq.idm.osp.oauth.access-token-format.format = jwt

3.14 Different Engine Control Values Are Set for Drivers Associated with Multiple Servers

Issue: When you create a driver in a driverset that is associated with multiple servers, different ECVs (Engine Control Value) are set for the driver for different servers. For example, the “Qualified form for DN-syntax attribute values” ECV shows different values (true and false) for the driver for each server it is associated with.

Workaround: There is no workaround at this time.

3.15 Roles Not Searched Correctly in the Conflicting Role 2 Field While Creating a New SoD Policy

Issue: While creating a new SoD policy, the dashboard correctly searches for roles in the Conflicting Role 1 field but fails to correctly search the roles in the Conflicting Role 2 field. (Bug 1137928)

Workaround: Search the role with '*' or add a search string followed by * in the Conflicting Role 2 field. For example, if you are searching for xyz, enter either '*' or 'xyz*'.

3.16 Performance Issues with People Search using Server Side Sorting in Identity Applications

Issue: When you configure an LDAP search to use the Server Side Sort control, the search takes a long time to return the results from the Identity Vault. (Bug 1126537)

Workaround: Perform the following actions to improve the performance of the search:

  • Ensure that the size of eDirectory cache is adequate for the DIB size and the hit ratio of the cache is sufficiently high. For more information about managing eDirectory cache memory, see the eDirectory Tuning Guide.

  • Server Side Sort uses Given Name and Surname as sorting key attributes to perform searches. To maximize the performance of a search, create an index with the sorting key attributes in addition to the attributes that are configured to be used as search attributes. The order of attributes is important. Place the Given Name and Surname attributes as the first two attributes for the index to be used when sorting the data.

    If the users are searched within a container in the tree, you can further improve the performance by adding AncestorsID information to the index. Currently, you can only create an index with AncestorsID by using the ndsindex command. For example:

    ndsindex add -a -D <admin LDAP DN> -W -s <Server LDAP DN> "GnSnFnCNAncID;Given Name\$Surname\$Full Name\$CN;value"

    This command creates an index that searches on Given Name, Surname, FullName, and CN attributes. The –a switch adds the AncestorsID details to the command.

    After creating an index with AncestorsID, set the original index that uses only Given Name and Surname attributes offline and eventually delete it. This ensures that the new index is selected for future searches. For more information about working with eDirectory indexes, see “Index Manager” in the eDirectory Administration Guide.

3.17 Designer Fails to Launch on MacOS 10.14

Issue: Designer fails to launch because it cannot locate the legacy Java SE 6 Runtime version on MacOS 10.14. (Bug 1122921)

Workaround: Install Java SE 6 Runtime version and then launch Designer.

3.18 iManager Plug-ins are Incorrectly Displayed After a Successful Upgrade

Issue: After successfully upgrading the iManager plug-ins for Identity Manager from 4.7.2 version to 4.7.2.1 version, the 4.7.2.1 plug-ins are incorrectly displayed in the Available iManager Plug-ins page.(Bug 1126250)

Workaround: There is no workaround at this time. However, it does not cause any loss of functionality.

3.19 Searching an Entity With Substring Value for Boolean Attributes Is Not Supported

Issue: The Identity Application allows substring search on the attributes defined in Customization > Configure Entity > Search Attribute. However, if the defined attribute is a boolean type (and not string), searching with substring value is not supported.

For example, if you created an entity named Mobile with attributes such as CN, OSVersion, RAMSize, Processor, and isDualSIM (where isDualSIM is a boolean attribute), and issued a search based on isDualSIM by specifying the substring value *Fal* in the search text field, the correct entities are not returned. (Bug 1144267)

Workaround: To search an entity with a Boolean attribute, provide the absolute value *True* or *False* in the search text field. Using the same example to elaborate, search the entity Mobile with isDualSIM attribute as false by entering the value *False* in the search text field. A correct list of entities is returned.

3.20 Cannot collect Identity Applications Audit Events through CEF Auditing with SSL Enabled

Issue: When you enable SSL connection between Sentinel and Identity Manager, the CEF events for Identity Applications will not be logged in Sentinel. (Bug 1151250)

Workaround: There is no workaround at present.

3.21 OSP Login Page Fails to Launch On Customization

Issue: When you customize the OSP login page using the osp-custom-resource.jar and upgrade the Identity Applications component to 4.7.2, the OSP login page breaks.(Bug 1125548)

Workaround: You have to set the customization again manually in the osp-custom-resource.jar.

4.0 Contact Information

Our goal is to provide documentation that meets your needs. If you have suggestions for improvements, please email Documentation-Feedback@netiq.com. We value your input and look forward to hearing from you.

For detailed contact information, see the Support Contact Information website.

For general corporate and product information, see the NetIQ Corporate website.

For interactive conversations with your peers and NetIQ experts, become an active member of our community. The NetIQ online community provides product information, useful links to helpful resources, blogs, and social media channels.

5.0 Legal Notice

For information about legal notices, trademarks, disclaimers, warranties, export and other use restrictions, U.S. Government rights, patent policy, and FIPS compliance, see https://www.netiq.com/company/legal/.

Copyright © 2019 NetIQ Corporation, a Micro Focus company. All Rights Reserved.