3.2 Walkthrough: Logging In to the PlateSpin Orchestrate Server
Before you can perform any administrator functions, you need to log in to the Orchestrate Server to establish your credentials as an authorized administrator. The information in this sections explains three methods for logging in to the server.
When you have logged in to the Orchestrate Server, you can create accounts for the computing resources that will eventually run computing jobs. To understand how resource accounts are created, see Section 3.3, Walkthrough: Creating a Resource Account.
3.2.1 Logging In by Using the Explorer
If the PlateSpin Orchestrate grid you created during the install is displayed in the Explorer panel, the Orchestrate Server that services it is available for authentication. The grid cannot be expanded and navigated until you log in to the Orchestrate Server in that grid.
-
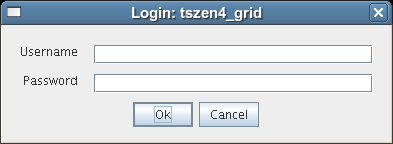
In the Explorer panel of the PlateSpin Orchestrate Development Client, click the grid name to launch a server login dialog box.
-
In the dialog box, enter the Administrator user name and password that you supplied when you installed the server, then click to log in to the server.
3.2.2 Logging In Explicitly to a Named Server
If you are not operating in a broadcast-capable network and you have installed the Orchestrate Clients on a machine with a different subnet from the server, PlateSpin Orchestrate might not be able to discover your Orchestrate Server. If this is the case, you must log in explicitly to the server you are looking for. Use the following steps to log in explicitly to a named server.
-
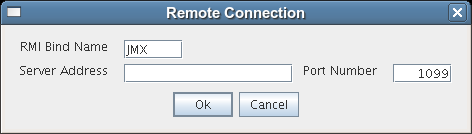
From the PlateSpin Orchestrate Development Client, click then click to display the Remote Connection dialog box.
PlateSpin Orchestrate supports multiple servers on the same network.
This login option allows you to select the server before you enter the administrator name and password.
-
In the dialog box, specify the IP address of the Orchestrate Server in the field, then click to display the login dialog box.
-
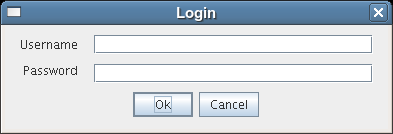
Specify the administrator name (created during the install) in the field, specify the administrator password in the field, then click to log in to the server.
3.2.3 Logging In As Default
If you want to save time during login, you can set a login preference to prepopulate the administrator username and password. Use the following steps to set the preference and log in as default.
-
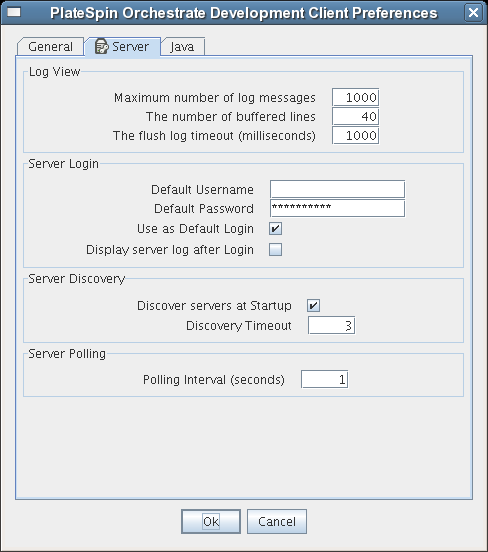
From the Development Client, click , then click to display the Orchestrate Development Client Preferences dialog box.
-
In this dialog box, click the tab to display the Server page.
-
In the section of the page, specify the administrator username in the field, then specify the administrator password in the field.
-
Select the check box, then click .
The next time you log in, either to an explicit, named server or by exploring the PlateSpin Orchestrate grid, the default login dialog box is displayed.
Figure 3-2 Default Login Dialog Box
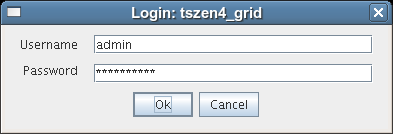
If the default user you provided as a preference is still accurate, you can simply click to log in.
HINT:If you re-install PlateSpin Orchestrate and specify a new administrator username and password, that information is not displayed in the default login unless you change the login preferences. The information you provided in the earlier install and established as the default is retained as a cached file in the user directory until it is overwritten with new default preferences.