1.4 Installing Portability Suite Software Components
1.4.1 Starting the Portability Suite Installation Launcher
-
Download the PortabilitySuiteSetup-8.1.0.xxxx.exe installation program and save it on your intended Portability Suite Server host.
-
Run the installation program, specify a location for the temporary setup files, then click .
The installation program extracts the required files and opens the Installation Launcher window:
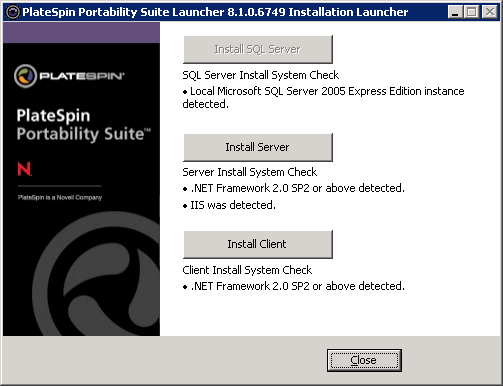
If you intend to use the Microsoft SQL Server 2005 Express Edition distributed with Portability Suite, install it first. If you intend to use an existing SQL Server 2005 database, skip the database installation and install the Portability Suite Server.
1.4.2 Installing the Database Server
If you do not have a Microsoft SQL Server 2005 database engine, you can install a copy of Microsoft SQL Server 2005 Express Edition included in your Portability Suite software distribution.
To install Microsoft SQL Server 2005 Express Edition:
-
On your intended database server host, start the Portability Suite Installation Launcher. See Starting the Portability Suite Installation Launcher.
-
Click and follow the on-screen instructions.
The program installs the database server and the database instances required for the operation of PlateSpin® Migrate or PlateSpin® Protect products.
1.4.3 Installing the Portability Suite Server
-
Make sure that your intended Portability Suite Server host meets the minimum system requirements. See System Requirements for Portability Suite Server Hosts.
-
Make sure that your intended Portability Suite Server host has the necessary prerequisite software installed. See Installation Prerequisites for Portability Suite Server Hosts.
-
On your intended Portability Suite Server host, start the Portability Suite Installation Launcher. See Starting the Portability Suite Installation Launcher.
-
Click and following the on-screen instructions.
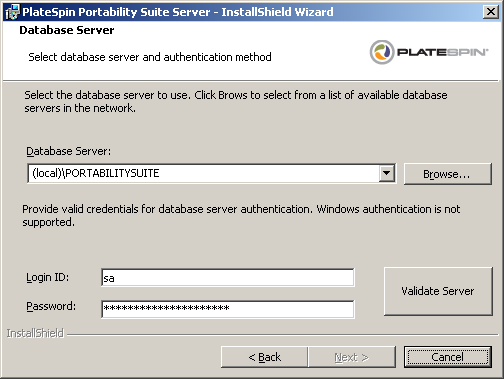
The installation program starts the installation process and prompts you to specify a database server and instance:
-
Do one of the following:
-
(Conditional) If you are using a local database server included in your Portability Suite software distribution (default option), leave the default selection in the drop-down list and leave the default sa credentials. If you subsequently move your Portability Suite database instance or change your SQL Server password, you must reset the Portability Suite database connection settings. See Knowledge Base article Q21119.
-
(Conditional) If you are using a remote database server, click to select from a list of available database servers in the network. Specify the database in the following format:
database_server\database_instance_name
-
-
Click to validate your database credentials for the selected database server.
-
Click and follow the on-screen instructions.
The installation program installs and prepares the Portability Suite Server software to run.
NOTE:This process might take several minutes to complete.
1.4.4 Installing the Portability Suite Client
You have two installation options for the Portability Suite Client:
-
Installing the Client from within the Installation Launcher: Use this option to install the Client on the same host with your Portability Suite Server immediately after the completion of the Server installation.
or
-
Downloading the Client from your Portability Suite Server: Use this option to install the Client on a remote host using a Web browser at any time after the completion of the Server installation.
To install the Portability Suite Client from within the Installation Launcher:
-
Complete the Server installation. See Installing the Portability Suite Server.
-
In the Installation Launcher window, click and follow the on-screen instructions.
The installation program installs and configures the Portability Suite Client, preparing it to run.
To install the Client by downloading it from your Portability Suite Server:
-
Complete the Portability Suite Server installation. See Installing the Portability Suite Server.
-
Make sure your intended Portability Suite Client host meets the minimum system requirements. See System Requirements for Portability Suite Client Hosts.
-
On your intended Portability Suite Client host, open a Web browser and navigate to the following URL:
http:// server_host /PortabilitySuite
Replace server_host with the actual name or IP address of your Portability Suite Server host. If the Portability Suite Server is installed on the local computer, replace server_host with localhost. If SSL is enabled, use the https protocol in the URL.
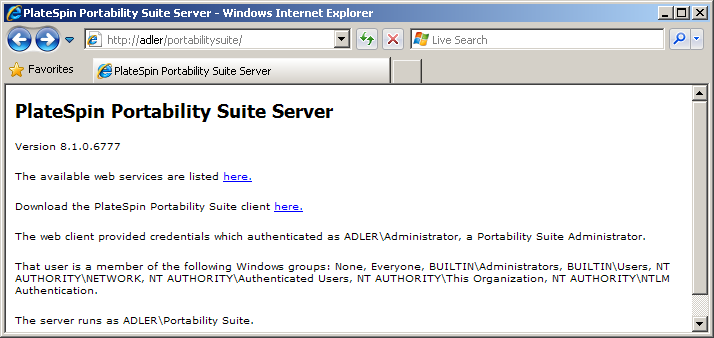
The browser loads the Portability Suite Server’s home page:
-
Click the Portability Suite Client download link, download the Portability Suite Client software, and install it by following the on-screen instructions.
To start the client, click > > > . When you install and launch the Portability Suite Client for the first time, the License Wizard opens and prompts you to activate your copy of the software. For help with product licensing, see Portability Suite Product Licensing
in your Configuration Guide.