3.8 Setting Up, Executing, and Managing Jobs
Most discovery and portability operations are defined, executed, and monitored as PlateSpin Migrate jobs.
3.8.1 Setting a Migration Job
For any migration job, you must have a discovered source and a discovered target. For information about discovering source workloads and migration targets, see Section 3.3, Discovering Source Workloads and Migration Targets.
To start a migration job:
-
Do one of the following to open the Action window:
-
Drag a discovered source and drop it on a discovered target.
-
Click a task in the Tasks pane.
-
Click the New Job toolbar.
-
In the Jobs view, right-click a source and select a command from the context menu. Available commands depend on the type of source.
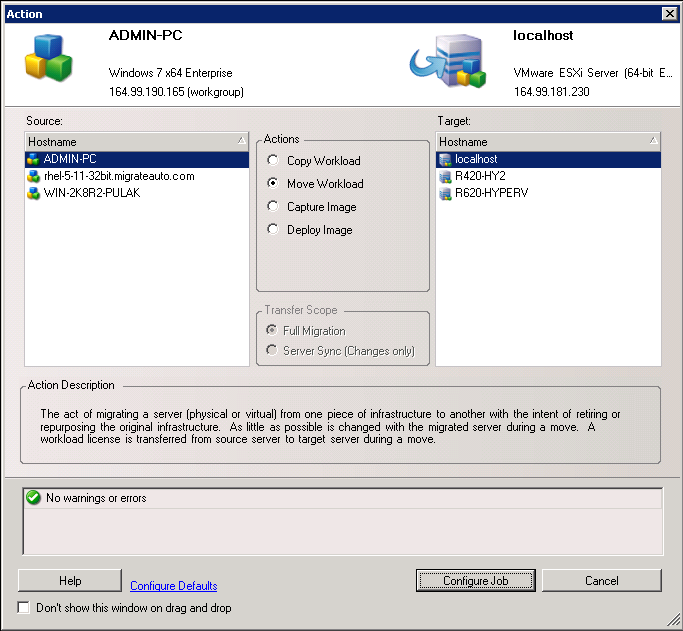
The Source and Target panes display workloads and targets applicable to the selected type of a migration job.
The and options are enabled in the following circumstances:
-
The system detects an existing operating system on the target
-
The operating system profile of the target matches that of the source workload
-
-
Check the validation messages at the bottom of the window.
-
To start configuring your migration job, click .
-
(Optional) For convenience, to avoid displaying the window on drag-and-drop, select before you proceed. Subsequent drag-and-drops actions bypass the Action window and directly open a Conversion Job window.
To restore the job migration startup behavior, restore the application defaults. See General Options.
3.8.2 Pre-Migration Job Validation
When starting a migration job, PlateSpin Migrate validates the job type, the source, the target, and the selected parameters, and might generate errors and warnings.
|
|
Error markers show configurations that you need to change before the migration job can start. |
|
|
Warning markers alert you to settings that should be confirmed prior to starting the migration. |
In a default PlateSpin Migrate configuration, validation messages display at the bottom of the Action window. However, If you have configured PlateSpin Migrate to bypass the Action window on drag-and-drop, errors and warnings are displayed in a separate window:
Figure 3-6 Migration Validation Window
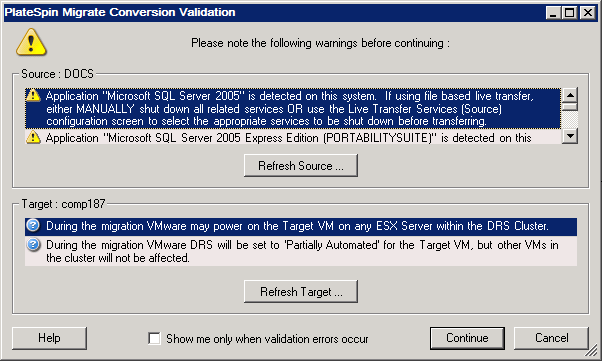
To force this window to open only on errors, select the option.
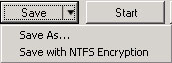
3.8.3 Saving Migration Jobs
You can save a migration job for executing it at a later time. After you start a job and configure all the options, click the arrow at the right side of the button, then select a command from the drop-down list:
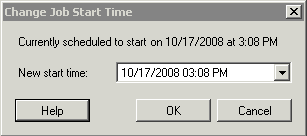
3.8.5 Changing the Start Time of a Scheduled Migration Job
-
In the PlateSpin Migrate Client’s Jobs view, locate the required scheduled job.
-
Right-click the job and select .
The Change Job Start Time dialog box opens.
-
Specify the required start date and time and click .
PlateSpin Migrate reschedules the job and executes it at the specified time.
3.8.9 Generating Job Reports
You can generate detailed reports of running and completed jobs. A report records the tasks performed during the job.
To generate a job report:
-
In the PlateSpin Migrate Client’s view, locate the required job.
-
Right-click the job and select .
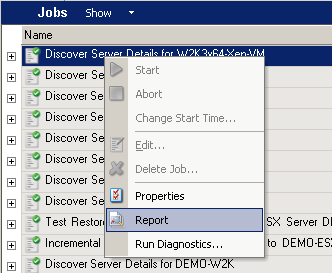
A Web browser window displays the requested report.