11.6 Configuring Suppression and Acknowledgement

An element or alarm can be configured for two actions:

  • Suppression

  • Acknowledgement (for BMC, Tivoli, PATROL, and NetView adaptors)

Administrators can use these features to troubleshoot issues related to an alarm, or identify how a new event affects the state of an element. After a failure occurs and the root cause is determined, an operator might suppress/acknowledge the root cause element or alarm so that if a separate failure occurs that impacts the element state, the operator can quickly identify the new root cause. The actual condition of suppressed elements is still available within the server, but the parent element ignores the real state of the suppressed element when calculating its roll‑up state.

Suppressing an element places the element in an unmanaged condition, which displays the element, but does not provide a condition status. A suppressed element’s condition changes are ignored when calculating the roll‑up state of parent elements. Suppression can be configured for a specific time interval, with an optional timeout. Suppression can be reset by a manual action, or it can expire.

Acknowledgment is available only for elements with a non‑OK condition. It is not possible to schedule an acknowledgement operation to start at a future date and time. An acknowledgement can be reset by a manual action, or it can expire. It can also be reset through a manual corrective state change on one of the elements that have a non‑OK state at the time of acknowledgement. Furthermore, a portion of the hierarchy that has a new failure (other than that which caused the original failure and subsequent acknowledgement) unacknowledges (turns nonbrown), but does not reset the entire acknowledgement. In this way, you can quickly determine when a new failure occurs.

Suppressing or acknowledging an element places the element in a new state. Unless the action is configured to affect only a single element, all children and their associated alarms are also suppressed or acknowledged. If configured with a time interval, these operations are reset to normal when the interval ends.

By default, users must have the Manage permission on the elements for which the Suppress or Acknowledge operations are configured in order to see and use these right-click options. However, it is possible to change the permission level required for using the Suppress option. For more information, see Section 11.6.2, Changing the Permission Level for Suppression.

To configure suppression and acknowledgement:

11.6.1 Configuring Suppression/Acknowledgement Functions

Suppression and Acknowledgement functions require that the Event Data Store be configured. These functions fail unless a database definition exists for the Event Store. Also note that alarm suppression is not supported on Sybase. For more information, see Database Management Overview.

IMPORTANT:After suppression and acknowledgement are configured for one adapter, they become available system-wide for all adapters. Therefore, it is important to configure these options on an adapter that is always running, otherwise these operations become unavailable when that adapter is not running. Alternatively, set the property directly in the adapter’s adapters.ini file, using the Script.onStarted=@commands/suppress command (see the next section), so that it is always available.

The suppression/acknowledgement setup script is at /OperationsCenter_install_path/database/scripts/commands/suppress.fs. Refer to this script for instructions and examples about setting up the suppression/acknowledgement feature.

To configure suppression/acknowledgement:

  1. In the Explorer pane, expand Administration > Adapters.

  2. Right-click an adapter, then select Properties to open the adapter’s Status property page.

  3. In the left pane of the Properties dialog box, click Adapter to open its property page.

  4. In the Property section, enter @commands/suppress in the Script.onStarted field.

    The adapters.ini file in the associated adapter’s section now includes the following code that starts the suppression/acknowledgement:

    Script.onStarted=@commands/suppress
    
  5. Click Apply to save changes, then close the dialog box.

11.6.2 Changing the Permission Level for Suppression

By default, the permission level is set to manage, meaning only those users who have manage permissions to an element can use the Suppress command.

It is possible to change the permission level for the Suppress command. For example, set the permission level to define to allow only those users with define privileges to an element to use the Suppress command.

The Tivoli T/EC adapter specifies options for suppression and acknowledgement through the AcknowledgeAvailable and SuppressAvailable adapter properties. These are both set to True by default.

To change the user permission level for the Suppress command, Edit the /OperationsCenter_install_path/config/Formula.custom.properties file and set Suppression.SuppressPermission to view, access, manage, or define.

11.6.3 Configuring Reacknowledgement on Server Restart

Upon restart of the Operations Center server, Acknowledged elements are not in an acknowledged state even if the acknowledge time interval has not expired. The suppress.fs script includes an option to Reacknowledge elements upon restart of the Operations Center server. This setting must be configured before restarting the server.

To configure reacknowledgement of elements on server restart, set the value for state.suppress.setPersistAcks to True in the suppress.fs script:

52  //when the Suppress subsystem was shut down.
53  state.suppress.setPersistAcks(true);

11.6.4 Configuring Suppression/Acknowledgement to Apply to a Single Element

Suppression applies to the entire hierarchy by default. However, you can set a custom option to limit suppression only to the selected element (does not apply to the element’s children and associated alarms).

To configure suppression to apply only to the selected element, add the following line to the /OperationsCenter_install_path/html/applet_params.xml file between the <common></common> tags:

<param name="suppress.elementonly.checkbox" value="true" /> 

11.6.5 Enabling Suppression after Correcting Database Problems

The suppression subsystem cannot start if the Event Data Store database is missing, unavailable, or misconfigured. The following error message appears in the formula.log if the database is missing, unavailable, or misconfigured:

ERROR Suppression – Database definition for ‘Event Store' schema is not defined or not enabled.

After ensuring the database is available and correctly configured, suppression can be enabled by either restarting the Operations Center server or configuring server operations to start and stop the suppression subsystem while the server is still running.

To configure operations to enable/disable suppression:

  1. In a text editor, open the /OperationsCenter_install_path/database/shadowed/Operations.ini file and add the following two operation definitions:

    Name: Start Suppression
    Menu Text: Start Suppression
    Context: Element
    Match by: Distinguished name expression: ^formulaServer=Server.*
    Permission: Define
    Type: Server script
    Operation: @commands/suppress
    
    Name: Stop Suppression
    Menu Text: Stop Suppression
    Context: Element
    Match by: Distinguished name expression: ^formulaServer=Server.*
    Permission: Define
    Type: Server script
    Operation: @commands/suppressoff
    

    Adding a new operation does not require the Operations Center server to be restarted, but might require you to log out and back in again.

    For instructions about creating operation definitions, see Section 11.4, Modifying Element and Alarm Menus.

  2. Right-click the Server element, then select Stop Suppression.

  3. Right-click the Server element, then select Start Suppression to restart the suppression subsystem.

11.6.6 Changing the Acknowledge and Suppress Menu Names

To change the default Suppress and Acknowledge menu option names:

  1. In a text editor, open the /OperationsCenter_install_path/config/Formula.custom.properties file.

    Use a Formula.custom.properties file so that Configuration Manager does not overwrite customized properties.

  2. Enter the following lines into the file replacing new name with the new menu option for the properties.

    operation.suppress.label=new name
    operation.unsuppress.label=new name
    operation.acknowledge.label=new name
    operation.unacknowledge.label=new name
    
  3. Save the file.

  4. Restart the Operations Center server.

11.6.7 Using the Suppression and Acknowledgement Options

After configuring the suppression and acknowledgement functionality, the Suppress and Acknowledge options are available for use.

Suppressing or Unsuppressing an Element or Alarm

To suppress/unsuppress an element or alarm:

  1. In the Explorer pane, expand Elements.

  2. Right-click the element, then select Suppress to open its dialog box.

  3. Specify the reason for suppressing the element or alarm.

    The OK button is not activated until you enter a reason for suppression.

    To leave the reason blank, enter one character, then backspace to delete it.

    If no reason is provided, the element displays the reason provided for the first parent element in the hierarchy that can provide a suppression reason.

  4. (Optional) Use the From and To spinners to define the starting and ending date and time interval during which the element or alarm is suppressed.

  5. (Optional) Click Add 10 Minutes, Add One Hour, Add 1 Day, or Add One Week to increase the time during which the suppressed state is applicable.

  6. Select the Apply to This Element Only check box to specify that the suppression does not apply to any children or their associated alarms.

    If not selected, suppression affects child elements and their alarms.

  7. Click OK.

Displaying the Reason for a Suppressed Element

To view the reason for an element suppression:

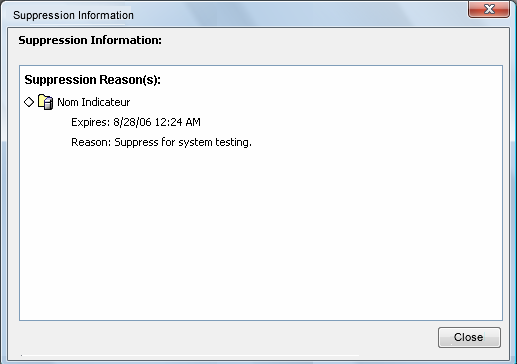
  1. Right-click the suppressed element, then select Show Reason.

    The Suppression Information dialog box opens and displays the reason the element was suppressed:

  2. Place the mouse over the suppressed element to display a tool tip that shows the location of the element in the hierarchy.

Unsuppressing an Element

To remove the suppression for an element:

  1. Right-click a suppressed element, then select Unsuppress.

    The element is no longer suppressed.

Acknowledging an Element

To acknowledge an element:

  1. In the Explorer pane, expand Elements.

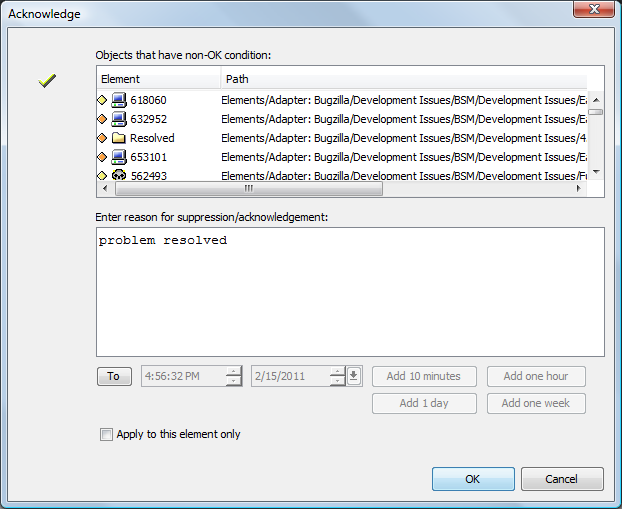
  2. Navigate to the element to be acknowledged, right-click the element, then select Acknowledge.

    The Acknowledge dialog box opens and displays a list of elements with a non‑OK condition:

  3. Specify the reason for acknowledging the element or alarm.

  4. (Optional) Use the To spinner to set the time and date when the acknowledgement is no longer applicable and expires.

  5. (Optional) Click Add 10 Minutes, Add One Hour, Add 1 Day, or Add One Week to increase the time during which the acknowledged state is applicable.

  6. Select the Apply to This Element Only check box to specify that the acknowledgement does not apply to any children or their associated alarms.

    If not selected, acknowledgement affects child elements and their alarms.

  7. Click OK.