7.9 Viewing and Managing the Alarm History
If the Data Warehouse is set up to store alarm history, the Alarms view can display the history of an alarm for a defined time period. Alarm history displays only if the administrator created a profile that has an associated Alarms expression and also started the profile.
For configuration settings regarding alarm history data collection, see Monitoring Alarm History Collection
in the Operations Center 5.6 Server Configuration Guide.
7.9.1 Viewing the Alarm History for Elements
To view the alarm history for elements:
-
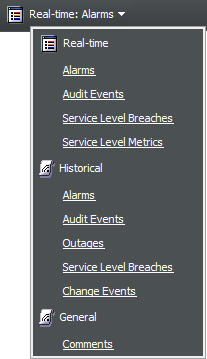
In the Alarms view, select the Historical: Alarms option:

In this example, select Historical Alarms to change the Alarms View display.
-
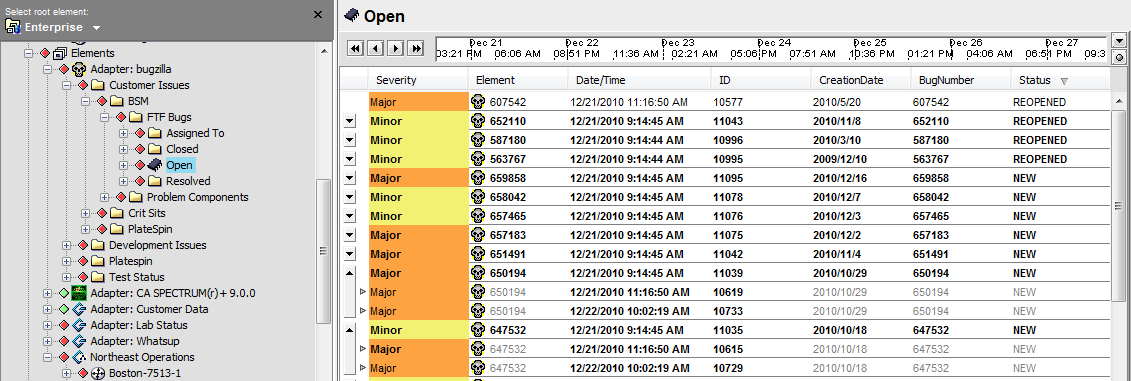
Click Retrieve to retrieve historical alarms, which shows historical alarms in the Alarms view:

Historical alarms display for a specified time period.
The following describes this view:
-
When an event occurs that triggers an alarm, a new row containing alarm information displays in the Alarms view.
-
When the status of an alarm changes, a new row containing alarm information displays in the Alarms view.
-
Alarms that contain historical data display in bold.
-
An arrow button
 to the left of the Severity column indicates that the alarm has more information.
-
You can do the following in this view:
-
Click the
 button to expand and view all entries for the alarm and the various times that the alarm information was received.
-
Click the
 symbol to expand the view and display additional historical alarms.
-
Click the
 button to collapse the alarm history and display only the most recent entry.
-
-
7.9.2 Changing the Dates for Displaying Historical Alarms
To update the date range for historical alarms:
-
Use the timeline buttons to adjust the time range for alarms:

The timeline buttons:
Button
Name
Description

Display Setup
Displays the time frame defined by a user-defined Start and End time or the selection of a saved bookmark.

Bookmark
Displays the time frame based on a selected bookmark.
For more information about bookmarks, see Section 8.7, Navigating with Charting Bookmarks.

Page Back
Moves the timeline backwards by an entire view.

Unit Back
Moves the timeline backwards by one unit of time.

Page Forward
Moves the timeline forwards by an entire view.

Unit Forward
Moves the timeline forwards by one unit of time.
-
Make adjustments by clicking and dragging the timeline to a new position using the following mouse actions:
Mouse Click Action
Function
Click and drag left.
Navigates forward.
Click and drag right.
Navigates back.
Shift+click
 or Shift+click
  .
.
Seeks the next occurrence of information forward
 or backward
  on the timeline.
Ctrl+click and drag left.
Zooms out on chart data.
Ctrl+click and drag right.
Zooms in to chart data.
Double-click.
Opens the Display Setup dialog box.
7.9.3 Sorting Alarms
By default, the Alarms History view lists alarms in chronological, ascending order. This means using the received time for the alarms to display the oldest alarms first, followed by the most recent alarms. Sorting service level breaches and outages uses the date and time when the breaches or outages occurred.
To reverse the alarm history sort order:
-
From the Format menu, select Reverse Alarm History Sort.
When selected, the sort order is chronological, descending. When deselected, the sort order is chronological, ascending.
The sort order is persistent across client sessions and is unique for each user.
7.9.4 Changing the Maximum Number of Alarms Displayed
Changing the Maximum Number of Historical Alarms Displayed
By default, a maximum of 1,000 historical alarms can display.
To change the maximum number of alarms displayed, in the Format menu, click Alarm History Query Limit, then select a value.
The possible values are 500, 1000, 2500, 5000, and 10,000.
7.9.5 Displaying Record Time
Some network management systems do not issue a new time/date stamp for each change or update to an alarm. However, it is possible to display and sort historical alarm changes using the date and time that Operations Center recorded changes for an alarm, called the Record Time.
To display or hide the Record Time column:
-
From the Format menu, select Query by Recorded Date.
When selected, the Record Time column lists the dates and times that Operations Center recorded each modified alarm.
7.9.6 Viewing Deleted Alarms in Historical Alarms
After deleting a historical alarm, a red x displays in the far left column and a red line strikes through the alarm column data.
Deleted alarms display data for six columns only: Severity, Element, Date/Time, ID, Source Element, and Record Time.
In Figure 7-7, a red strikeout line identifies deleted historical alarms:
Figure 7-7 Alarm History View

7.9.7 Adjusting the Timeline between Real-Time and Alarm History Views
For alarms retrieved in the Alarm History view, the end time displayed in the timeline corresponds to the date and time when the timeline first displayed.
To view the most recent changes in the Alarm History view:
-
On the toolbar, click the alarms drop-down list, then select Real-Time Alarms to update the Alarms view.
-
Click Retrieve to update the Alarms view.
-
Make changes to one or more real-time alarms, such as by performing operations on them.
-
Click the alarms drop-down list, then select Historical ‑ Alarms to update the Alarms view.
-
Click Retrieve.
The most recent changes do not display because the end time is still set to the previous request’s end time.
-
Advance the timeline to see the most recent alarm changes.
7.9.8 Viewing the Alarm History Property Page
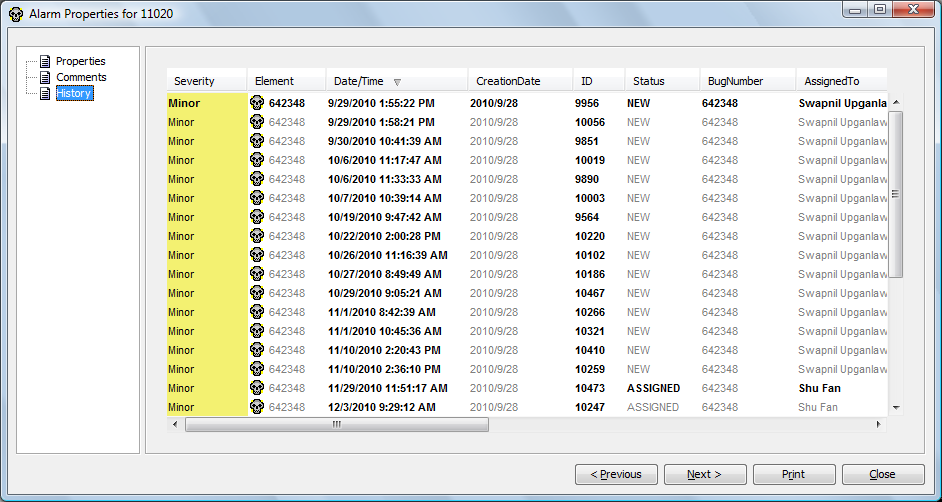
The alarm History property page displays historical alarm information for a specific alarm.
To view the history of a specific alarm:
-
Do one of the following:
-
In the Alarms view, double-click an alarm.
-
Right-click an alarm, then select Properties.
-
-
In the left pane, click History.
The History property page displays all available history for the selected alarm:

-
To view a different alarm, do one of the following:
-
Click Next to view the next alarm.
-
Click Previous to view the previous alarm.
-