4.3 Creating and Deleting Behavior Models
Behavior models provide a convenient way to organize custom property pages by business function and attach them to service model elements. For example, define a group of behavior models that represent various IT components required to operate business center branches. Attach custom property pages to these behavior models, then use behavior model matching rules to select elements. The behavior models (and the property pages) are attached to the selected elements.
Create behavior models and then attach custom property pages to them. Attach behavior models to selected elements based on element class or other matching rules.
4.3.1 Creating a Behavior Model
-
In the Explorer pane, expand Metamodel > Behavior Models.
-
Right-click the Behavior Models folder (or a subfolder), then select Create Behavior Model to open its dialog box.
-
Specify the behavior model name and description in the fields.
-
To define matching rules for selecting elements to attach the behavior model, click
 New in the Matching Rules section to open the Match Rules wizard.
For more information, see Creating a Matching Rule.
-
To attach a property page to a behavior model, do one of the following:
-
To select an existing property page for the behavior model, click
 Browse in the Property Pages section and navigate to the property page you want to attach.
-
To define a new property page, click
 Create a Property Page in the Property Pages section.
For more information, see Creating a Property Page.
-
-
Click Create.
The new behavior model name displays in the Metamodel hierarchy in the Explorer pane.
4.3.2 Creating a Matching Rule
The Match Rules wizard is used to create matching rules that determine which elements are assigned a specific behavior model (and the custom property pages assigned to that behavior model).
Define only one match rule type per behavior model, per element. For example, you can set only one class matcher to element X. You can set one class matcher to element Y and another to element Z, and so on. If multiple class matches are needed for the same element, select the Match by Expression option and write an LDAP expression that uses an OR statement.
The last four sections are optional steps that are referenced from with the first section. To create matching rules, follow the instructions in the first section:
Creating a Matching Rule for a Behavior Model
-
From the Create Model dialog box (or the Model property page for an existing behavior model), click
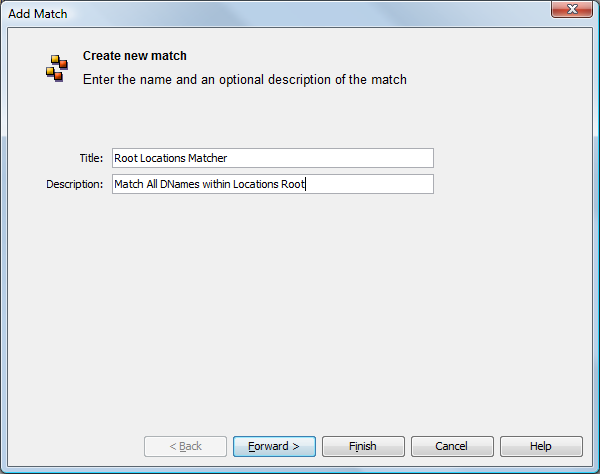
 (Create New) in the Element Matching Rules section to open the Add Match dialog box:
-
Specify a name and description for the matching rule in the Title and Description fields, then click Forward.
-
To specify the matching criteria used to select elements to associate with this behavior model, select one of the following options:
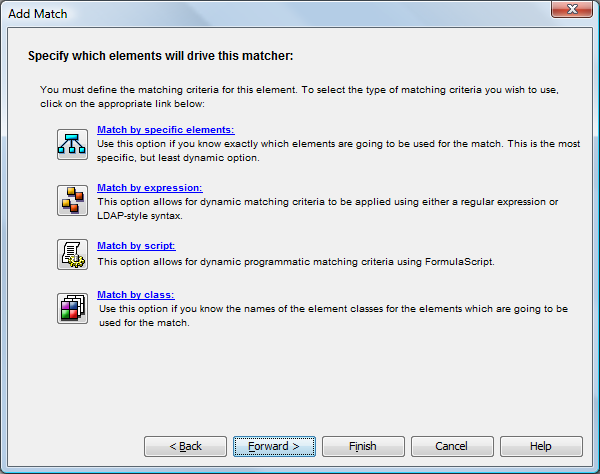
The Add Match dialog box updates to include four tabs along the bottom that allow you to create a matching rule, which are described in the following table:
Icon
Description

Match by Specific Elements: Allows you to search for and select an element for the match criteria.
For instructions, see Matching by Element.

Match by Expression: Selects elements based on a regular expression or LDAP-style syntax. The match is based on the element’s full DName.
For instructions, see Matching by Expression.

Match by Script: Selects elements based on a script written using the NOC Script language. The entire text in the window must evaluate to either True or False for a given object.
Only administrators with programming experience should use this feature. It is reserved for situations that require statements that exceed the complexity of an element expression, or that require validation of a property other than an element’s DName.
For instructions, see Matching by Script.

Match by Class: Selects elements based on element class name. Results are based on the fully qualified class name, not just the base name.
For instructions, see Matching by Class.
It is not possible to use multiple matchers with the same starting element. Instead, use an Expression matcher with the LDAP syntax. For example, to match the classes city and state, use the following expression:
(|(objectClass=city)(objectClass=state))
-
After completing a matching rule definition, do one of the following:
-
Click Forward to create a matching rule to open the Create Rule dialog box.
The matching rule displays in the Create Model dialog box.
-
Click Finish to save the matching rule.
-
Matching by Element
To assign the behavior model to specific elements:
-
On the Add Match dialog box, click
 (Match by Specific Elements).
-
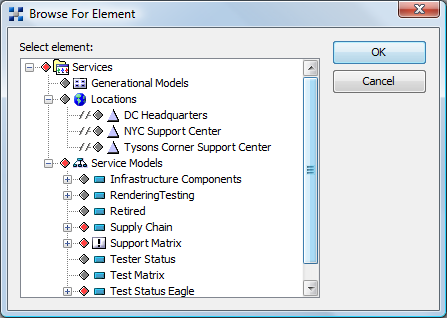
If you know the location of the element to use as a match, click Add to open the Browse for Element dialog box.
-
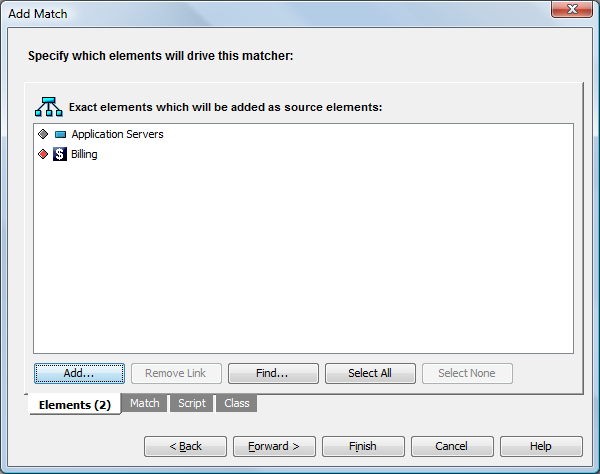
Navigate to the element that you want to select, then click OK.
The selected elements display in the following dialog box:
-
If you do not know the exact element name or its location in the hierarchy, click Find to open its dialog box, then search for a specific element.
For more information on using this feature, see the Monitoring Guide.
Matching by Expression
To use an expression to select matching elements:
-
On the Add Match dialog box, click
 (Match by Expression).
-
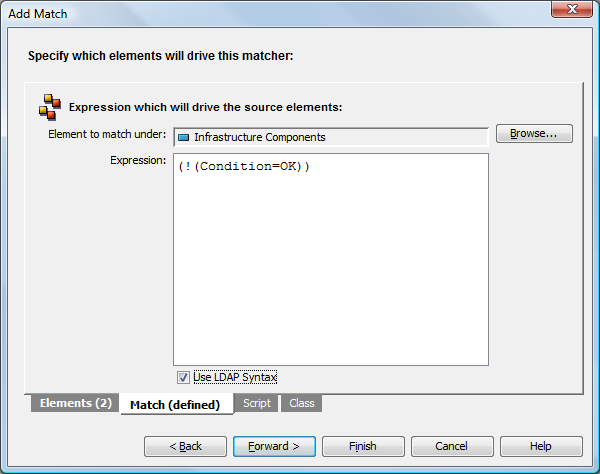
To specify the parent element whose children should be used to test the matching expression, click Browse to open the Browse for Elements dialog box, navigate to the element, then click OK.
The element displays in the Element to Match Under field.
-
Enter the expression in the Expression field.
-
To identify the expression as LDAP, select the Use LDAP Syntax check box.
The following example uses and LDAP expression that selects elements with any condition except OK:
Matching by Script
To define a match by script:
-
On the Add Match dialog box, click
 (Match by Script).
-
To specify the element to match, click Browse to open the Browse for Elements dialog box, navigate to the element you want to use, then click OK.
The element displays in the Element to Match Under field.
-
Enter the script code in the field.
The script language expected is NOC Script.
The script must result in a True or False output for elements in the selected element branch.
Matching by Class
To define a match by class:
-
On the Add Match dialog box, click
 (Match by Class).
-
To specify the parent element to match, click Browse to open the Browse for Elements dialog box, navigate to the appropriate parent element, then click OK.
The element displays in the Element to Match Under field.
-
Specify the element name and/or class in the Name and Class fields.
Use the fully qualified class name to accurately identify the exact element to use as a match.
If you do not use the fully qualified class name, you can match against an element that has the same name, but is in a different class.
4.3.3 Deleting Behavior Models
Deleting a behavior model deletes the behavior model, but property pages and classes linked to a behavior model are not deleted. Properties related to property pages are not deleted when a behavior model is deleted.
To delete a behavior model:
-
In the Explorer pane, expand Administration > Metamodel > Behavior Models, then navigate to the element that you want to delete.
-
Right-click the behavior model, then select Delete Model to open a confirmation dialog box.
-
Click Yes to delete the behavior model.
The behavior model is removed from the hierarchy.