5.4 Displaying an Element’s Children using Child Containers
Child Containers make it easy to create a container of an element’s children. After a Child Container is added to a drawing, you can decide to:
-
Filter elements.
-
Modify how elements are sorted.
-
Change the layout of how element nodes are displayed.
-
Change the number of levels of children shown.
-
Specify the maximum number of children shown.
-
Apply a new node style.
For more information about Node Styles, see Section 6.0, Working with Node Styles and Custom Graphics.
NOTE:Stack containers are another type of container that can be added to a drawing. Stack containers are especially useful when creating new node styles as they can layer multiple objects which can be hidden or shown based on a condition that is met. For more information about Stack Containers, see Section 6.7, Stacked Container Example: Toggling Graphics Based on Condition State and Section C.4, Looking at the Source Code with a Toggling Graphic Node Style Example.
To add a child container to a drawing:
-
Open the Layout view for the desired element.
-
Right-click the background of the Layout View, and select New Drawing.
All elements are removed leaving the Layout view empty and in Edit Mode.
-
Right-click the Layout View, and select Customize > Container > Add > Children Container.
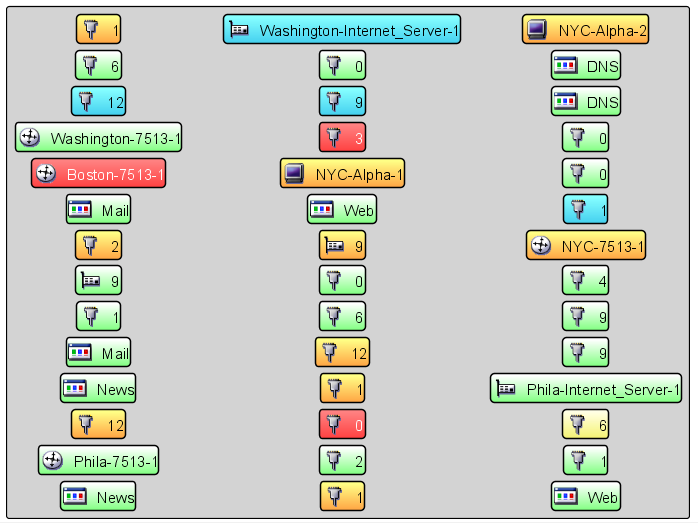
A child container displaying all elements displays:
-
To filter the elements show, right-click the container, and select Customize > Child Container > Filtering > Adjust Filtering. Do any of the following:
-
Include the current element (“self”) in the drawing.
-
Look for matching elements under non-matching elements. This is useful when you are going more than 1 layer deep.
-
Use regular expressions to include elements based on name, dName, or class.
-
Exclude or include elements based on condition levels.
-
Or write a script to apply a custom filter.
-
-
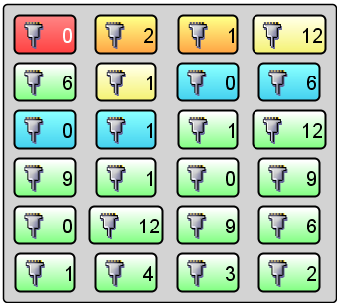
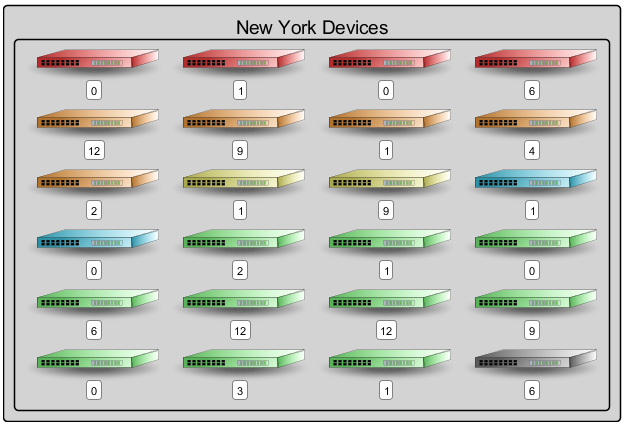
To change the number of columns, right-click the container, then select Customize > Child Container > Layout > Adjust Layout. In this example, we selected 4 columns.
-
To sort the elements, right-click the container, then select Customize > Child Container > Layout > Sorting. You can sort by condition, name, dName, or class.
In this example, we selected Sort Direction > Ascending and Sort By > Condition to show elements with the most severe condition first.
-
To adjust element depth or maximum number of elements shown, right-click the container, then select Customize > Child Container > Depth > Adjust Depth. In this example, we didn’t make any changes to depth settings.
-
To change the style of the element nodes, do the following:
-
Right-click the container, then select Change Group.
-
In the Graphics panel, select the Nodes category and locate the desired node style.
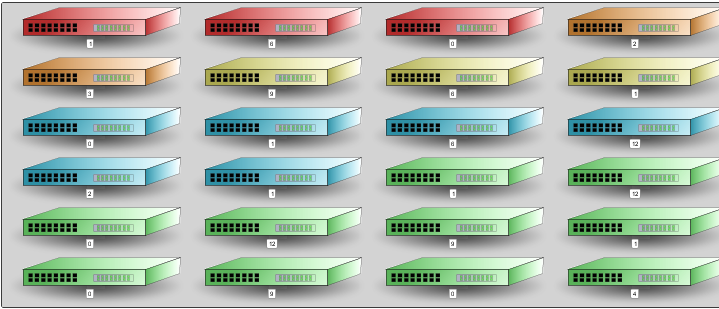
In this example, we selected Technology > Networking > Router.
-
Drag the node style image over onto an elements inside the container.
-
Select Change Node Style for All Nodes from the pop‑up menu.
All element nodes update with the new node style:
-
Right-click the container, then select Save Group.
-
-
To add an Element Name label, do the following:
-
Click the Text drawing tool, and click the Layout background.
-
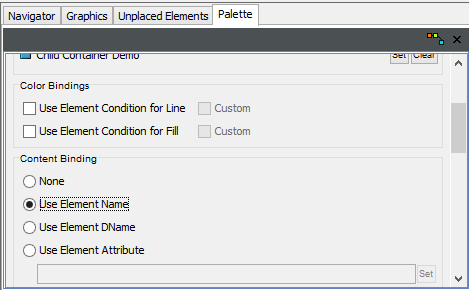
Select the text object, and in the Palette, select Content Binding > Use Element Name.
-
Select both the child container and the text object, and select Customize > Container > Wrap in Container.
-
Right-click the container and select Customize > Container > Layout > Set Layout. Set the layout to Flow.
-
Do the following to order the objects and remove the background color on the container.
-
Right-click the container, and select Change Group.
-
Right-click the text object, and select Arrange > Send to Back. The text moves to the top but disappears behind the container background.
-
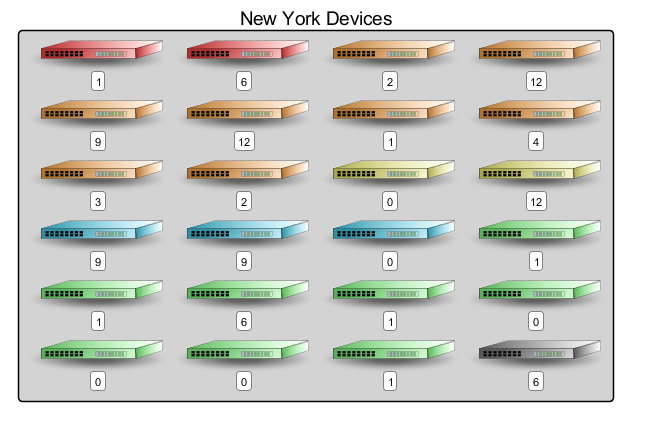
Right-click the outer container, and select Arrange > Send to Back. The element name (text object) is now visible above the child container.
-
To make the outer container transparent, select the outer container, and in the Palette panel in the Properties section, and remove the color selections (X buttons in color selectors) for both fill and border.
-
Right-click the container, and select Change Group.
-
-
5.4.1 Customizing a Child Container
Child Containers can be customized to display every configuration of elements that you need. The following sections address the various options you can apply on Child Containers:
Quick Reference for Child Container Settings
Table 5-1 provides a list of the various settings that allow you to customize the container in your Layout drawing.
Table 5-1 Child Container Settings Quick Reference
|
For options to set: |
Right-Click the container object and select... |
|---|---|
|
Current element |
Customize > Child Container > Filtering > Adjust Filtering |
|
Element depth |
Customize > Child Container > Depth > Adjust Depth |
|
Filter by name, Dname, or class. Filter using custom script. |
Customize > Child Container > Filtering > Adjust Filtering |
|
Filter on condition state |
Customize > Child Container > Filtering > Adjust Filtering |
|
Include matching children under non-matching elements |
Customize > Child Container > Filtering > Adjust Filtering |
|
Maximum elements |
Customize > Child Container > Depth > Adjust Depth |
|
Number of columns |
Customize > Child Container > Layout > Adjust Layout |
|
Sort by, Sort order |
Customize > Child Container > Layout > Sorting |
Adjusting the Layout Type and Layout Options
There are many types of layouts available for a container that set how components are displayed in the container. Grid and Flow layouts have additional settings for configuration.
Table 5-2
|
Layout Type |
Great for... |
|---|---|
|
Grid |
Organizing many elements/objects using a series of columns and rows. Set how many items display before wrapping to the next row. Set filters based on element class or condition and adjust element depth settings. |
|
Flow |
Keeping a text label displaying with another object like a child container. This layout lets you set alignment of objects to left, center or right. The order in which objects display rely on the current order/arrangement of objects from front to back. |
To change the layout type and set layout settings:
-
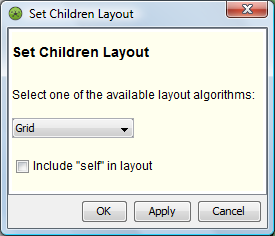
In the drawing, right-click the container, then select Customize > Child Container > Layout > Set Children Layout.
-
Select the layout type in the drop-down list.
-
To include the parent element in the container, select the Include “self” in layout radio button.
-
Click OK.
The view updates to the new layout type.
-
To adjust settings for a Grid Layout, right-click the container and select Customize > Child Container > Layout > Adjust Grid Layout. The Adjust Grid Layout dialog box opens.
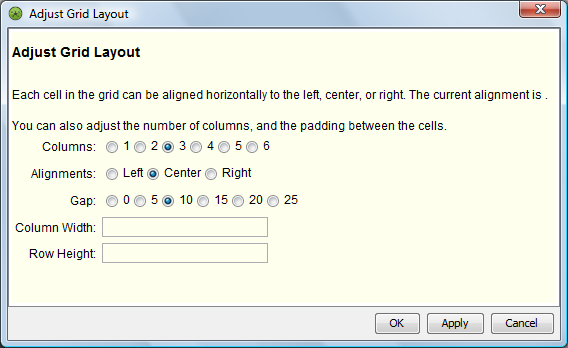
Specify options as desired for the number of columns, node alignment, spacing widths, column width and row height.
-
To adjust setting on a Flow Layout, right-click the container and select Customize > Child Container > Layout > Adjust Flow Layout. The Adjust Flow Layout dialog box opens.
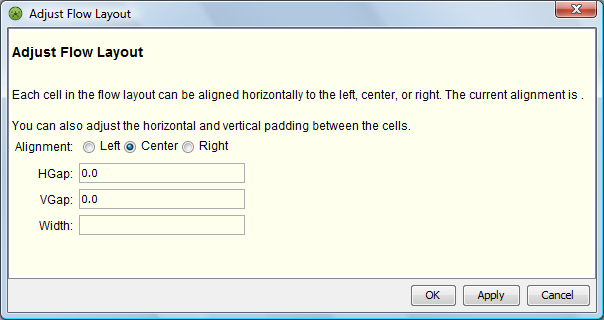
Specify options as desired for the spacing and width.