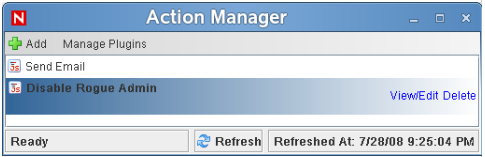
2.5 Sending Alerts When Rogue Administration Occurs
When an identity attribute is changed by an administrator, not by Identity Manager, Sentinel logs the event and then takes the appropriate action. For example, the action can be an e-mail, an alert, or the rogue administrator’s account is terminated. This solution not only detects the rogue activity, it detects who performed the activity and then takes immediate action against the account.
This solution uses the SOAP integrator feature of Sentinel to integrate with the User Application. The SOAP integrator allows Sentinel to call the SOAP endpoints provided by the User Application to initiate User Application workflows. These workflows are usually stored in the User Application's Provisioning Request Definitions stored under the Directory Abstraction Layer (DAL).
The Rogue_Administration_Activity workflow is called from Sentinel. It sets the user’s LoginDisabled attribute equal to True and sends the Default Approver (user or group) a workflow item to notify them that the user might be attempting illicit network activity.
The following sections outline the steps required to implement this scenario.
2.5.1 Assumptions
The steps for this scenario assume the following:
-
Install and configure the latest available version of Sentinel 6.1 or Sentinel 6.1 RD. For more information, see the Sentinel 6.1 Installation Guide or the Sentinel 6.1 Rapid Deployment Installation Guide.
-
Install and configure the eDirectory Collector. The documentation for the eDirectory Collector is included with the Collector. Download the eDirectory Collector and the documentation from the Sentinel 6.1 Content Web site.
-
Install and configure event Collectors for all integrated systems that are part of the Identity Manager solution. For example, if you are synchronizing Active Directory accounts with Identity Manager, you need to download and configure the Active Directory Services Collector. All Sentinel Collectors are located at the Sentinel 6.1 Content Web site.
-
Download the Identity Tracking Solution Pack from the Sentinel Solution Pack Download Web site .
-
Install and configure Identity Manager 4.0.1 Advanced Edition and the Roles Based Provisioning Module. For more information, see the Identity Manager 4.0.1 Integrated Installation Guide.
-
Install Designer 4.0.1. For more information, see the Designer for Identity Manager 4.0.1 Administration Guide.
-
Install and configure the Identity Manager Collector. The documentation for the Identity Manager Collector is included with the Collector. Download the Identity Manager Collector and the documentation from the Sentinel 6.1 Content Web site. For configuration documentation for the Identity Manager Collector with Identity Manager, see the Identity Manager 4.0.1 Reporting Guide for Novell Sentinel.
-
Install and configure the Sentinel driver and Identity Vault Collector. For more information, see the Driver for Sentinel 6.1 and the Identity Vault Collector Implementation Guide.
2.5.2 Installing the Identity Tracking Solution Pack
If you have already installed the Identity Tracking Solution Pack, skip this section and proceed directly to Section 2.5.4, Installing the Rogue Administration Control. If not, see Section 2.2.3, Installing the Identity Tracking Solution Pack for instructions on installing the solution pack.
2.5.3 Configuring the Global Setup
The Identity Tracking Solution Pack requires some global configuration that must be completed. This configuration needs to be completed before any additional configuration. The configuration information is contained in the Identity Tracking Solution Pack. For details on configuring the global setup, see Section 2.2.4, Configuring the Global Setup.
2.5.4 Installing the Rogue Administration Control
-
Launch the Solution Manager by selecting in the toolbar in the Sentinel Control Center.
-
Select , then click .

-
Select Rogue Administration in the left pane of the Solution Manager, then click .

-
Verify that the Rogue Administration Control is listed, then click .
-
Select your correlation engine from the drop-down list as the location where the Rogue Administration rules are installed.
-
Select , then click .

-
Select whether the Crystal server is local or remote by selecting:
-
-
Specify the following Crystal server information:
-
Server Name: Specify the Crystal server DNS name or IP address.
-
User Name: Specify an administrative user for the Crystal server.
-
Password: Specify the administrative user’s password.
-
-
Click after you have specified the Crystal server information.

-
Review the contents of the Rogue Administration Control, then click .
-
Review the installation summary, then click .
2.5.5 Configuring the Rogue Administration Control
There are additional configuration steps required to implement the Rogue Administration Control.
The following documentation includes instructions for configuring the Disable Identity and Start Rogue Admin Workflow actions. This documentation covers configuration within the Sentinel environment. Additional configuration may be necessary for production environments or if your enterprise is configured in ways that differ from standard installations of integrated systems.
Solution Packs and Action Plugins In many cases, Action Plugins are delivered as part of pre-defined controls within Solution Packs, where they will already be instantiated as Actions, attached to Rules or Menu Tools, and will already be configured to use the appropriate Integrator. This is the case with the Identity Tracking Solution Pack. Installing the Solution Pack control which uses the Action Plugin is sufficient to install all the necessary components. The only configuration you will typically need to perform will be to modify the Integrator configuration to point to the correct integration targets. However, you may need to additionally change some Action parameters that control the Action Plugin.
Enabling Auditing on All Endpoint Systems
You must enable each endpoint system to audit the desired account management events. This process defines which events are sent to Sentinel to track. The endpoint systems are the systems that are part of the Identity Manager solution. For example, eDirectory or Active Directory are endpoint systems.
Configuration steps are different for each endpoint system. For example, in eDirectory you set the events to track on the properties of each object. You need to track events that are related to account management, such as, a user create, a user delete, or a user modify. The following figure shows an example of enabling events on the server object.
Figure 2-1 Enabling Audit Events on eDirectory

Copying Script Files
There are script files that are included in the Rogue Administration Control that must be copied to the ESEC_HOME/config/exec directory. These scripts simplify the addition of entries to the IDMManagedSystems map and the ApprovedAccount Admins map.
To copy the scripts:
-
Launch the Solution Manager by selecting in the toolbar for the Sentinel Control Center.
-
Select , then click .
-
In the left pane, browse to and select the IdTApprovedAccountAdmins.
-
In the right pane, select Add2ApprovedAccountAdmins.bat or Add2ApprovedAccountAdmins.sh, then click .
The .bat files is for Windows and the .sh file is for Linux/UNIX.

-
In the left pane, browse to and select .
-
In the right pane, select Add2IDManagedSystems.bat or Add2IDManagedSystems.sh, then click .
Configuring Right-Click Menu Options
-
From the Sentinel Control Center, select the tab.
-
Click .
-
Click .
-
Use the following information to complete the configuration:
-
Name: Specify the name as Identity Tracking/Add to ApprovedAccountAdmins map.
-
Description: Specify the description as Adds InitUserName and InitUserDomain from the current event to the ApprovedAccountAdmins map.
-
Action: Select from the drop-down list.
-
File Type: Leave this field blank.
-
Command/URL: Specify Add2ApprovedAccountAdmins.bat or Add2ApprovedAccountAdmins.sh as the name of the script file to execute.
The .bat file is for Windows and the .sh file is for Linux/UNIX.
-
Parameters: Specify %InitUserName% %InitUserDomain% for the parameters.
The delimiter for Linux/UNIX is a space and the delimiter for Windows is a comma.
-
-
Use the following information to configure a second option:
-
Name: Specify the name as Identity Tracking/Add to IDManagedSystems map.
-
Description: Specify the description as Adds Collector from the current event to the IDManagedSystems map.
-
Action: Select from the drop-down list.
-
File Type: Leave this field blank.
-
Command/URL: Specify Add2IDManagedSystems.bat or Add2IDManagedSystems.sh as the name of the script file to execute.
The .bat file is for Windows and the .sh file is for Linux/UNIX.
-
Parameters: Specify %CollectorId% for the parameters.
The delimiter for Linux/UNIX is a space and the delimiter for Windows is a comma.
-
-
Click to save the changes.
Populating the ApprovedAccountAdmin Map
The ApprovedAccountAdmin map must be populated with an administrator username and the domain of the integrated systems.
-
Create a test identity and ensure that the account is create in the integrated system.
-
Find the associated event in the Sentinel Active view.
-
Right-click the event, then select the submenu.
-
Click .
Populating the IdentityManagedSystems Map
To populate the IdentityManagedSystems map with the CollectorID of the systems that have accounts managed by Identity Manager:
-
Generate activity on each integrated system.
-
Find the associated events in the Sentinel Active view.
-
Right-click an event, then select the new Identity Tracking submenu.
-
Click .
Configuring the SOAP Integrator
Sentinel contains a SOAP Integrator that allow Sentinel to Integrate with the User Application. The SOAP Integrator must be configured to communicate to the User Application. After the Rogue Administration Control is installed, the SOAP Integrator must be configured to communicate with the User Application server.
-
In the Sentinel Control Center, click from the toolbar.
-
Select the Identity Manager SOAP Integrator from the list on the left.
NOTE:The the SOAP Integrator must be named Identity Manager SOAP.
-
Click the tab, then use the following information to configure the connection settings on the Identity Manager SOAP Integrator:
-
URL: Specify the Web service URL used to get WSDL from the User Application server. The User Application is the SOAP provider for Identity Manager. The correct URL is located in the server.xml file for Tomcat on the User Application server.
For example, specify http://10.0.0.3:8444/IDMProv/provisioning/service?wsdl.
-
Service Name: Specify ProvisioningService as a SOAP service.
-
Port: Specify ProvisioningPort as the SOAP port.
-
Use SSL: Select if the connection to the User Application server is secure.
-
Use Authentication: Select to enable authentication to the User Application server.
-
Username: Specify a user with administrative rights to start workflows. Use LDAP notation with the DN of the user.
-
Password: Specify the administrator's password.
-
-
Click to regenerate the WSDL API.
-
Click , then verify that the Integrator test completes successfully.
-
Click to save the changes.
Configuring the LDAP Integrator
Sentinel contains an LDAP Integrator that allows Sentinel to communicate with eDirectory. After the Rogue Administration Control is installed, the LDAP Integrator must be configured to communicate with eDirectory.
NOTE:The LDAP Integrator is required for the Disable Identity plugin.
-
In the Sentinel Control Center, click in the toolbar.
-
Select the Identity Vault from the list on the left.
NOTE:The LDAP Integrator must be named Identity Vault.
-
Click the tab, then use the following information to configure the connections setting on the Identity Vault Integrator:
-
Server: Specify the IP address of the eDirectory server.
-
Port: Specify the TCP port LDAP uses on the eDirectory server.
The default port for unsecured communication is 389.
-
Use SSL: Select this option to use a secure connection to the eDirectory server.
The default port for secure communication is 636.
-
Login: Specify the DN of a user that has administrative rights to eDirectory.
Use the LDAP format. For example, cn=admin,o=novell.
-
Password: Specify the administrator user’s password.
-
-
Click to save the changes.
Modifying the Sentinel Execution Permissions
Action Plugins run in a protected execution environment that is intended to help protect the system from accidental corruption of the data objects used by Sentinel. The Disable Identity Plugin however, needs to be able to look up information about the identity that it is planning to disable. To allow this, we need to modify the permissions for Action execution.
To modify the permissions:
-
Log into the Sentinel Server machine as a user with privileges to edit files in the ESEC_HOME directory.
-
Locate ESEC_HOME/config/execution.properties and open it in a file editor.
-
Append the following line to the file:
esecurity.execution.script.context.restricted=false
-
Save and close the file.
-
Restart Sentinel:
-
Windows: Stop and then Start the service in the Services Control Panel applet.
-
Linux: Execute the following commands as root:
/etc/rc.d/sentinel stop
/etc/rc.d/sentinel start
-
Configuring the Action for Start Rogue Admin Workflow
No changes should be necessary for this Action Plugin as it is included as part of the Identity Tracking Solution Pack. If, however, you have multiple User Applications, you may need to replicate the Integrator configuration and manually configure additional Actions.
-
Log in to the Sentinel Control Center (SCC) as a user with rights to manage Actions ().
-
Select the menu .
-
Select the Integrator that was installed as part of this control (this is set as a parameter on the Action if you don't know it) from the list at left.
-
Select the (plus sign) button to create a new Action.
-
Give the Action a name in the entry box at top.

-
Select the button at the bottom of the dialog.
-
Use the popup wizard to browse for and install this Action Plugin. Once complete, the name of the Action Plugin should appear in the drop-down list in the Configure Action dialog.
-
Select the plugin name from the drop-down list. The list of configurable parameters for this Plugin should appear.
-
Set the workflow DN for the Rogue Administration Activity workflow that is included as part of the Novell User Application CMP Extension Package. Browse the eDirectory tree and find the User Application container, then locate the workflow definition under that container.
-
Refer to the table below for the parameters that can be configured for this Action Plugin.
-
Configure the parameters with settings appropriate for your environment.
Configuring the Action for Disable Identity
No changes should be necessary for this Action Plugin as it is included as part of the Identity Tracking Solution Pack. If, however, you have multiple Identity Vaults, you may need to replicate the Integrator configuration and manually configure additional Actions.
-
Log in to the Sentinel Control Center (SCC) as a user with rights to manage Actions ().
-
Select the menu .
-
Select the Integrator that was installed as part of this control (this is set as a parameter on the Action if you don't know it) from the list at left.
-
Select the (plus sign) button to create a new Action.
-
Give the Action a name in the entry box at top.

-
Select the button at the bottom of the dialog.
-
Use the popup wizard to browse for and install this Action Plugin. Once complete, the name of the Action Plugin should appear in the drop-down list in the Configure Action dialog.
-
Select the plugin name from the drop-down list. The list of configurable parameters for this Plugin should appear.
-
Refer to the table below for the parameters that can be configured for this Action Plugin.
-
Configure the parameters with settings appropriate for your environment.
2.5.6 Adding the CMP Extension Package to the User Application Driver
Now you need to add the User Application CMP Extension package to the User Application Driver in Designer.
To add the User Application CMP Extension package to the User Application Driver:
-
In the , select the line connecting the User Application Driver to the Identity Vault and click .
-
Select in the Properties page.
-
Click on the symbol in the top right corner.
-
Select the package.

-
Click to install this package.
-
In the Package Installation Wizard, provide values for the following configuration parameters:
These parameters are added as global configuration values (GCVs) on the User Application Driver.
-
Click .
-
To verify that the package installation was successful:
-
In the Outline view, look for under within the driver.

-
Edit the entity in the , and look for the attribute on the entity definition.

-
-
Deploy the changes to the Identity Vault.
-
Restart the User Application and the User Application driver to apply the changes.