3.2 Working with Entities and Attributes
You can customize your User Application by adding objects and their attributes based on the content of your own Identity Vault. You do this by adding new entities and attributes to the directory abstraction layer and deploying them to the User Application driver.
To modify the entity files installed by default, see Section 3.2.2, Adding Entities and Section 3.2.3, Adding Attributes. To modify the entity files of an already ed project or a set of files defined by another developer, you must first import the files to your design environment. For information on importing files, see Section 2.4, Importing Provisioning Objects.
3.2.1 About Entities and Attributes
Any Identity Vault object that you want users to search, display, or edit in the Identity Manager User Application must be defined as an entity in the directory abstraction layer. For example, to use the inetOrgPerson Identity Vault object in the User Application, you must create an entity definition for it. There are two logical kinds of entities (but you create them the same way):
-
Entities that are mapped from schema: These entities represent objects that exist in the Identity Vault that are directly exposed to users in the User Application. When defining this type of entity, expose all of the attributes that you want your users to work with. Examples of this entity type include User and Group. You can create more than one entity definition for the same object to expose different sets of attributes to different kinds of users. For more information, see Creating Multiple Entity Definitions for a Single Object.
-
Entities that represent LDAP relationships: This type of entity is known as a DNLookup and it is used by the User Application to:
-
Populate a list with the results of a DN search among related entities
-
Maintain referential integrity across DN referenced attributes during updates and deletes
Entities that support DNLookups are used by the Org Chart portlet to determine relationships and are also used by the Search, Create, and Detail portlets to provide pop-up selection lists and DN contexts. The User Lookup entity is an example of this type of entity. For more information, see Attributes and DNLookup Properties.
-
Creating Multiple Entity Definitions for a Single Object
You can create more than one entity definition that represents the same Identity Vault object but provides a different view of the data. Within the entity definitions, you can define different attributes for each entity definition, or you can define the same attributes but specify different access properties that control how the attributes are searched, viewed, edited, or hidden.
NOTE:You can optionally define a filter to hide certain entities from the result set.
You can then use these different entity definitions in different parts of the user interface. For example, suppose that you want to create a directory of employees; one for a public site and one for an internal site. On the public site you want to supply first and last names and a phone number, but on the internal site, you want to list additional information like title, managers, and so on. Here’s how you can accomplish this:
-
Create two entity definitions (with different keys).
Both entity definitions expose the same Identity Vault object, but one entity definition key is public-staff-information, and the other is internal-staff-information.
-
Within each entity definition, define a different set of attributes: one for public-staff-information, the other for internal-staff-information.
-
Use the tab of the Identity Manager User Application to create a portlet instance for the public page, and another one for the internal page.
For more information about creating portlet instances, see the Portlet Reference section in the Identity Manager 3.5 User Application: Administration Guide.
3.2.2 Adding Entities
You add entities through the Add Entity Wizard (described in the next procedure) or by clicking (from the toolbar).
NOTE:When using the button, you are prompted to select the object class of the entity to create, and the editor automatically adds the required attributes to the entity. Use the Add Attribute dialog box to complete the entity definition.
To add an entity using the Add Entity Wizard:
-
Launch the Add Entity Wizard in one of these ways:
From Designer’s menus:
-
Select . Choose then click Next.
From the Provisioning view:
-
Right-click the node, then choose .
From the directory abstraction layer editor:
-
Select
or
-
Right-click the node, then choose .
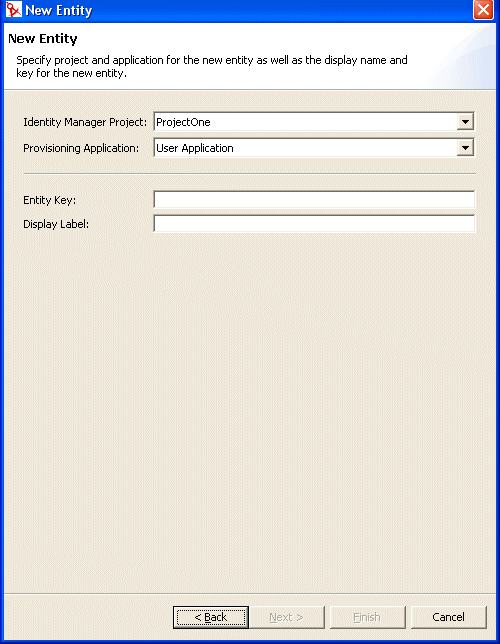
The New Entity dialog box displays.
NOTE:If launched from the menu, the dialog box contains the additional fields shown below.

-
-
Fill in the fields as follows:
Field
Description
The Identity Manager project and the provisioning application where you want to add the entity and attributes.
NOTE:These fields display when you launch the wizard from the menu.
A unique identifier for the entity.
The string displayed when the entity is displayed by the User Application. You can localize this label. For more information, see Section 2.10, Localizing Provisioning Objects.
-
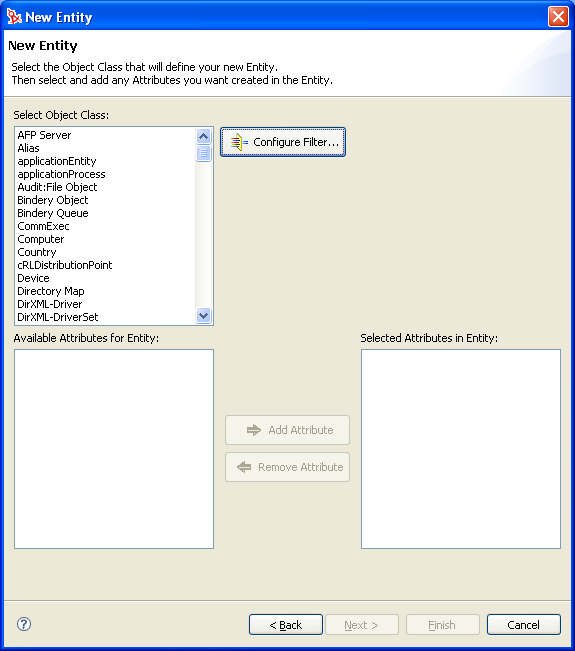
Click . The New Entity dialog box displays:

-
Choose the entity’s object class and add the attributes you want by double-clicking them in the list. Mandatory attributes are added when you select an , and you cannot remove them from the list.
HINT:If the entity’s object class is not shown in the list, you should update Designer’s local schema file by following the steps described in Updating the Schema Elements List.
-
Click .
The property page displays for editing. For more information, see Entity Properties. You must deploy the entity before it is available to the User Application.
Filter the Object Class List
You can limit the object classes shown in the New Entity dialog box by adding a filter. To add a filter:
-
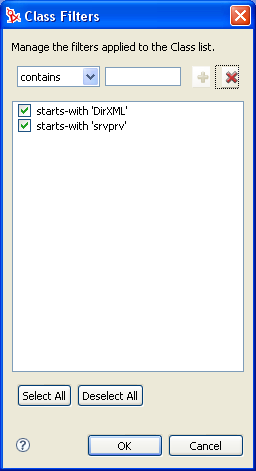
Click to launch the Class List Filters dialog box.

By default, Designer does not apply any class filters. The Class Filter dialog box contains two predefined filters ( and ). To activate them, click , then click . The filters are immediately applied to the object class list. Filters are applied until you deselect them.
-
Use the buttons as follows:
Adding Entity Filters
You define an entity filter to limit the entries returned for the specified entity. You define the filter based on attributes and their comparison to another value that you specify. For example, you can create a filter so that the User entity includes only those entries whose Region attribute contains Northeast.
-
Click .

-
Use the drop-down list on the left to select an attribute.
-
Use the drop-down list in the middle to select a comparison operation.
-
Use the entry on the right to specify a value for comparison.
-
To specify multiple condition groupings, repeat this procedure. Within a condition grouping, you specify each criterion that you want and connect them by using the logical operations: and, or.
The conditions are evaluated in the order in which you define them.
3.2.3 Adding Attributes
-
Select an entity.
-
Do any of the following to add an attribute:
-
Right-click an entity, then select
or
-
Click the button.
or
-
Click .
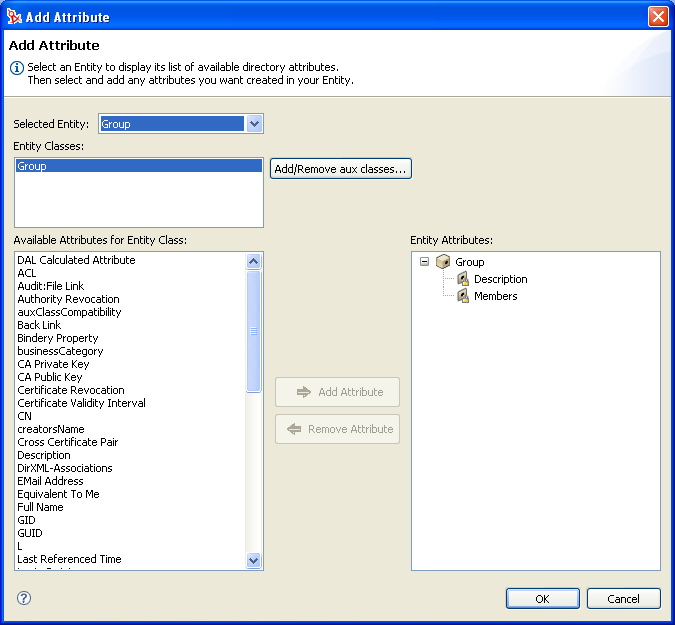
You are prompted to choose the entity class that contains the attributes that you want to add to the entity. You can also add (and remove) auxiliary classes if you need to add a class that contains the attribute you are looking for.

-
-
Add attributes by double-clicking them in the list.
LDAP operational attributes are supported by the directory abstraction layer editor and User Application; however, when you add an operational attribute, the Edit, Required, and Hidden properties are set to false and are disabled so you cannot change these property values.
HINT:If the attribute you want to add is not displayed in the list, you should update Designer’s local schema file by following the procedure in Updating the Schema Elements List.
-
Click . The property page displays for editing.
For more information, see Attribute Properties. To make an attribute available to the User Application, you must deploy it.
Adding DAL Calculated Attributes
You can create an attribute that is derived from an expression. For example, you can concatenate two or more attributes to produce a single calculated value. The expressions are ECMAScript compatible and conform to the ECMA 262 Language specification.
Restrictions: Because this attribute type does not map to a specific attribute in the Identity Vault, these attributes cannot be updated, removed, multivalued, required, or searched.
To create a calculated attribute:
-
Add an attribute as instructed in Section 3.2.3, Adding Attributes and make sure to select from the list.
Designer adds the Attribute with the following restrictions:
Table 3-3 Calculated Attribute Properties
|
Property Name |
Description |
|---|---|
|
Expression |
Click to launch the ECMA Expression Builder. To learn more about how to use the ECMA Expression Builder, see Section 9.0, Working with ECMA Expressions. |
3.2.4 Updating the Schema Elements List
-
With the Identity Manager project open, right-click your Identity Vault, then select
-
Choose and provide the specifications for the eDirectory host.
-
Click .
-
Select the classes and attributes to import, then click


