2.1 Operations Menu Bar
The Operations Menu Bar in the Orchestration Console provides options that help you to create and administer objects in the Explorer Tree.
2.1.1 File
The File menu (Alt+F) provides keyboard and mouse accessible methods for users to save changes or to exit the application.
Save
The Save operation provides a keyboard (File > Ctrl+S) and mouse-accessible method for users to save any changes made in the visible view.
Exit
The exit operation provides a keyboard (File > Alt+X) and mouse-accessible method for users to close all server connections and to exit the Orchestration Console application.
2.1.2 Edit
The Edit menu (Alt+E) provides keyboard and mouse-accessible methods for users to save changes or to exit the application.
Undo Addition
The Undo operation provides a mouse-accessible method for users to undo the action they have just performed in the Orchestration Console. The operation can also be executed from the keyboard (Ctrl+Z).
Redo
The Redo operation provides a mouse-accessible method for users to redo the action they have just performed in the Orchestration Console. The operation can also be executed from the keyboard (Ctrl+Y).
Cut
The Cut operation provides a mouse-accessible method for users to cut the selected object and move it to the clipboard. The operation can also be executed from the keyboard (Ctrl+X).
Copy
The Copy operation provides a mouse-accessible method for users to copy the selected object to the clipboard. The operation can also be executed from the keyboard (Ctrl+C).
Paste
The Paste operation provides a mouse-accessible method for users to paste the contents of the clipboard to the desired location. The operation can also be executed from the keyboard (Ctrl+V).
Find
The Exit operation provides a mouse-accessible method for users to open the Find and Replace dialog box, where they can search for and replace (if necessary) editable strings located in logs and editing views (for example, the Policy Editor).
Figure 2-1 The Find and Replace Dialog Box Invoked From the Policy Editor
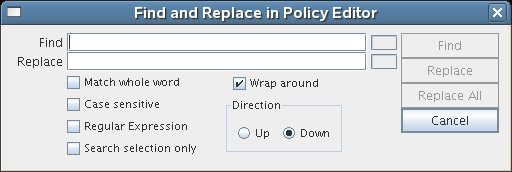
The operation can also be executed from the keyboard (Ctrl+F).
Find Next
The Find Next operation provides a mouse-accessible method for users to find the next occurrence of the string they previously searched for. The operation can also be executed from the keyboard (F3).
Find Previous
The Find Previous operation provides a mouse-accessible method for users to find the previous occurrence of the string they searched for. The operation can also be executed from the keyboard (Shift+F3).
Enter Find String
The Enter Find String operation provides a mouse-accessible method for users to load the text of the string they want to search for. The operation can also be executed from the keyboard (Ctrl+E).
Load Text
The Load Text operation provides a method for users to load text from an existing file into the open, editable view. When selected, the operation opens a browse dialog box where the file can be selected.
Save Text
The Save Text operation provides a method for users to save text in an editable, active view to a file. When selected, the operation opens a Save dialog box where you can browse to a network location where you want to save the file. By default, the file is named according to the view and the context within which you are viewing it. You can change the name of the file when you save it.
Preferences
The Preferences operation provides a method for users to change the preferences for the Orchestration Console display. When selected, the operation opens the Orchestration Console Preferences dialog box.
The dialog box has three tabbed pages
General Page
Figure 2-2 General Page of the Orchestration Console Preferences
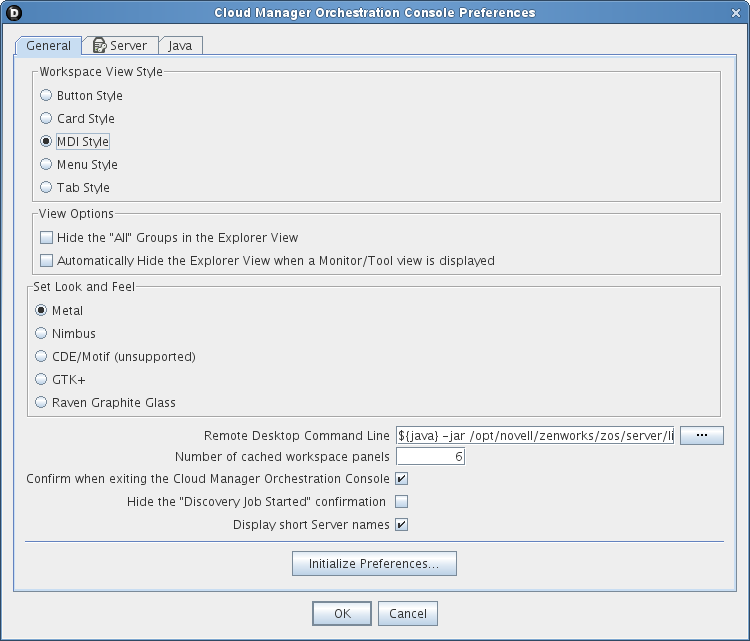
Preference settings that you can change on this page are self-explanatory. If you click , the preference settings (except settings) are returned to installation values.
Server Page
Figure 2-3 Server Page of the Orchestration Console Preferences
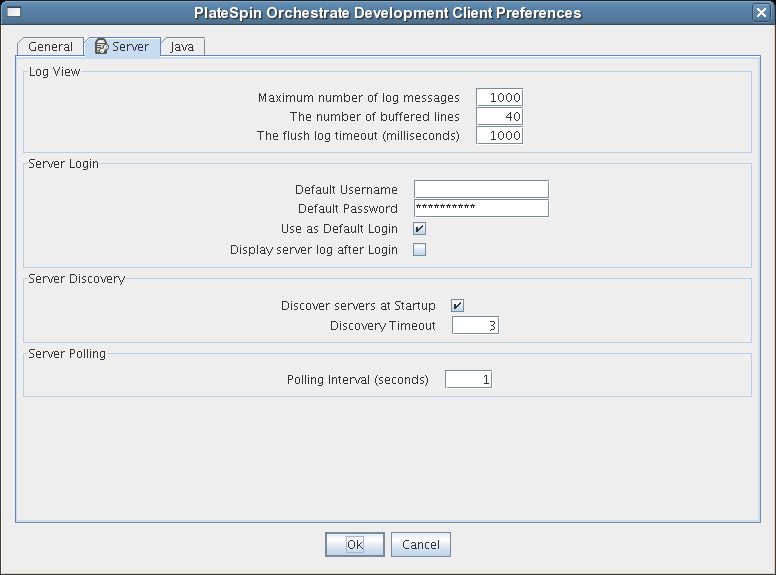
Preference settings that you can change on this page are self-explanatory.
Java Properties Page
Figure 2-4 The Java Properties Page of the Orchestration Console Preferences
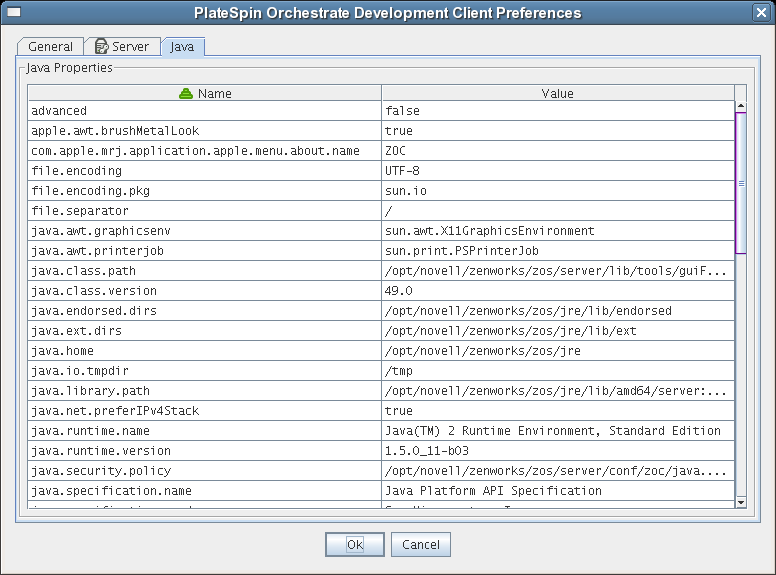
This page lists the Java property names and values that are used to render the Orchestration Console interface in Java Swing. The list is for your information only.
2.1.3 View
The menu includes various operations that let you manipulate the Orchestration Console display of the various Orchestration component views. The function of the options under this menu are self-explanatory, and are a compilation of view operations that are also available from the Operations toolbar.
For more information about the View operations, see Section 2.2, Orchestration Console Toolbar.
2.1.4 Actions
The multiple operations listed as options under the menu provide a quick way for you to perform operations that can also be performed (generally by right-clicking an object) in the Explorer View.
For example, if you select a option from the Actions menu, the Create dialog box remains open after you create each object. You can repeatedly create new objects in the dialog box, pressing or after each is created. Similarly, in the dialog boxes of some operations in the Actions menu, you can select many objects and delete them at the same time.
2.1.5 Provision
The menu includes provisioning actions that you can perform on multiple resources simultaneously. Many of the operations listed in the menu include some of the provisioning actions that you can execute by right-clicking a single VM or VM Host object in the Explorer Tree.
Discover VM Hosts & Repositories
When you select this option, the Discover VM Hosts and Repositories dialog box is displayed.
Figure 2-5 VM Discovery Dialog Box
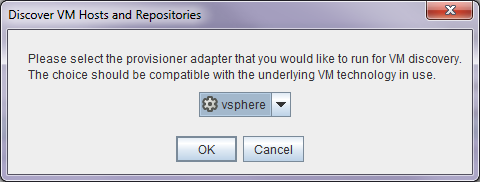
You use this dialog box to select a provisioning adapter (hyperv, vsphere, kvm, xen, xenserver) that discovers all VM host machines where the Cloud Manager Orchestration Agent is installed and creates objects in the model. The provisioning adapter also discovers the VM Repositories where VM hosts reside.
Discover VM Images
When you select the menu option, the Discover VM Images dialog box is displayed.
Figure 2-6 Discover VM Images Dialog Box
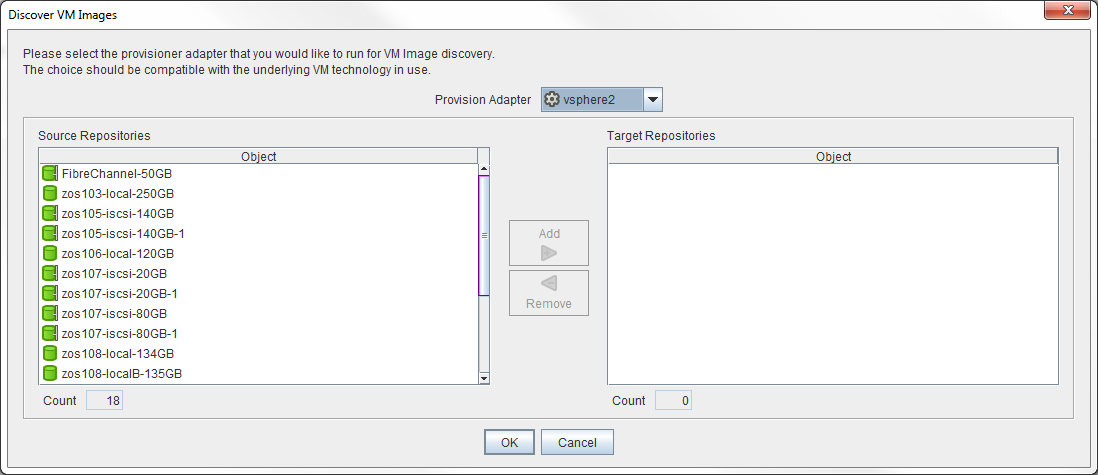
You use this dialog box to select a provisioning adapter (hyperv, kvm, vsphere2, xen, or xenserver) that discovers all of its associated VM images and creates objects in the model.
Discover Disks
When you select the menu option, the Discover Disks dialog box is displayed.
Figure 2-7 Discover Disks Dialog Box
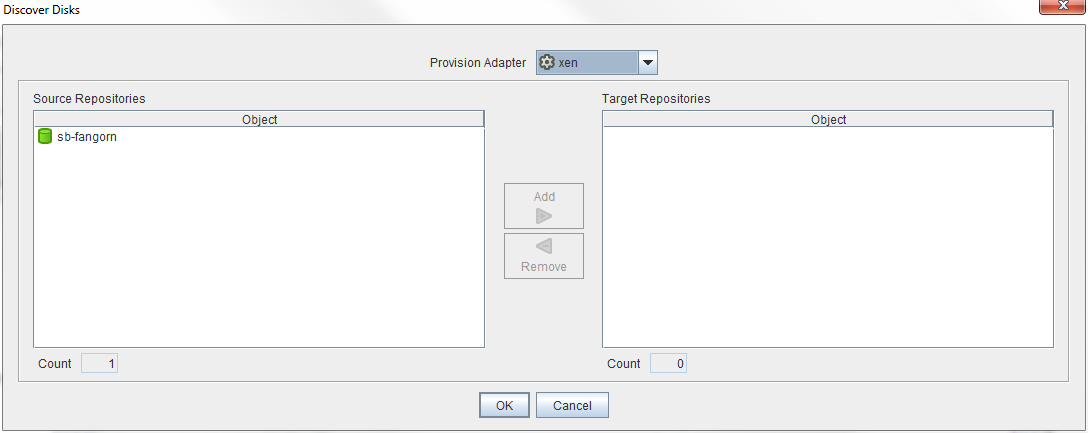
Using this dialog box, you can select a provisioning adapter that discovers all of its associated source repositories and the vDisks on those repositories.
Rediscover VMs
When you select the Discover Disks menu option, the Discover Disks dialog box is displayed.
Figure 2-8 Rediscover VMs Dialog Box
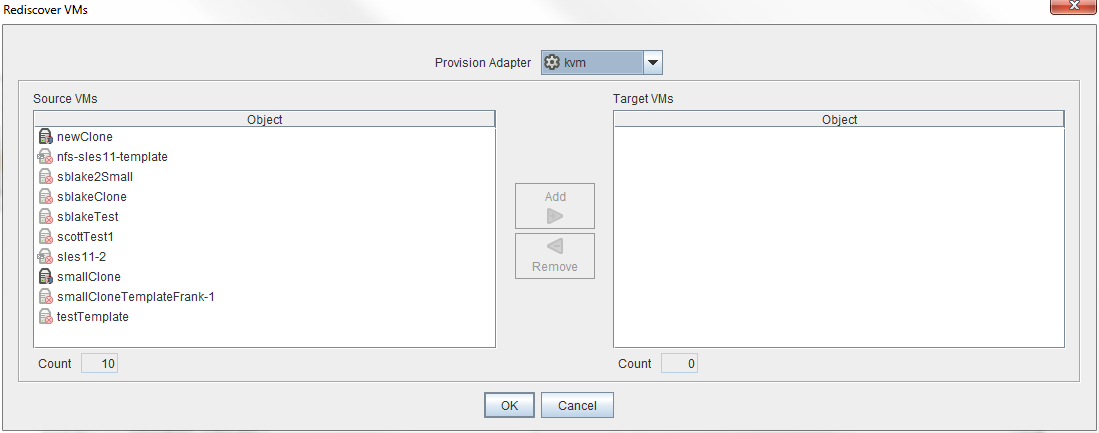
You use this dialog box to select a provisioning adapter that rediscovers the configurations of all of its associated VMs. This can occur when the native hypervisor is used to reconfigure a VM. Using this operation, you can reconfigure the Orchestration Server facts to match the configuration of the hypervisor facts.
A VM is not listed in the dialog box if the Cloud Manager Orchestration Server cannot rediscover its facts.
Other Provisioning Operations
The other operations listed in the menu are self-explanatory. Remember that all VMs
2.1.6 Server
The menu lets you start a local server, log in to the server, create and display logs for logged in servers, log out from the server, and shut down a server.
Select Server
The operation lets you select one of the Orchestration Servers in your grid to log in to. When you select a server, you are required to log in. This operation accomplishes the same thing as selecting a server object from the Explorer Tree.
Discover Servers
The operation lets you launch the discovery process for servers. This is the same process that initiates (if so chosen in your server preferences) when the Orchestration Console starts.
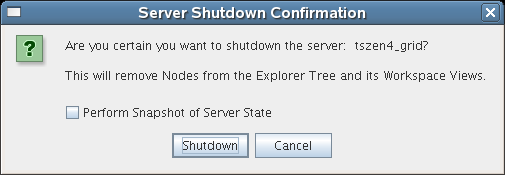
Shutdown Server
The operation lets you shut down the current, logged-in Orchestration Server. The shutdown dialog box also lets you create a snapshot of the server state when you shut down.
Figure 2-9 The Server Shutdown Dialog Box
Login
The operation lets you establish a remote connection to another Orchestration Server. The server IP address is required for the login. When you enter the IP address, you need to provide the username and password for the server where you are logging on.
Logout
The operation lets you log out of the current, logged-inn Orchestration Server without exiting the Orchestration Console. Logging out removes the server’s nodes from the Explorer Tree and its workspace views.
Display Log
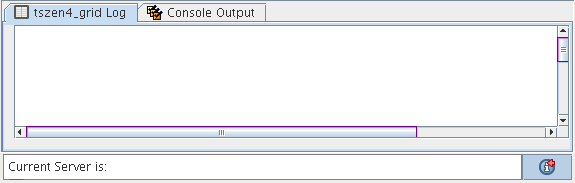
The operation displays the default server log for the current, logged-inn Orchestration Server. The display is in the Information window located at the bottom of the Orchestration Console. The server log file is also located by default in the /var/opt/novell/zenworks/zos/server/logs directory.
Figure 2-10 Server Log Opened in Information Window of the Orchestration Console
When a log is displayed, you can right-click its tab to further direct the actions of the display. You can pause logging in the window, copy the log to the clipboard, clear its contents, undock the log display as a new window, or remove it from the Information window.
If you right-click on the log display, all of the default editing capabilities of the Orchestration Console are available for your use inside the window. For more information, see Section 2.1.2, Edit.
Create Custom Log
The operation opens the Custom Log View Parameters dialog box.
Figure 2-11 The Custom Log View Parameters Dialog Box

By enabling a custom log, you can monitor various components of the Orchestration Server. For example, you can view debugging information for the Audit facility. You can create, update, or remove a log view from the dialog box. You can open a custom view in the Information window by selecting in the dialog box.
Log View Name: Provide the name of the log view. This is displayed on a tab in the log display panel.
NOTE:You can enter only alphanumeric characters and spaces in the field.
Log Level: From the drop-down list, select the minimum log level for the log view. The log messages included in the custom view will be of this level and above.
Log Channels: A log channel provides log information specific to an Orchestration Server component or facility, such as the Audit facility.
When the custom view is displayed, you can right-click its tab to further direct the actions of the display. You can pause logging in the window, copy the log to the clipboard, clear its contents, undock the log display as a new window, or remove it from the Information window.
If you right-click on the log display, all of the default editing capabilities of the Orchestration Console are available for your use inside the window. For more information, see Section 2.1.2, Edit.
2.1.7 Windows
When you right-click various views and panels in the Orchestration Console, you can select the option to open these views and panels in separate windows. This allows you the perspective you sometimes need when working with Orchestration Server objects in conjunction with one another. The menu lets you toggle between the various views or panels that are open. You can also choose to , , or of these windows.
When a window is open, its fields and selectable dialog boxes remain functional so that you can perform object operations or text editing as you would when these views or panels are docked normally to the Orchestration Console.
2.1.8 Help
From the menu, you can access a link to the online Cloud Manager documentation (available in .html or .pdf format) or you can open the About box for the product, where you can view its version number, its license expiration date, and a list of its current management pack capabilities (for example, the Virtual Machine Management capability).