5.1 Implementing Multi-Factor Authentication to VPN
Let us assume Reltic Data, Inc. wants to implement multi-factor authentication for its VPN (Virtual Private Network) connection to secure the Corporate network that is accessed from their employees who are in a remote location.
This section explains the prerequisites, flow of actions, and step-by-step configuration details to achieve this.
This example refers to the following user profiles:
-
Thomas: An administrator of Reltic Data, Inc.
-
Mark Jones: An employee of Reltic Data, Inc.
Thomas, an administrator wants to enforce Multi-factor authentication with the LDAP Password and Smartphone methods for OpenVPN to secure the corporate network. After multi-factor authentication is implemented, employees need to authenticate to both methods successfully to access the network through VPN.
Thomas must perform the following tasks to implement multi-factor authentication for OpenVPN:
To understand the sequential flow of configuration in the Advanced Authentication Administration portal, see Configuration Flow in Advanced Authentication for RADIUS Server Event.
For information about how an end user enrolls the configured methods and authenticates to VPN client using Advanced Authentication, see End User Tasks.
5.1.2 Considerations Before Configuration
Follow these guidelines to begin implementing multi-factor authentication for any event:
-
Identify the authentication methods that you want to configure.
-
Determine the order of methods in the chain. The methods are displayed to the end user in the order that you have configured.
-
Determine the policy that must be configured for the identified method.
-
Identify the user group for which you want to enforce this authentication chain.
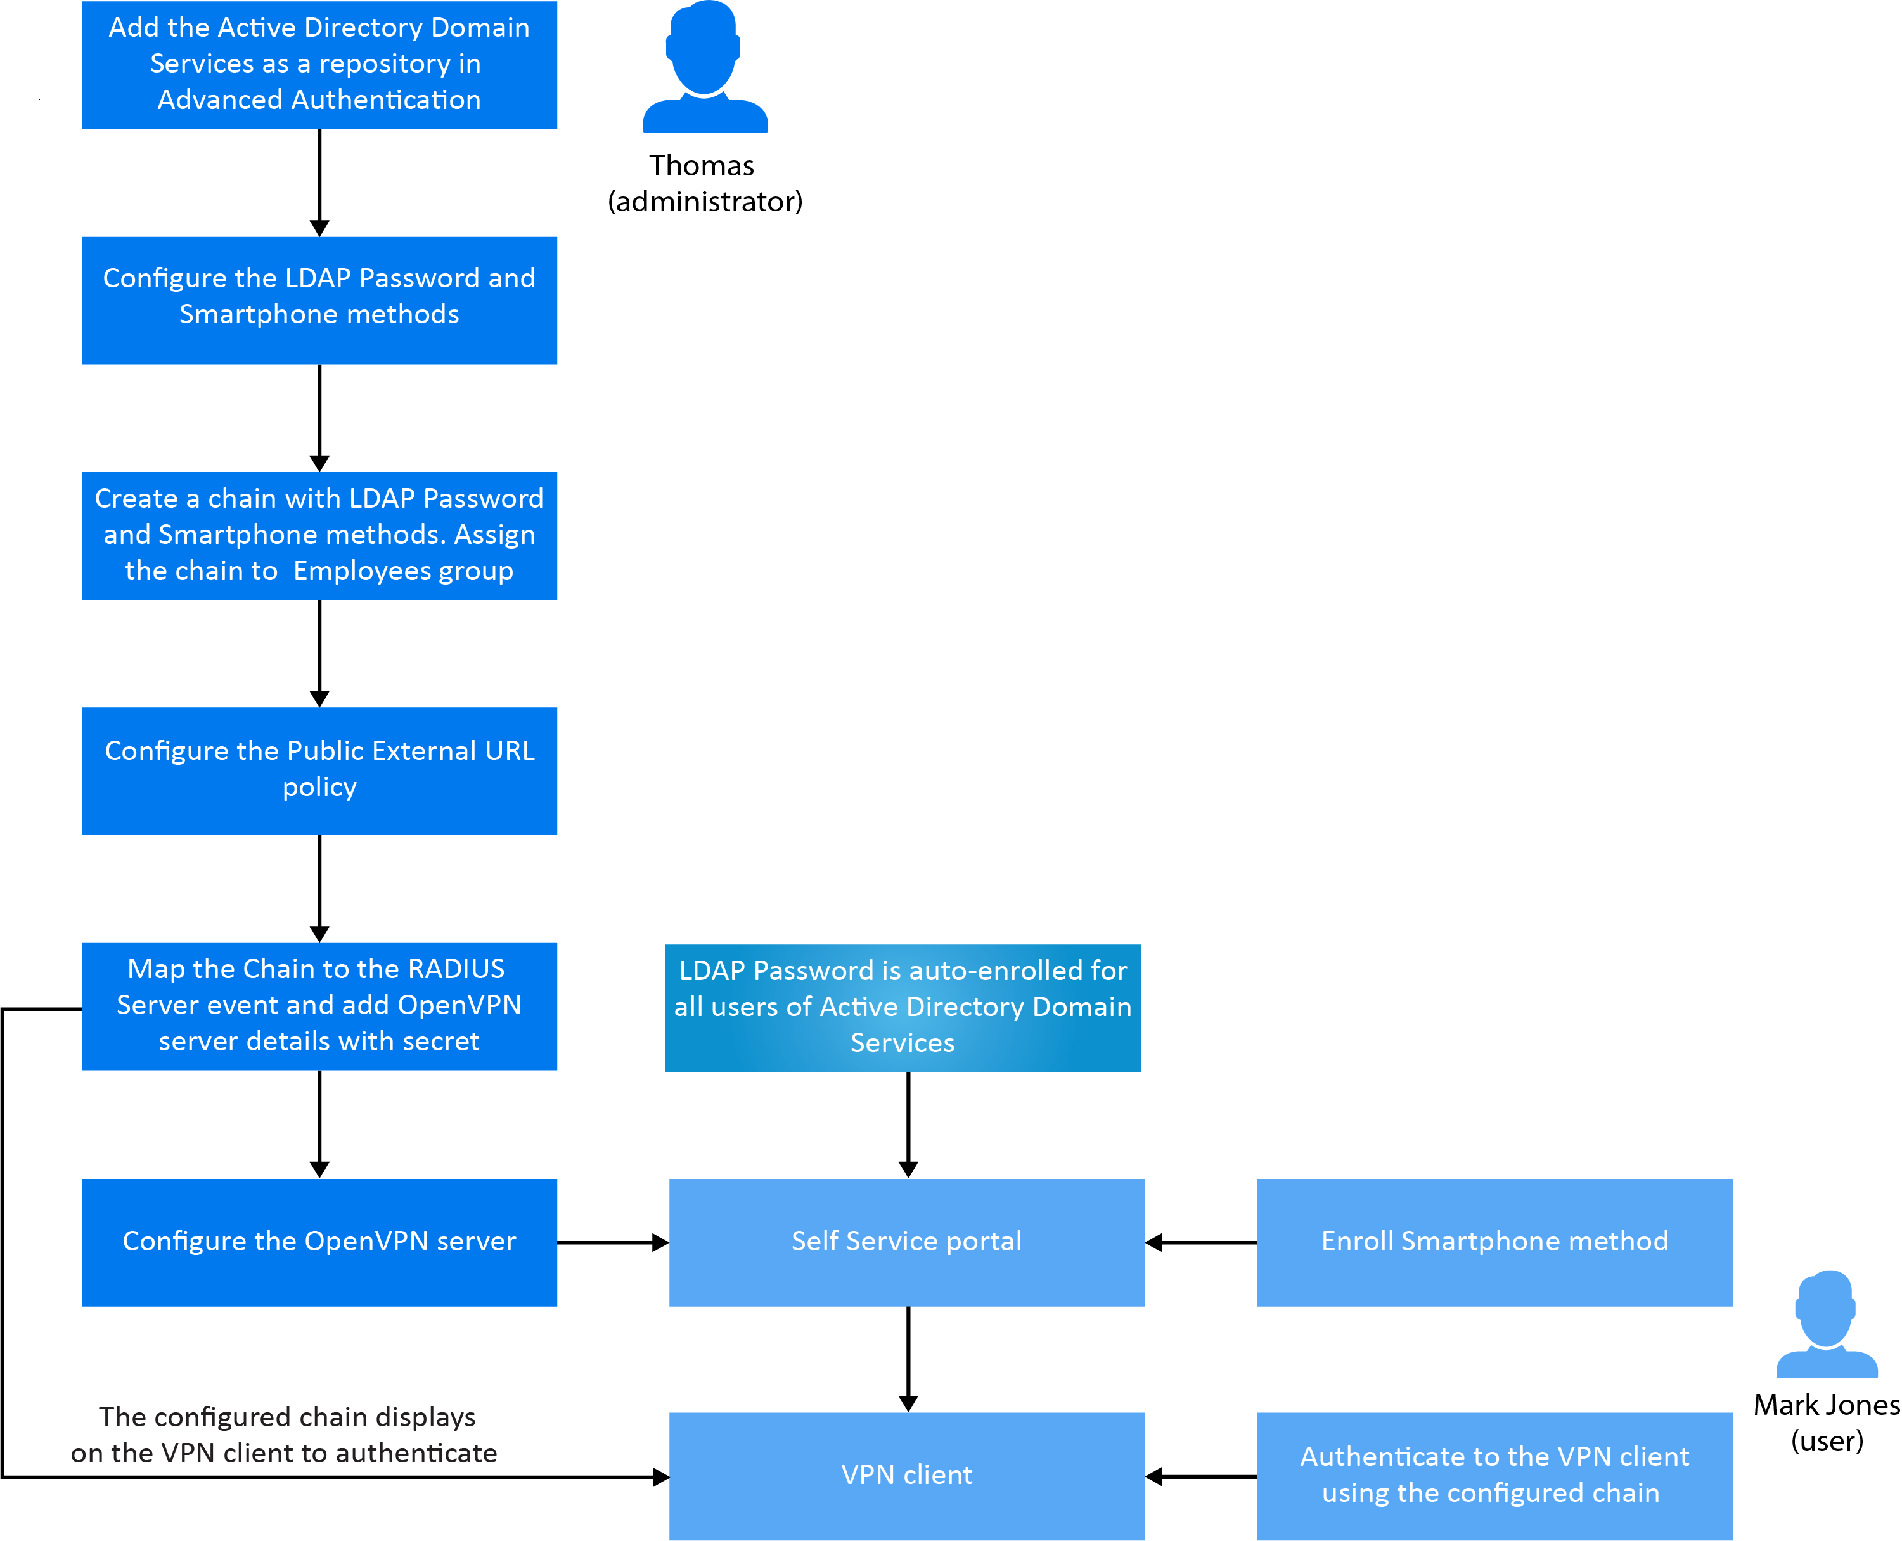
Configuration Flow in Advanced Authentication for RADIUS Server Event
The following diagram illustrates the sequential flow of actions required for securing the Open VPN client with multi-factor authentication: