27.7 Configuring Integration with Salesforce

This section provides the configuration information on integrating Advanced Authentication with Salesforce. This integration secures the Salesforce connection.

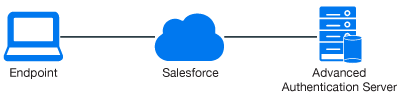
The following diagram represents Advanced Authentication in Salesforce.

To configure the Advanced Authentication integration with Salesforce, perform the following configuration tasks:

27.7.1 Configuring the Advanced Authentication SAML 2.0 Event

  1. Click username > Switch to Lightning Experience.

  2. Click Gear and select Setup Home.

  3. Navigate to Identity > Single Sign-On Settings.

  4. Click the created configuration (not for Edit).

  5. Click Download Metadata.

  6. Open the Advanced Authentication Administration portal.

  7. Click Events > Add to add a new event.

  8. Create an event with the following parameters.

    • Name: Salesforce

    • Chains: select the required chains.

    • Click Browse to Upload SP SAML 2.0 metadata file. Open the Salesforce metadata file and click Save.

27.7.2 Configuring to Authenticate on Salesforce with SAML 2.0

  1. Click Policies > Web Authentication.

  2. Set Identity provider URL to https://AdvancedAuthenticationServerAddress/ and replace AdvancedAuthenticationServerAddress with domain name or IP address of your Advanced Authentication server.

    NOTE:To use multiple Advanced Authentication servers with SAML 2.0, you must do the following:

    1. Configure an external load balancer.

    2. Specify the address with port number in Identity provider URL instead of specifying an address of a single Advanced Authentication server.

    IMPORTANT:You must use the server name or IP address specified in the Issuer field of Salesforce.

  3. Click Save.

27.7.3 Obtaining the Signing Certificate of Advanced Authentication

  1. Click Server Options in the Advanced Authentication Administration portal.

  2. Verify whether the Signing Certificate is available and use the certificate.

  3. If the certificate does not exist, then upload the certificate.

  4. Navigate to Policies > Web Authentication and click Download IdP SAML 2.0 Metadata.

    A new tab launches with the SAML 2.0 metadata that includes the certificate in x.509 format.

  5. Find the tag <ds:X509Certificate> and copy the certificate that follows to a notepad file.

  6. Add the ---BEGIN CERTIFICATE ------------ at the beginning and ---END CERTIFICATE------------ at end of the certificate in the notepad file.

  7. Save the notepad file for further use.

27.7.4 Configuring the Salesforce Domain Name

  1. Login to your Salesforce account.

  2. Create a domain. If the domain is not created, then perform the following tasks:

    1. Click Gear and select Setup Home in the Lightning Experience interface.

    2. Scroll down the setup toolbar and navigate to Company Settings.

    3. Click My Domain.

    4. Specify your domain name and click Save.

      The domain is activated. Use your domain name to open Salesforce. For example, https://CompanyName.my.salesforce.com/. SAML provider requires the domain name.

27.7.5 Configuring the SAML Provider

  1. Click Settings > Identity > Single Sign-On Settings.

  2. Upload the Identity Provider Signing Certificate that you obtained in Step 7 of section 27.7.3.

  3. In Single Sign-On Settings, click New and specify the following details:

    1. Name: Advanced Authentication.

    2. API Name: AAF.

    3. Issuer: https://AdvancedAuthenticationServerAddress/osp/a/TOP/auth/saml2/metadata, where you must replace AdvancedAuthenticationServerAddress with the domain name or IP address of your Advanced Authentication server.

    4. Entity ID: https://CompanyName.my.salesforce.com/.

    5. Click Browse to open the Identity Provider certificate.

    6. SAML Identity Type: Select Assertion contains the Federation ID from the User object.

    7. SAML Identity Location: Select Identity is in an Attribute element.

    8. Attribute Name: upn.

    9. Service Provider Initiated Request Binding: Select HTTP Redirect.

    10. Identity Provider Login URL: https://AdvancedAuthenticationServerAddress/osp/a/TOP/auth/saml2/sso.

    11. Select User Provisioning Enabled.

    12. Click Save.

  4. Click Edit for Federated Single Sign-On Using SAML.

  5. Select SAML Enabled.

  6. Click Save.

  7. Click Settings > Users.

  8. Click Edit for the required Salesforce users by adding Federation ID for the user accounts. The Federation ID corresponds to userPrincipalName attribute in Active Directory. For example, pjones@company.com.

    NOTE:The name that you specify in Federation ID is case sensitive. The following error appears, if you ignore the case:

    We can't log you in. Check for an invalid assertion in the SAML Assertion Validator (available in Single-Sign On Settings) or check the login history for failed logins.

  9. Click your profile icon and click Switch to Salesforce Classic.

    This mode is required to tune the domain options.

  10. Click Setup Administrator > Domain Management > My Domain > Edit to access the Authentication Configuration screen.

  11. Select Login Page and osp options.

  12. Click Save.

27.7.6 Verifying Single Sign-On to Salesforce

Open the URL https://CompanyName.my.salesforce.com/ and click Advanced Authentication to check the SAML 2.0 authentication.

NOTE:While logging in to Salesforce if an error message Single Sign-on error is displayed after succeeding all methods in the chain, you must change the SAML Identity Type in the Salesforce console.

For more information, see Error While Logging In to Salesforce.