13.1 Upgrading Access Gateway on Linux
IMPORTANT:If the base operating system is RHEL 7.6, you must first upgrade to Access Manager 4.5, and then upgrade to RHEL 7.9.
13.1.2 Upgrading Access Gateway
Upgrading Access Gateway Appliance
Upgrading from Access Gateway Appliance 4.4.x
Access Gateway Appliance is packaged as an OVF installer. Therefore if you are using Access Gateway Appliance 4.4 Service Pack 4 Hotfix 1 or earlier supported versions, you must migrate to latest version of Access Gateway Appliance. For information about how to migrate, see Section Migrating Access Gateway Appliance Setup.
If you are using Access Gateway appliance 4.4, ensure to upgrade to any of the following supported upgrade versions of Access Gateway Appliance before migrating to the latest version:
-
4.4 Service Pack 4 Hotfix 1
-
4.4 Service Pack 4
-
4.4 Service Pack 3
-
4.4 Service Pack 2
For information about upgrading from 4.4 to any of the supported upgrade version of Access Gateway, see Upgrading Access Gateway Appliance in the NetIQ Access Manager 4.4 Installation and Upgrade Guide.
NOTE:All versions of Access Gateway Appliance 4.4.x do not support a direct upgrade to the latest version. For the supported upgrade paths, see the release specific Release Notes.
Upgrading from Access Gateway Appliance 4.5
NOTE:You can use the latest upgrade file to upgrade from 4.5 to the latest version of Access Gateway Appliance.
If you are using Access Gateway Appliance 4.4 Service Pack 4 Hotfix 1 or earlier supported versions, see Upgrading from Access Gateway Appliance 4.4.x.
Upgrading the base Operating System and Common Appliance Framework
You must update the base Operating System and CAF before upgrading Access Gateway Appliance to the 4.5.2 version. Perform the following steps:
NOTE:Ignore notifications if you are on Access Manager 4.5.x release version. For operating system updates, click . For Access Gateway release updates, click . Click only if you want to upgrade from Access Manager 4.5.x to 5.0.x release version.
-
Log in to the Configuration console (https://<access_gateway_appliance-IP address>:9443) as a root user.
-
Click .
-
Click to apply all patches.
NOTE:Some of the updates might require rebooting Access Gateway Appliance. It is recommended to reboot Access Gateway Appliance in the following scenarios:
-
When Configuration console displays the option in the upper right corner of the Appliance Configuration pane.
-
When Configuration console displays a message or a warning to reboot.
-
-
Click > .
-
Review and accept the License Agreement.
-
Register for the Online Update Service. For registering for the Online Update Service, see To register for the Online Update Service:.
-
Click to install all the required updates.
-
In the upper right corner of the Appliance Configuration pane, click .
Verifying the version of the base Operating System and Common Appliance Framework
(Applicable for upgrading Access Gateway Appliance to 4.5.2)
-
Open a terminal window and log in as the root user.
-
Use the following command to check the Operating System version:
cat /etc/os-release
Ensure that the version is SLES 12 SP4.
-
Use the following command to check the CAF version:
cat /etc/Novell-VA-base
Ensure that the version is 2.0.3.
Steps to upgrade from 4.5 to the latest version of Access Gateway Appliance:
-
Back up any customized JSP pages and related files.
Even though the upgrade program backs up the JSP directory and its related files in the /root/nambkup folder, it is a good practice to backup these files.
-
Open a terminal window.
-
Log in as the root user.
-
Download the upgrade file from dl.netiq.com or from your purchased build, and then extract the tar.gz file using the following command:
tar -xzvf <filename>
NOTE:For information about the name of the upgrade file, see the specific Release Notes on the Access Manager Documentation website.
-
Change to the directory where you unpacked the file, then enter the following command in a terminal window:
./ma_upgrade.sh
-
A warning message regarding backup and restore is displayed followed by the message for including security settings.
If you have customized any files, take a backup and restore them after installation.
-
Would you like to continue this upgrade? Type to continue.
If you do not want to include the security configurations, then type n. This stops the upgrade.
-
Do you want to restore custom login pages? Type to confirm.
-
Enter the Access Manager Administration Console user ID.
-
Enter the Access Manager Administration Console password
-
Re-enter the password for verification
-
The system displays the following message when the upgrade is complete:
Upgrade completed successfully.
-
Restore any customized files from the backup taken earlier. To restore the files, copy the files to the respective locations below:
-
/opt/novell/nam/mag/webapps/nesp/WEB-INF/web.xml
-
/opt/novell/nam/mag/webapps/nesp/jsp
-
/opt/novell/nam/mag/webapps/nesp/html
-
/opt/novell/nam/mag/webapps/nesp/images
-
/opt/novell/nam/mag/webapps/agm/WEB-INF/config/current
-
/opt/novell/nam/mag/webapps/nesp/config
-
/opt/novell/devman/jcc/scripts/presysconfig.sh
-
/opt/novell/devman/jcc/scripts/postsysconfig.sh
-
Migrating Access Gateway Appliance Setup
In migration, you install the latest version of Access Gateway Appliance on a new server, and then migrate the existing data to the new server.
During the migration process, you can either provide a new IP address and host name or reuse an existing IP address and host name.
Prerequisites
In addition to the Section 4.2.1, Prerequisites for Installing Access Gateway Appliance, ensure that the following prerequisites are met before migrating Access Gateway Appliance:
-
You have completed upgrading all instances of Administration Console and Identity Server before migrating the Access Gateway Appliance.
-
(If the services are managed by an L4 switch) You have removed the device that needs to be migrated from the L4 switch. This prevents the L4 switch from sending the request of the users to that device during migration.
Add the device to the L4 switch after the migration is complete.
-
The upgrade path mentioned in the Release Notes applies to the migration path of Access Gateway Appliance. Ensure that you are migrating Access Gateway Appliance from 4.4 Service Pack 2 (4.4 SP2) or later to the latest version.
If you have older versions prior to the Access Gateway Appliance 4.4 Service Pack 2, first upgrade from a supported upgrade path to 4.4 Service Pack 2 using the instructions at Upgrading Access Gateway Appliance in the Access Manager 4.4 Installation and Upgrade Guide.
-
(For using an existing IP address) You have backed up customized files, if any.
It is important to take the backup of the customized files if you are reusing the same IP address.
Take a backup of the following files if these are customized:
-
/opt/novell/nam/mag/conf/server.xml
-
/opt/novell/nam/mag/conf/tomcat.conf
-
/opt/novell/nam/mag/conf/web.xml
-
/opt/novell/nesp/lib/webapp/WEB-INF/web.xml
-
/opt/novell/nam/mag/webapps/nesp/jsp/
-
/opt/novell/nam/mag/webapps/nesp/images/
-
/opt/novell/nam/mag/webapps/agm/WEB-INF/config/current/ErrorPagesConfig.xml
-
/etc/opt/novell/apache2/conf/extra/httpd-multilang-errordoc.conf
-
/opt/novell/apache2/share/apache2/error/include/top.html
-
/opt/novell/apache2/share/apache2/error/include/bottom.html
-
/opt/novell/apache2/share/apache2/error/images/
-
-
(For using new IP address) Adding the new Access Gateway Appliance in the existing cluster restores the files mentioned in the tab of on Administration Console. If code promotion was performed earlier to get the existing version, a custom file cache is pushed instead of the files mentioned in the tab.
If you have customized the server.xml and the web.xml files, ensure to take a back up of those files because these files are not restored automatically.
-
(For using existing IP address) Make a note of the IP address and the host name (with the domain name such as, server.domain.com) of the existing Access Gateway Appliance before migrating to the latest Access Gateway Appliance. The IP address that the existing Access Gateway Appliance uses to communicate with Administration Console will be used for installing the new Access Gateway Appliance.
-
(For using existing IP address) The number of network interfaces along with their values are same for both the new Access Gateway Appliance and the existing Access Gateway Appliance.
-
You have physical access to the server or server console (in case of VMWare setups) as a root user.
-
The required ports are opened in the firewall. For more information about ports, see Section 1.8, Setting Up Firewalls.
-
Determine if you want to reuse your existing IP address or use a new IP address to setup the system.
-
Verify if you have configured any Access Gateway advanced option that refers to a non-default folder in the file system. If yes, you must manually create the folders with the same name before migrating a new Access Gateway Appliance.
For example, if you have configured the CoreDumpDirectory option as CoreDumpDirectory /data/cores, then before migrating Access Gateway Appliance, create the /data/cores folder.
Migrating Access Gateway Appliance
Migrating the existing Access Gateway Appliance to new Access Gateway Appliance will not cause any disruption to the existing setup. You can add new Access Gateway Appliance nodes into the existing Access Gateway Appliance cluster. They can co-exist, but it is recommended to replace all the existing nodes to the latest version.
You can select any one of the following approaches to migrate to Access Gateway Appliance 4.5:
Using the Existing IP Address
Workflow:
-
Back up any files that you have customized and note down the IP address and host name of the existing Access Gateway Appliance.
-
Shut down the existing Access Gateway Appliance.
-
Install Access Gateway Appliance with the IP address and host name noted in Step 1.
-
Restore any customized files from the backup taken earlier.
Use case:
You are upgrading Access Manager 4.4 Service Pack 2 (4.4 SP2) to Access Manager 4.5. After upgrading Administration Console and Identity Server to 4.5 version, you require to migrate Access Gateway Appliance to the 4.5 version using the existing IP address.
This scenario assumes that you have a server with the system requirements as mentioned at NetIQ Access Manager System Requirements to install the new Access Gateway Appliance.
Consider that the setup includes the following components:
-
Access Manager 4.5 Administration Console (primary Administration Console: AC 1)
-
Access Manager 4.5 Identity Server cluster (primary Identity Server: IDP 1 and secondary Identity Server: IDP 2)
-
Access Manager 4.4 SP2 Access Gateway Appliance cluster (primary Access Gateway: AG 1 and secondary Access Gateway: AG 1, AG 2 and A G 3)
Migration process:
-
If you are first migrating AG 2 using the existing IP address of AG 2, ensure you do the following:
-
Shut down AG 2
-
Ensure that you have met the Prerequisites.
-
-
Install the Access Gateway Appliance (newAGA 2) with the same IP address and hostname as of the 4.4 SP2 Access Gateway Appliance (AG 2). For information about installing the new Access Gateway Appliance, see Section 4.2, Installing Access Gateway Appliance.
After the installation is complete, the configuration sync up takes some time. Do not modify any configuration during this time.
When the configuration is synced up, the health of this Access Gateway Appliance and the other members of the cluster turn green.
NOTE:After the installed Access Gateway Appliance turns green, it is recommended to migrate all the other members of Access Gateway Appliance to Access Gateway Appliance 4.5 before applying the changes by using the update option in Administration Console.
-
Restore any customized files that you backed up earlier as part of Prerequisites.
server.xml: If you have modified any elements or attributes in the 4.4 Service Pack 2 environment, the corresponding changes will need to be applied to the /opt/novell/nam/mag/conf/server.xml file of the new Access Gateway Appliance.
Typical changes done to the server.xml in 4.4 SP2 include modifying the 'Address=' attribute to restrict the IP address the application will listen on, or 'maxThreads=' attribute to modify the number of threads.
In the following example, 4.4 SP2 has customized maxThreads value.
<Connector port="9029" enableLookups="false" protocol="AJP/1.3" address="127.0.0.1" minSpareThreads="25" maxThreads="300" backlog="0" connectionTimeout="20000", ... ../>
Make a note of the customizations and copy paste the changed values in the new server.xml file.
-
Test the Access Gateway Appliance functionality by accessing Access Gateway protected resources and ensuring that pages are rendered successfully.
-
Repeat Step 1 through Step 4 until you have completely migrated all the existing 4.4 SP2 Access Gateway Appliance (AG 1 and AG 3) to Access Gateway Appliance 4.5.
-
On the newly added Access Gateway Appliance, restart Tomcat by using the /etc/init.d/novell-mag restart or rcnovell- mag restart command.
Using a New IP Address
Workflow:
-
Back up any files that you have customized.
-
Install the new Access Gateway Appliance.
For information about installing the new Access Gateway Appliance, see Section 4.2, Installing Access Gateway Appliance.
-
Restore the customized files from the backup taken earlier.
Use case
You are upgrading Access Manager 4.4 SP2 to Access Manager 4.5. After upgrading Administration Console and Identity Server to 4.5 version, you require to migrate Access Gateway Appliance to the 4.5 version using the new IP address.
This scenario assumes that you have a server with the system requirements as mentioned at NetIQ Access Manager System Requirements to install the new Access Gateway Appliance.
Consider that the setup includes the following components:
-
Access Manager 4.5 Administration Console (primary Administration Console: AC 1)
-
Access Manager 4.5 Identity Server cluster (primary Identity Server: IDP 1 and secondary Identity Server: IDP2)
-
Access Manager 4.4 SP2 Access Gateway Appliance cluster (primary Access Gateway: AG 1 and secondary Access Gateway: AG 2).
Migration process:
-
Determine the primary server in the 4.4 SP2 Access Gateway cluster.
In this scenario, AG 1 is the primary server. To verify which is the primary server in your set up, perform the following:
-
Log in to Administration Console.
-
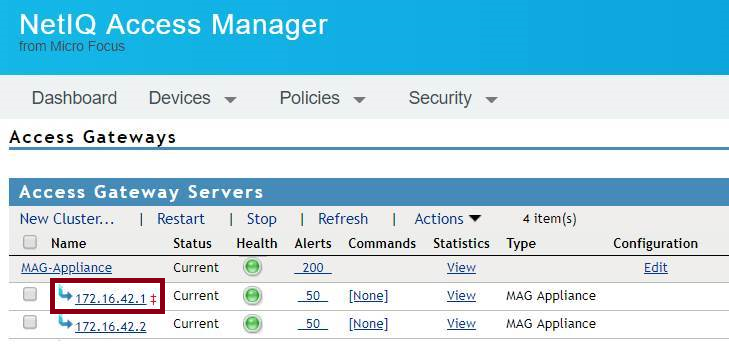
Click , and select the cluster.
The primary server is indicated by a red mark beside the IP address.
-
-
Install the new Access Gateway Appliance (newAGA 1). For more information, see Section 4.2, Installing Access Gateway Appliance.
After the installation, you must configure Access Gateway Appliance to specify the IP address of Administration Console (AC 1), user name, and password in the field on the Appliance Configuration page.
-
Add the newly installed Access Gateway Appliance to the existing Access Gateway Appliance 4.4 Service Pack 2 cluster.
-
By default, all proxy services of newly added devices to the cluster listen on the same IP address and port. To configure each reverse proxy service to a specific IP address and port, perform the following steps:
-
Configure a primary IP Address in YaST for the remaining interfaces.
-
Go to YaST > Network Devices > Network Settings > Overview.
-
Select the network card and click .
-
Specify the IP address.
Repeat the steps for all the interfaces.
-
-
Click > , and select the device.
-
Click > .
-
Add the secondary IP address, if applicable, to the interfaces from > .
-
Configure the DNS in > .
-
Add the Host entries (if any) in > .
-
Set up the routing (if any) in > .
-
Under Services, click . In the , click the proxy service name. Select the newly added cluster member and select the for that service.
(Optional) If you want to specify the outbound connection to the web server, click > . Select the and select the IP address from the list against if you want to select the outbound IP address to communicate with the web server.
-
Restore any customized files that you backed up earlier as part of Prerequisites.
The files mentioned in Administration Console at > > get restored automatically:
Copy the content of the server.xml file to the corresponding file in the new location.
Typical changes done to the server.xml in 4.4 SP2 include modifying the 'Address=' attribute to restrict the IP address the application will listen on, or 'maxThreads=' attribute to modify the number of threads.
server.xml: If you have modified any elements or attributes in the 4.4 SP2 environment, the corresponding changes will need to be applied to the /opt/novell/nam/mag/conf/server.xml file of the new Access Gateway Appliance.
In the following example, 4.4 SP2 contains maxThreads value.
<Connector port="9009" enableLookups="false" redirectPort="8443"protocol="AJP/1.3" address="127.0.0.1" minSpareThreads="25" maxThreads="300" backlog="0" connectionTimeout="20000", ... ../>
Make a note of the customizations and copy paste the changed values in the new server.xml file.
-
-
Test the Access Gateway Appliance functionality by accessing Access Gateway protected resources and ensuring that the pages are rendered successfully.
-
On the Administration Console, specify AGA 1 as the primary server and click .
-
Remove 4.4 SP2 Access Gateway Appliance (AG 1) from the cluster.
-
Install new Access Gateway Appliance (AGA 2) as in Step 2 and add it to the 4.4 SP2 Access Gateway Appliance cluster as in Step 3.
-
After you confirm that all the services are running remove 4.4 SP2 Access Gateway Appliance (AG 2) from the cluster.
-
Click > .
-
Repeat Step 2 to Step 5 until you migrate all existing Access Gateway Appliance from 4.4 Service Pack 2 to 4.5.
After installing Access Gateway Appliance, delete all 4.4 SP2 Access Gateway Appliances from Administration Console.
-
On the newly added Access Gateway server, restart Tomcat by using the /etc/init.d/novell-mag restart or rcnovell-mag restart command.
Upgrading Access Gateway Service
Prerequisites
Manually back up the tomcat.conf and the server.xml files from /opt/novell/nam/mag/conf.
The ag_upgrade.sh script takes care of backing up the remaining customized files automatically. These files get automatically backed up at the /root/nambkup folder and includes apache configuration and error pages.
IMPORTANT:(Applicable for RHEL) When more than 60 proxy services are configured, Apache fails to start after upgrade. RHEL has 128 semaphore arrays by default which is inadequate for more than 60 proxy services. Apache 2.4 requires a semaphore array for each proxy service.
You must increase the number of semaphore arrays depending on the number of proxy services you are going to use. Perform the following steps to increase the number of semaphore arrays to the recommended value:
-
Open /etc/sysctl.conf
-
Add kernel.sem = 250 256000 100 1024
This creates the following:
Maximum number of arrays = 1024 (number of proxy services x 2)
Maximum semaphores per array = 250
Maximum semaphores system wide = 256000 (Maximum number of arrays x Maximum semaphores per array)
Maximum ops per semop call = 100
-
Use command sysctl -p to update the changes
-
Start Apache.
Process
-
Download the AM_45_AccessGatewayService_Linux_64.tar.gz file from the NetIQ download site and extract it by using the following command:
tar -xzvf <AM_45_AccessGatewayService_Linux_64.tar.gz>
-
Run the ag_upgrade.sh script from the folder to start the upgrade.
-
Specify the following information:
User ID: Specify the name of the administration user for Administration Console.
Password and Re-enter Password: Specify and re-enter the password for the administration user account.
Access Gateway Service is upgraded. The following message is displayed when upgrade is complete:
Starting Access Manager services...
Backup of customized files are available at /root/nambkup. Restore them if required.
-
View the log files. The install logs are located in the /tmp/novell_access_manager/ directory.
-
Restore any customized files from the backup taken earlier as part of steps in Prerequisites.
To restore the files, copy the content of the following files to the corresponding file in the new location.
Old File Locations
New File Location
/root/novell_access_manager/apache2/(contains apache var files)
/opt/novell/apache2/share/apache2/error
/root/novell_access_manager/nesp/ (contains modified error pages)
/var/opt/novell/tomcat/webapps/nesp/jsp/
server.xml:
If you have modified any elements or attributes in the 4.4.x environment the corresponding changes will need to be applied to the 4.5 server.xml file.Typical changes done to the server.xml include modifying the 'Address=' to restrict the IP address the application will listen on, or 'maxThreads=' attributes to modify the number of threads.
In the following example, 4.4.x has customized maxThreads value.
<<Connector port="9009" enableLookups="false" redirectPort="8443" protocol="AJP/1.3" address="127.0.0.1" minSpareThreads="25" maxThreads="700" backlog="0" connectionTimeout="20000, ... ../>
Make a note of the customizations and copy paste the changed values in the 4.5 server.xml file
tomcat.conf:
Copy any elements or attributes that you have customized in the tomcat8.conf file to the tomcat.conf file.For example, if you have included the environment variable to increase the heap size by using -Xmx/Xms/Xss attributes in the tomcat8.conf file, copy this variable to the 4.5 /opt/novell/nam/idp/conf/tomcat.conf file.
-
Modify the required properties in /opt/novell/nam/mag/webapps/agm/WEB-INF/agm.properties using back up file /root/novell_access_manager/agm/agm.properties. If you have customized the agm.properties file from the backup taken in 4.4.x, ensure that you apply the same to the new 4.5 /opt/novell/nam/mag/webapps/agm/WEB-INF/agm.properties file. An example below shows the how to enable the backend webserver's web page caching and the cache location.
apache.disk.cache.enabled=yes
apache.disk.cache.root=/var/cache/novell-apache2
-
Change the ownerships of the following files (with read access to tomcat user) using the following commands:
chown -R novlwww:novlwww /var/opt/novell/tomcat/webapps/nesp/jsp/
chown -R novlwww:novlwww /opt/novell/nam/mag/webapps/agm/WEB-INF/agm.properties
-
On the newly added Access Gateway Service, restart Tomcat using the /etc/init.d/novell-mag restart or rcnovell-mag restart command.
NOTE:If you have customized the Java settings in the /opt/novell/nam/idp/conf/tomcat.conf file, then after the upgrade, you must copy the customized setting to the new file.