36.1 Managing Custom Forms
The following sections explain how to create, modify, delete, and import or export forms.
36.1.1 Task to Create Custom Forms
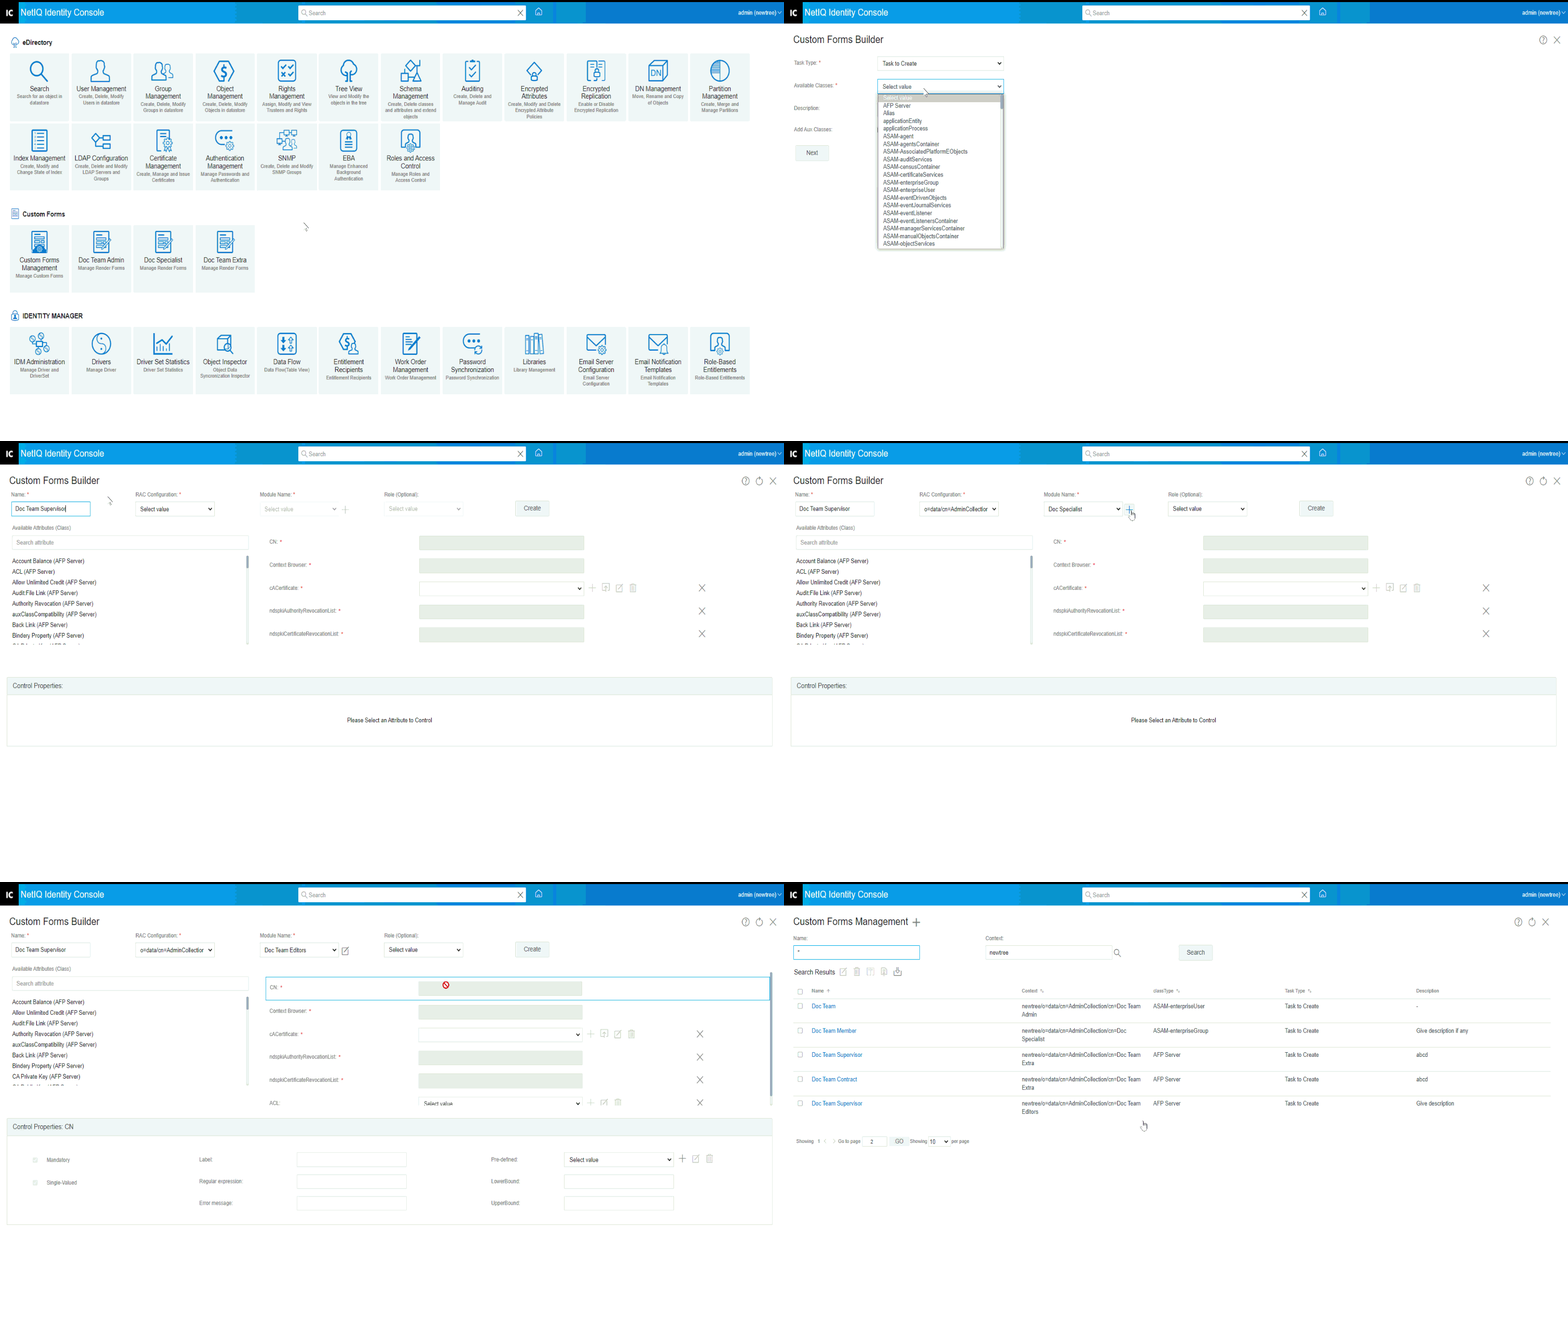
The following procedure explains how to create a Custom Form.
NOTE:Before creating the Custom Forms, ensure that the RAC Configuration exists in the tree.
-
Click Custom Forms Management.
-
On the Custom Forms Management page, click
 .
.The Custom Forms Builder page opens.
-
Select the Task Type.
-
Select the class from the Available Classes.
-
(Optional) Add a description in the Description field.
-
If you want to specify any additional attribute, select Add Aux Class checkbox.
The available Aux Classes list appears.
-
Select the required Aux Class that provides the required attributes.
-
-
Click Next.
A Custom Forms Builder page with Available Attributes (Class) list and Control Properties appears.
-
Enter a name in the Name field.
-
Select the RAC Configuration.
-
Select a Module Name.
-
If a new module is required, click
 .
.
-
-
(Optional) Select a Role.
-
Select the required attributes from the list.
You can change the hierarchy of the attributes by double-click on any Attribute > drag up or down.
-
(Optional) Double-click on the attribute to add the Control Properties. The following are the options to customize your Attributes.
-
Mandatory: When the mandatory checkbox is selected, the user cannot leave the field empty.
-
Read Only: Read-only fields allow the user to view information, but not change the data. In addition, eDirectory attribute fields that are marked readonly gives only read rights through Roles and Access Control.
-
Single Valued: If a control is marked as single valued, the control will not let the user enter more than one value.
-
Label: Customize the name of the attribute as per your requirement, for example: Change the text Last-name to Surname.
-
Regular Expression: A Java-script regular expression that all values must match. If values do not match the regular expression, the error message that is created will be shown.
-
Error Message: An error message that will be shown if a value does not match the regular Expression parameter.
-
Pre-defined Values: This field can be utilized to create a predefined list of value(s).
-
Lower Bound: The lower bound that will be used to validate the field values. If the syntax of the field is Counter, Integer, or Interval the field is a numerical lower bound. Otherwise, it is the lower bound on the length of the string.
-
Upper Bound: The upper bound that will be used to validate the field values. If the syntax of the field is Counter, Integer, or Interval the field is a numerical upper bound. Otherwise, it is the upper bound on the length of the string.
-
-
Click
 .
.The Custom Form Created Successfully message appears.
Figure 36-2 Task to Create Custom Forms

36.1.2 Modifying Custom Forms
The following procedure explains how to modify a Custom Form.
-
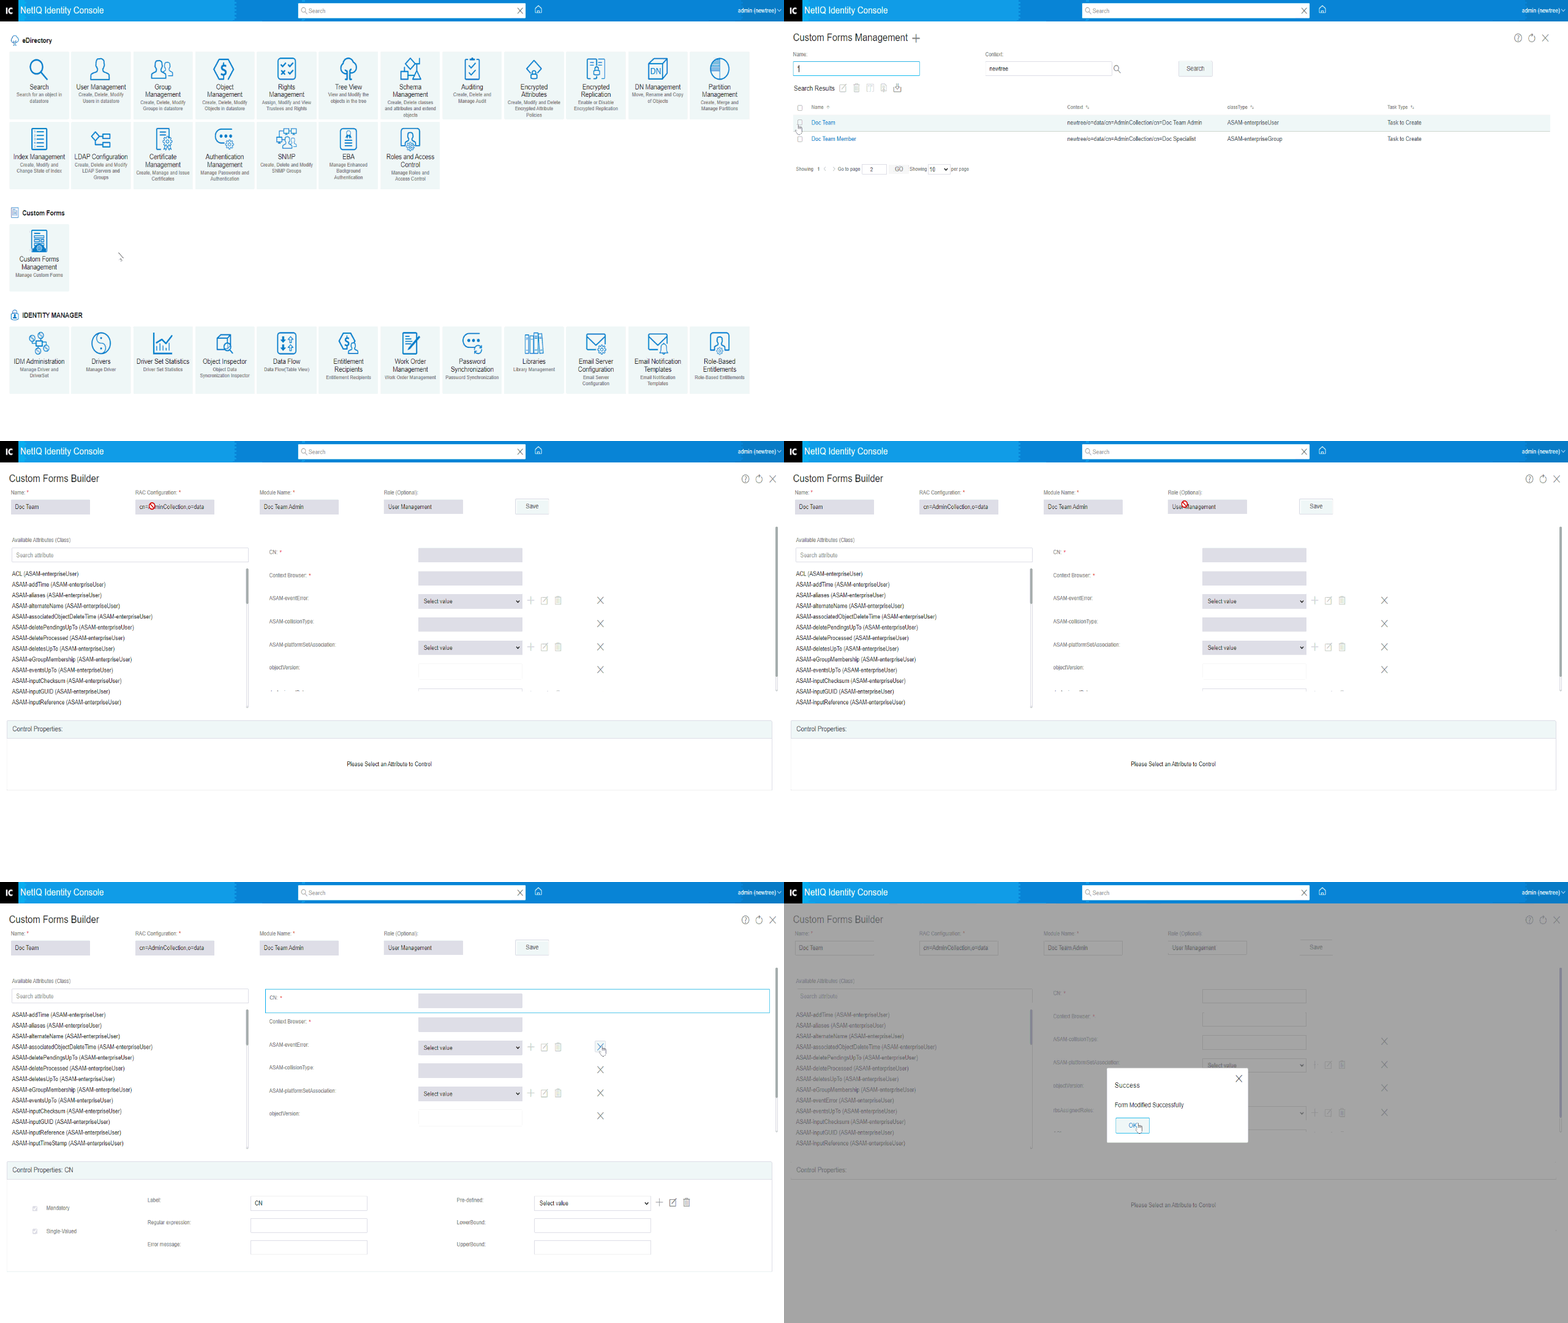
Click Custom Forms Management.
The Custom Forms Management page appears.
-
Select the checkbox against the Form that needs to be modified > click Update Form
 .
.The Custom Forms Builder page opens with a list of all the Attributes.
NOTE:The user cannot modify the Name, RAC Configuration, Module Name, and Role (Optional) fields.
-
Edit or add the required Available Attributes (Class).
-
Edit or add the required Control Properties.
-
Click
 .
.The Form Modified Successfully message appears.
Figure 36-3 Modify Custom Form

36.1.3 Deleting Custom Forms
-
Click Custom Forms Management.
The Custom Forms Management page appears.
-
Select the checkbox against the Form that needs to be deleted. Then click
 .
. -
A Delete Confirm page appears. Click OK to delete.
The Form(s) Deleted Successfully message appears.
36.1.4 Copying Custom Forms
-
Click Custom Forms Management.
The Custom Forms Management page appears.
-
Select the checkbox against the Form that needs to be copied.
-
Click Copy Form
 .
.A Custom Forms Builder page with Available Attributes (Class) list and Control Properties will appear.
-
Edit Available Attributes (Class) list and Control Properties as required.
-
Edit the Name, RAC Configuration, Module Name, and Role (Optional) fields.
-
Click
 .
.The Custom Form Created Successfully message appears.
-
Click OK.
36.1.5 Importing Custom Forms
The following procedure explains importing a Custom Form onto the Identity Console server.
NOTE:While importing the form containing the custom Classes and Attributes, ensure to create related Object Classes and Attributes in your schema.
-
On the Custom Form Management page, click
 Import Form.
The Import Forms page appears. Navigate to the folder where your file is present
-
Select the CustomForms.json file that you want to import.
-
Select the RAC Collection into which you want to import the Custom Form.
-
Click OK.
36.1.6 Exporting Custom Forms
The following procedure explains how to export a Custom Form, making them deployable to other Identity Console servers.
-
On the Custom Form Management page, select the check-box of Custom Form(s) that needs to be exported.
-
Click
 Export Form.