1.3 Introduction to the User Interface
In the Sentinel Control Center user interface, you can perform the activities through the following components:
Sentinel Control Center provides you the “dockable” framework, which allows you to move the Toolbars, Tabs or Frames from their default location to user-specific locations for ease-of-use.
Figure 1-1 Sentinel Control Center

1.3.1 Menu Bar
The menu bar has the menus required to Navigate, perform activities and change the appearance of Sentinel Control Center.
Figure 1-2 Figure 1‑2: Menu Bar

The File, Options, Event Source Management, Windows and Help menus are always available. The availability of other menus depends on your location in the console and permissions.
1.3.2 Toolbar
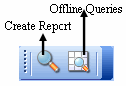
The Tool Bar allows you to perform the Tab specific functions. There are four system-wide toolbar buttons that are always displayed. These toolbar buttons are View Sentinel Help, Cascade All Display Windows, Tile All Display Windows and Save User Preferences. The availability of other toolbar buttons depends on your location in the console and permissions.
System-Wide Toolbar
The system-wide toolbar buttons are:
Figure 1-3 System-Wide Toolbar

Tab Specific Toolbar buttons
Tab-specific toolbar buttons allows you to perform the functions related to each tab.
Table 1-1 Tab Specific Toolbar Buttons
|
Toolbar |
View |
|---|---|
|
Active Views |

|
|
Correlation |

|
|
Incidents |

|
|
iTRAC |

|
|
Analysis |
|
|
Admin |

|
For more information on Tabs-specific toolbar buttons, see the sections on each of the Tabs mentioned in the list above.
1.3.3 Tabs
Depending on your access permissions, Sentinel Control Center displays the following tabs.
-
Active Views
-
Correlation
-
Incidents
-
iTRAC
-
Analysis
-
Advisor
-
Admin
For more information about Tabs, see the sections on each tab.
1.3.4 Frames
Sentinel provides a dock-able framework which allows you to drag frames on the screen to place them in user preferred locations. In a frame the following buttons displays, which allow you to drag/hide frames.
-
Toggle Floating
-
Toggle Auto-hide
Figure 1-4 Navigator Frame

To drag a frame to any location:
-
Click Toggle Floating icon on the Frame or hold the frame and drag it to the desired location.
To hide a frame:
-
Click Toggle Auto-hide icon.
NOTE:You can undo dragging or reset to default position using the toolbar buttons.
1.3.5 Navigating through Sentinel Control Center
To navigate using Toolbar:
-
Click the tab you need to work on.
-
Click toolbar buttons to perform the actions.
To navigate using Menu bar:
-
Click the tab menu in the Menu bar.
-
Select an action you need to perform.
NOTE:This procedure is generic for all the tabs in Sentinel Control Center. Navigation specific procedures for tabs are discussed in the relevant sections.
1.3.6 Changing the appearance of Sentinel Control Center
You can change the Sentinel Control Center’s look by:
Setting the Tab Position
To set the tab position:
-
Click Options > Tab Placement.
-
Select either Top or Bottom.
Cascading Windows
To cascade windows:
-
Click Windows > Cascade All. All open windows in the right panel cascade.
Tiling Windows
To Tile Windows:
-
Click Windows > Tile All.
-
Select from the following to meet your requirement:
-
Tile Best Fit
-
Tile Vertical
-
Tile Horizontal
-
Minimizing and Restoring Windows
To minimize all windows:
-
Click Windows > Minimize All. All open windows in the right panel minimize.
To restore windows to original size:
-
Click Windows > Restore All. All open windows in the right panel restores to their original size.
NOTE:Use the Minimize and Restore options provided on the top-right corner of the tab to minimize individual tabs.
Closing all open Windows
To close all windows:
-
Click Windows > Close All.
1.3.7 Saving User Preferences
If the user has permissions to save their workspace, they can save the following preferences:
-
Permanent windows that are not dependent on data that was available at the time of their original creation.
-
Active Views
-
Summary displays
-
Window positions
-
Window sizes, including the application window
-
Tab positions
-
Navigator docked or floating and showing or hidden
The following preferences are not saved when the user logs out:
-
Snapshots
-
Historical event queries
-
Secondary windows opened from one of the primary windows in the Admin Navigator
-
Column widths in Active Views
To save your preferences:
-
Click File > Save Preferences or click

1.3.8 Changing Password
To change your Sentinel Control Center password:
-
Click Options > Change Password.
-
Provide the old password.
-
Provide the new password and matching confirm password.
-
Click OK.
NOTE:For more information on password security, see Setting Passwords
in Best Practices section
in Sentinel Installation Guide.
1.3.9 Hostname updates
If the hostname of a system is changed, you might need to perform some of the following actions on the system depending on the Sentinel components installed on it.
IMPORTANT:Stop Sentinel Service before you perform these actions.
You might need to update all the machines (which have components affected by the hostname change) before you restart Sentinel service on any machine.
Scenario 1: Change in Sentinel Database Hostname
In this scenario, the affected components are DAS and SDM. So you might need to
-
Update the DAS
-
Update SDM
The configuration file enables DAS to connect to the database. So, you need to update the configuration files to update DAS.
To update DAS:
-
Login to the machine where DAS is installed as esecadm (on UNIX), or as an administrator (on Windows).
-
Stop the Sentinel Services running on the machine.
-
Go to ESEC_HOME\bin:
-
On Unix, type the command cd $ESEC_HOME/bin
-
On Windows, type the command cd /d %ESEC_HOME%\bin
-
-
Update DAS configuration files on Unix and Windows using the following commands.
-
On Unix, execute ./dbconfig -a ../config -h <new DB hostname>.
-
On Windows, execute .\dbconfig -a ..\config -h <new DB hostname>.
-
You require the Database Hostname to login to SDM. To login to SDM, you might need to update the Database Hostname in SDM login window.
To Update SDM
-
Open Sentinel Data Manager.
-
In the login window, provide details of the Database, new hostname and other required details.
-
Click Connect.
Scenario 2: Change in Sentinel Communication Server Hostname
In this scenario, the affected components are Communication Server, DAS, Correlation Engine, Sentinel Collector Manager and Sentinel Control Center. So you might need to
-
Update the Communication Server
-
Update DAS, Correlation Engine, Sentinel Collector Manager, Sentinel Control Center
You might need to re-install the Communication Server to update the Hostname change.
To re-install Communication Server:
-
Login as root (Unix) or administrator (Windows) on the system where the Communication Server is installed.
-
Run Sentinel Uninstaller. In the Select components to Uninstall window, select Communication Server and deselect all other options.
Follow instructions in
Uninstalling Sentinel
in Sentinel 6.1 Installation Guide as required and complete uninstallation. -
Click Finish.
-
Insert (and mount, on Solaris/Linux only) the Sentinel Installer CD.
-
Run the setup file. In the Select components to Install window, select Communication Server only.
Follow the instructions in
Installing Sentinel 6.1 SP2
in Sentinel 6.1 Installation Guide as required and complete installation. -
Reboot the system.
The configuration file that connects the Communication Server and Sentinel processes needs to be updated. You might need to perform the steps given below on all machines with DAS, Correlation Engine, Collector Manager, and Sentinel Control Center installed.
To update DAS, Correlation Engine, Collector Manager, and Sentinel Control Center:
-
Go to ESEC_HOME/config/ and edit configuration.xml.
-
Replace the four occurrences of the Communications Server Hostname with the new Hostname.
-
Save and exit the configuration.xml file.
IMPORTANT:After the steps mentioned above are performed, restart the Sentinel Services for the changes to take affect.
1.3.10 Configuring the Attachment Viewer
To configure the Attachment Viewer:
-
On the Tools menu, click Attachment Viewer Configuration or alternatively click Configure Attachment Viewers button. The Attachment Viewer Configuration window displays.

-
Click Add. The Attachment Identification window displays.

Specify the extension type (such as .doc, .xls, .txt, .html and so on) and click Browse or type in the application program to launch the file type (such as notepad.exe for Notepad).
-
Click OK.