6.6 Transitions
Transitions are used to connect steps. There are several types of transitions:
-
Unconditional
-
Conditional
-
Timeout
-
Alert
-
Else
-
Error
A transition can have the following attributes:
-
Name
-
Description
-
Destination
-
Expression
-
Timeout Values
Different steps have different properties and therefore they are associated with different transition types.
Table 6-5 Steps and Valid Transition
|
Step Type |
Valid Transitions |
|---|---|
|
|
|
|
|
|
6.6.1 Unconditional Transitions
An unconditional transition must always be used from a start step. manual, command, activity, and mail steps can also have unconditional transitions. The only parameter for an unconditional transition is the next step.
This path is taken when the current step is completed (unless a timeout transition is configured and the timeout period elapses).
To add an unconditional transition:
-
Open the Process Builder.
-
Right-click an existing step and select.
-
Specify a name for the transition.
-
Select from the Transition list.

-
Click the down-arrow for the field and select a step.
-
Provide a description for this transition and click .
6.6.2 Conditional Transitions
Select an exit path based on an expression using iTRAC variables set in a manual or command step.
NOTE:You can add Conditional transitions only from a decision step to any other step.
When creating a Conditional transition, the conditional expressions can be based on comparing a variable that is populated during the workflow process to a specific value or to another variable populated during the workflow process. Multiple conditional expressions can be combined or nested using the AND and OR operator.
To add a Conditional transition:
-
Open the Process Builder.
-
Right-click an existing decision step and select .
-
Provide a name for the transition.
-
Select the transition type from the list.

-
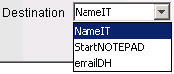
Specify the destination step.
-
Click to add an expression. The empty Expression window displays.

-
Click to add the first expression. The evaluation expression is an expression that evaluates to TRUE or FALSE during the workflow process. Select the appropriate drop-down list under to compare a variable to a constant value (Variables and Values) or to another variable (Variables and Variables).

-
Select a variable from the drop-down list or add a new one if desired.
-
Select a condition from the drop-down list. The condition list varies depending on the type of Attribute variable chosen.
String Variable Conditions:

Integer and Float Variable Conditions:
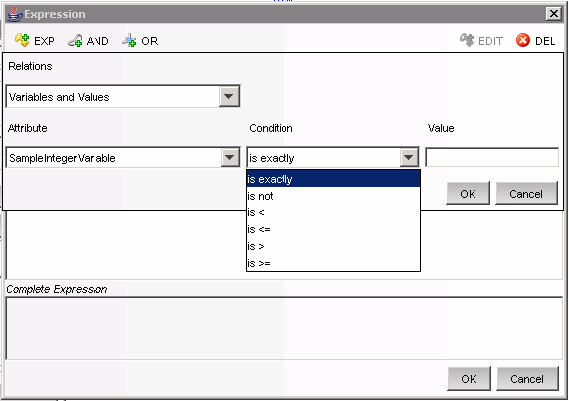
Boolean Variable Conditions:

-
Set the value.
-
Click .
-
If a second expression is desired, select the root folder.

-
Repeat steps 7-12 as needed.
-
By default, all expressions at the root level are separated by AND operators. To nest expressions or to use the OR operator, click the appropriate operator button and drag and drop expressions onto that operator.

-
When the expression is complete, click OK.
You can edit/delete an existing expression using the and buttons in the Expression window.
-
Click . The expressions you provided displays in the Transition window under the Expression section.
-
Provide a description for your transition and click .
6.6.3 Else Transitions
An Else transition leads to a path that is taken from a decision step when the criteria for the Conditional transitions are not met. This transition only applies to decision steps, and every decision step must have an Else transition. The workflow path with the Else transition is only followed if none of the criteria for the Conditional transitions are met.
NOTE:You can add transitions only from a decision step to any other step.
To add an Else transition:
-
Open the Process Builder.
-
Right-click an existing decision step and select .
-
Select the Transition type from the list.
-
Specify the destination step.
-
Provide a description for this step and click .
6.6.4 Timeout Transitions
A Timeout transition leads to a path that is taken when a user-specified amount of time (minutes, hours or days) elapses after a Base Time, which is either step_activated_time or step_accepted_time. Step_activated_time is the time that iTRAC activates this step within the workflow process. Step_accepted_time is the time when a user accepts (or takes ownership) of the worklist item for this step. If the timeout time period passes without the step being completed, control moves to the next step.
Timeout transitions can be set for a manual step or a command step. Step_accepted_time is only relevant for manual steps and should not be selected for a command step.
This transition is represented by a red line.
To add a Timeout transition:
-
Open the Process Builder.
-
Right-click an existing decision step and select .
-
Select the transition type timeout from the list.
-
Specify the destination step.
-
Click to specify the Timeout details. The timeout details window displays.
-
Specify the timeout value in minutes, hours, or days. Click .
-
Select .
-
Provide a description for your transition and click .
6.6.5 Alert Transitions
An Alert transition leads to a path that is taken when a user-specified amount of time (minutes, hours or days) elapses after step_activated_time or step_accepted_time. At this point, the workflow process is usually escalated to a user who can intervene and take action.
Step_activated_time is the time that iTRAC activates this step within the workflow process. Step_accepted_time is the time when a user accepts (or takes ownership) of the worklist item for this step.
If the alert time period passes without the step being completed, the workflow process branches into two active paths. The original step remains active for user intervention. The alert path is also initiated. For example, the alert path might escalate the workflow process to the attention of a supervisor, although the main path is still open and the original owner still has the option to complete the worklist item. Another example is that if a command is taking too long to run, you might want to alert an analyst to investigate the delay or possibly run the command manually.
Alert transitions can be set for a manual step or a command step. Step_accepted_time is only relevant for manual steps and should not be selected for a command step.
This transition is represented by a yellow line.
To add an Alert transition:
-
Open the Process Builder.
-
Right-click an existing decision step and select .
-
Select the Alert transition type from the list.
-
Specify the destination step.
-
Click Set to provide the Alert details. The Alert details window displays.
-
Specify the Alert Time value, in minutes, hours, or days. Click .
-
Provide a description for your transition and click .
6.6.6 Error Transition
An Error transition leads to a path that is taken if an automated step cannot successfully complete. Error transitions can be used for command, mail, and activity steps (for example, if a command step fails to execute).
Error transitions should typically lead to some kind of notification. For example, an Error transition might lead to a manual step in which the user is instructed to manually run a process that previously failed.
NOTE:The Error transition is only taken if the iTRAC call to the command, mail, or activity step fails. If there is an internal error with the command script or the mail server fails, this does not satisfy the conditions for an Error transition.
Only the destination step can be specified, along with a description.
To add an Error transition:
-
Open the Process Builder.
-
Right-click an existing decision step and select .
-
Select the Error transition type from the list.
-
Specify the destination step.
-
Provide a description for this step and click .
6.6.7 Managing Transitions
After creating a transition, you can edit or delete the transition.
Modifying Transitions
-
Click the tab.
-
In the Navigator, click .
-
Select an existing template, then click . The iTRAC Process Builder window displays.
-
Double-click an existing transition line. The Transitions window displays.
-
Edit the transition as needed.
-
If you are editing an expression from a decision step, click the button and double-click the expression.

-
Edit as needed.
-
Click until you exit the Transitions window.
-
Click .
Deleting Transitions
-
Click tab.
-
In the Navigator, click .
-
Select an existing template, then click View/Edit. The iTRAC Process Builder window displays.
-
Right-click an existing step and select .
-
In the Alert Message window, click .