1.3 Reporting
You can upload, run, view, and delete reports or report definitions by using the Sentinel Rapid Deployment Web interface. You can run a report by using the desired parameters (such as start and end date) as given in the report definition. The report results are saved with a name of your choice. After the report runs, you can retrieve the results and view them as a PDF file.
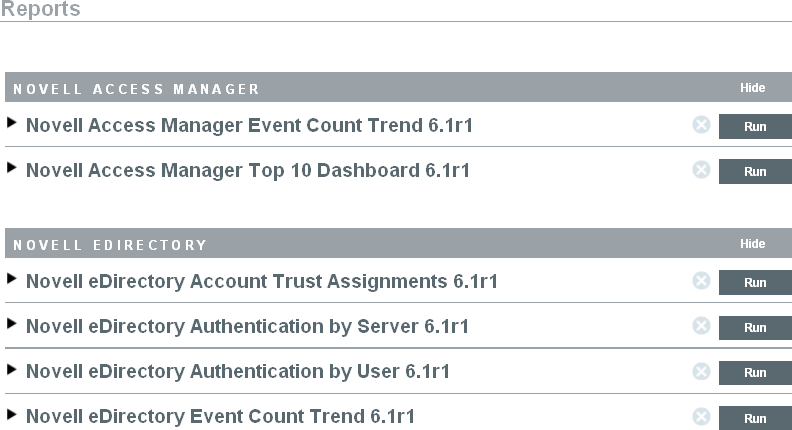
Reports are organized by category.
1.3.1 Running Reports
Sentinel Rapid Deployment is installed with a set of reports organized into several product categories. Reports run asynchronously, so you can continue to do other things in the application while the report is running. You can view the PDF report results after the report finishes running.
Many report definitions include parameters. You are prompted to set them before running the reports. Depending on how the report developer designed the report, the report parameters can be text, numbers, Boolean values, or dates. A parameter might have a default value or a list based on values in the Sentinel RD database.
IMPORTANT:If a report in progress is canceled by using the link, the query on the database is canceled.
Manually Running a Report
-
Click to display the available reports.
-
If desired, click a report definition to expand it. If you see a link, you can click to find out how the completed report looks with a set of sample data.
-
Select the report you want to run and click .
-
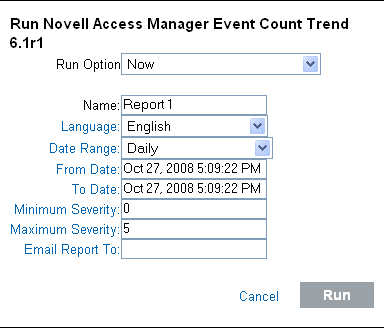
Specify the following:
The report parameters are specific to the report definition. Therefore, the report parameters might vary based on the report definition you select.
-
Click .
A report results entry is created and mailed to the designated recipients.
1.3.2 Viewing Reports
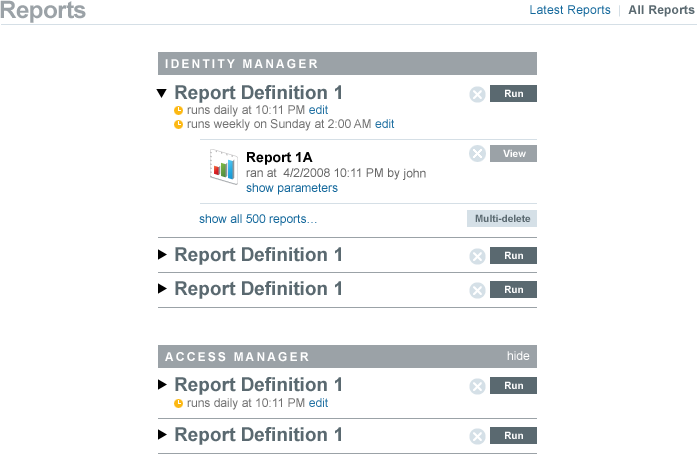
You can view the reports for different applications in the Sentinel Rapid Deployment Web interface for reports. The report GUI by default shows up to 10 report results for any given report definition. The 10 report results displayed are the 10 most recent report results for that report definition.
If there are more than 10 report results for any given report definition (that is, the report has been run more than 10 times), a link is displayed after the 10th report, where x is the total number of results available for that given report definition.
-
To view the list of report results, click .
All previously run reports are shown with the user-defined report name, the user who ran them, and the time the report was run.
IMPORTANT:The default number of report results to be displayed for each report definition is managed by the reporting.reportResultsDisplayed property specified in the das_core.xml file.
<obj-component id="JasperReportingComponent">
<class>esecurity.ccs.comp.reporting.jasper.JasperReportingComponent</class><property name="reporting.reportResultsDisplayed">10</property></obj-component>
You can change the reporting.reportResultsDisplayed property value. After changing this value, ensure that you restart the das_core to apply the changes.
-
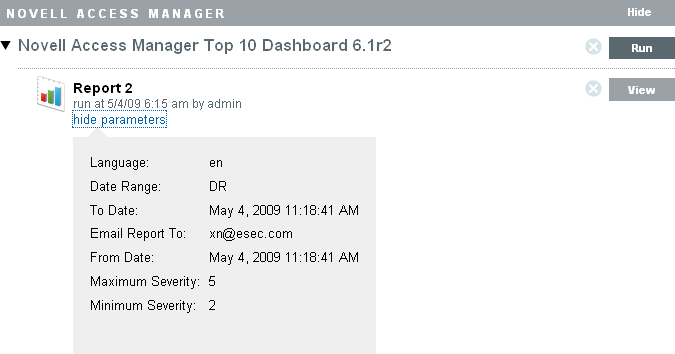
Click to see the exact values used to run the report.
-
For Date Range, D=Current Day, PD=Previous Day, W=Week To Date, PW=Previous Week, M=Month To Date, PM=Previous Month, and DR=Custom Date Range.
-
For Language, en=English, fr=French, de=German, it=Italian, ja=Japanese, pt=Brazilian Portuguese, es=Spanish, zh=Simplified Chinese, and zh_TW=Traditional Chinese.
-
-
Click for the report results you want to see. The report results are displayed in a new window in .pdf format.
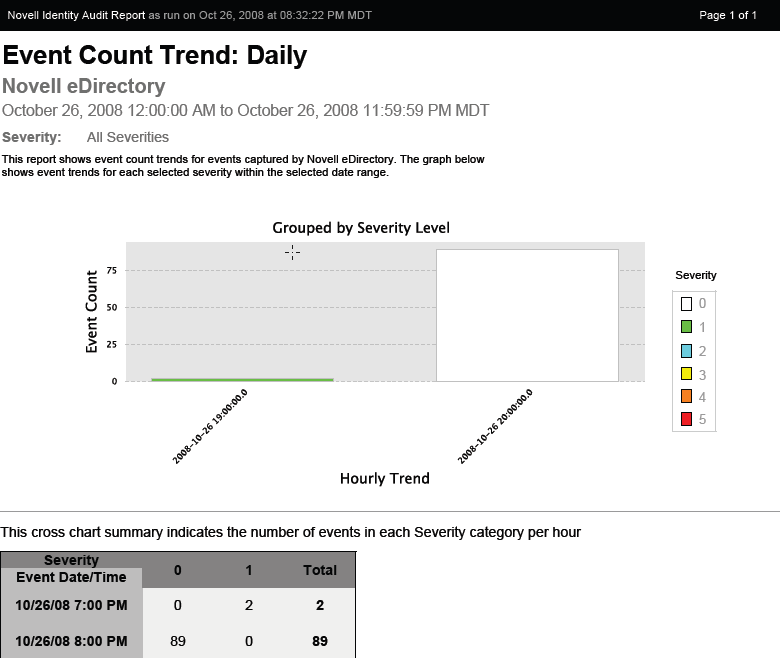
HINT:Report results are organized from newest to oldest.
1.3.3 Scheduling a Report
When you run a report, you can run the report immediately or schedule it to be run later, either once or on a recurring basis. For scheduled reports, you must choose a frequency and enter a time at which the report should run.
-
Now: This is the default. It runs the report immediately.
-
Once: Runs the report once at the specified date and time.
-
Daily: Runs the report once a day at the specified time.
-
Weekly: Runs the report once a week on the same day at the specified time.
-
Monthly: Runs the report on the same day of the month every month, starting at the specified date and time. For example, if the start date and time is October 28 at 2:00 p.m, the report runs on the 28th day of the month at 2:00 p.m.every month.
NOTE:All time settings are based on the browser’s local time.
Figure 1-2 Scheduled Reports
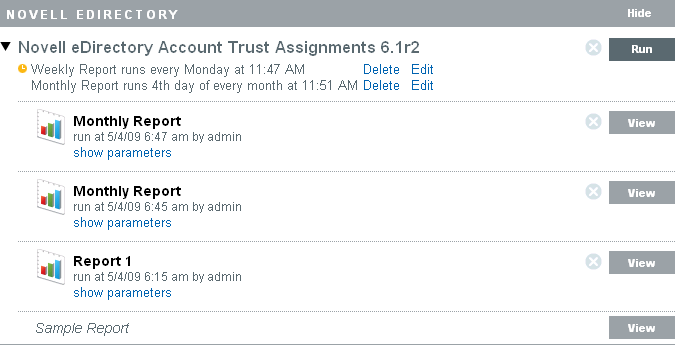
Report schedules can be removed or modified by using the and links.
1.3.4 Managing Reports
Sentinel Rapid Deployment users can add, delete, update, and schedule reports.
Adding Reports
Any user can add or update reports in Sentinel Rapid Deployment.
Downloading New or Updated Reports
New or updated reports by Novell can be downloaded from the Novell Content Web site.
Adding New Reports
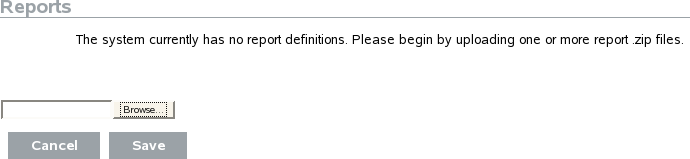
Sentinel Rapid Deployment comes preloaded with reports, but new report plug-ins (special .zip files that include the report definition plus metadata) can be uploaded into Sentinel Rapid Deployment. If there are no reports in the system, the following screen displays:
Figure 1-3 No Reports Loaded
To add a report:
-
Click the button on the left side of the screen.
-
Click the button.
-
Browse and select the report plug-in .zip file on your local machine.
-
Click .
-
Click .
-
If the same report already exists in the report repository (based on the report’s unique ID), decide whether to replace the existing report.
Sentinel Rapid Deployment displays the details of both the report in the system and the one being imported. In the example below, the imported report is the same version as the existing report.
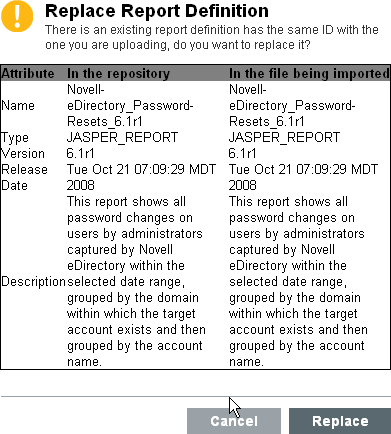
The new report definition is added to the list in alphabetical order and can be run immediately, if desired.
Creating New Reports
Users can modify or write reports by using JasperForge iReport. a graphical report designer for JasperReports. iReport is an open source report development tool that is available for download from JasperForge.org (as of the time of this publication).
New or modified reports can include additional database fields that are not presented in the Sentinel Rapid Deployment Web interface. They must adhere to the file and format requirements of the report plug-ins. For more information about database fields and file and format requirements for report plug-ins, see the Sentinel SDK Web site.
Renaming Report Results
Report results (but not report definitions) can be renamed in the interface.
-
Click the button on the left side of the screen.
-
Click a report name to expand it.
-
Click the name of the report results you want to rename.
-
Specify the new name.
-
Click .
Deleting Reports and Report Definitions
Deleting Report Definitions
You can delete either a set of report results or a report definition by using the  button at the right side of the report definition. If a report definition is deleted, all associated report results are also deleted.
IMPORTANT:Only the users with Manage Reports permissions can delete the report definitions.
For more information on permissions, see Reporting
in the Sentinel 6.1 Rapid Deployment Reference Guide.
Deleting Report Results
There are two ways to delete report results.
-
Delete a single report by using the
button at the right side of the report result.
IMPORTANT:Users with the Run/View Reports or Manage Reports permission can delete the report results. For more information on permissions, see
Reporting
in the Sentinel 6.1 Rapid Deployment Reference Guide.
-
Delete multiple report results by using the
 option at the bottom right side of the report results for each report definition.
NOTE:If the number of report results you have created for a report definition is less than or equal to the default value, you need to use the
button to delete each report result.
However, you can change the default value by editing the following property of the JasperReportingComponent in the config/das_core.xml file:
<property name="reporting.reportResultsDisplayed">10</property>
After you modify this property value, restart the Sentinel services to apply the changes.
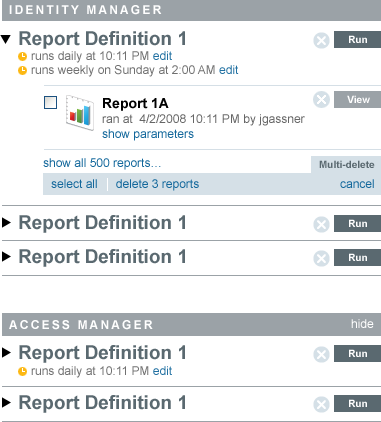
Using the Multi-delete Option
The ![]() option is displayed only if:
option is displayed only if:
-
You have either Run/View Reports or Manage Reports permissions.
-
The number of report results created for a report definition is higher than the default value specified in the Jasper Reporting component.
-
Click the option to:
-
Expand the panel to list and options.
-
Display a check box next to each report result.
-
-
Select the report results for deletion.
You can also use the or options from the options panel.
-
Click to delete the selected report results, where # is the number of report result selected for deletion.
For example, if you select 3 reports for deletion, a option displays under panel. Click to delete all the selected reports. Click and select to remove all the reports for a selected report definition.
Click to remove the panel and the check boxes for all the report results.
Figure 1-4 Multi-delete
Updating Report Definitions
Users can upload updated reports to replace an existing report. For more information, see Adding Reports.