17.2 Action Plug-Ins
You can download action plug-ins from the Sentinel Plug-in Web site.
Action plug-ins are frequently included in Solution Packs. Also, JavaScript actions used in Execute Script actions in versions of Sentinel before Sentinel Rapid Deployment can be converted to action plug-ins by using the Action Manager.
17.2.1 Importing JavaScript Action Plug-Ins
JavaScript plug-ins from Novell or other sources can be imported into Sentinel.
-
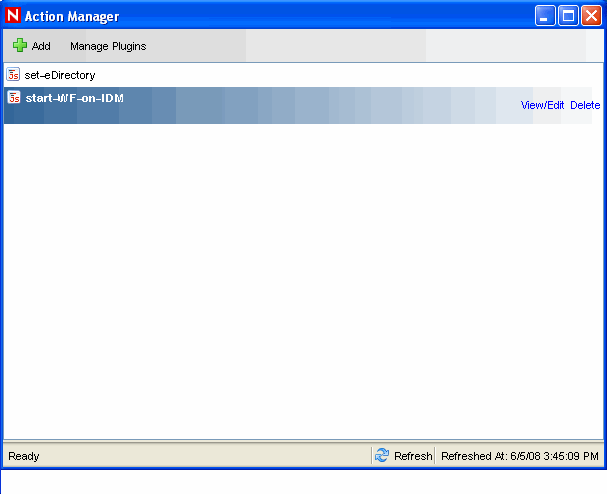
Click . The Action Manager window displays.

-
Click . The Action Plugin Manager window displays.

-
Click the icon on the top left corner to import plug-ins. The window displays.
-
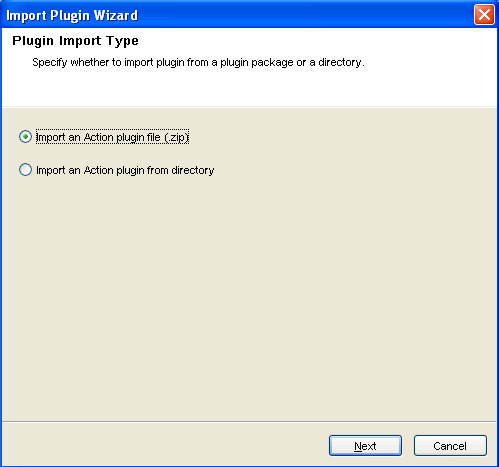
Select Import an Action plugin file (.zip). Click .
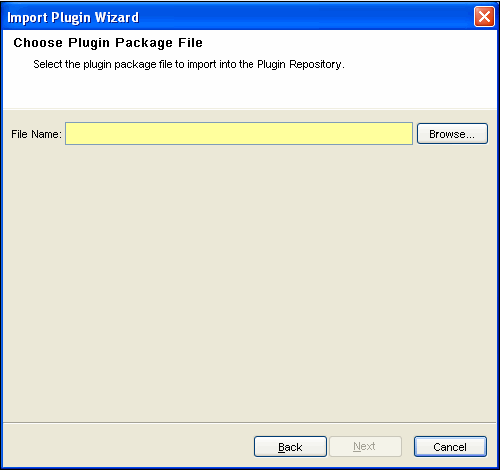
The Choose Plugin Package File window displays.
-
Browse to a location of the plug-in package file and click OK, then click .
If the file you have selected is not the proper format, the Next button does not activate.
If you are updating an already-imported plug-in file, you are provided with the option of updating the existing plug-in, going back and selecting a different plug-in, or canceling the import.
-
If you want to continue, click .
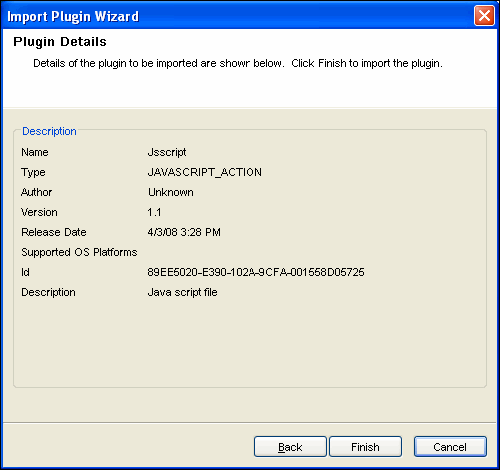
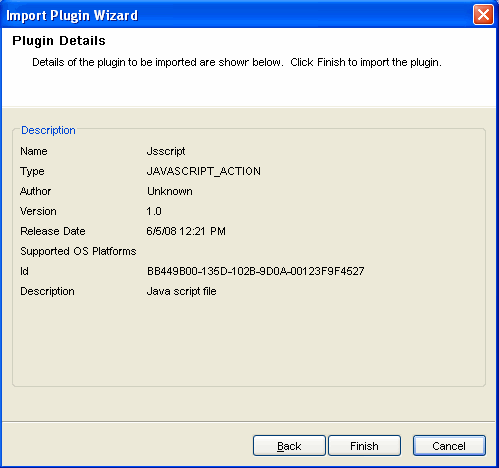
The Plugin Details window displays. Details of the plug-ins to be imported are displayed.
-
Click .
17.2.2 Importing JavaScript Files
Although JavaScript action plug-ins can be obtained from Novell, it is also possible to create and manage your own JavaScript action plug-ins. Plug-ins can be created by using JavaScript files that were used in the Execute Script command in versions prior to Sentinel Rapid Deployment, or they can be created using any JavaScript file written by using the Sentinel JavaScript API.
NOTE:For information about the API for developing JavaScript scripts for Sentinel correlation, see Sentinel JavaScript Action API on the Novell Developer Community Web site .
After you import a JavaScript file into Sentinel, a JavaScript action plug-in is created and stored in the central plug-in repository. Then the action plug-in can be used to configure an action instance. Unlike the Sentinel 6.0 Execute Script command, the JavaScript file does not need to be manually moved to a specific directory location.
When you import a JavaScript file from a directory, it is important to define the required objects correctly so the JavaScript actions that use the plug-in are available in the right parts of the Sentinel Control Center interface. The following table shows the Required Objects options in the import wizard and where the actions are available if those options are selected.
Table 17-1 Required Objects
To import JavaScript files:
-
Click . The Action Manager window displays.
-
Click . The Action Plugin Manager window displays.

-
Click the icon on the top left corner to Import plug-ins. The Plugin Import Type window displays.

-
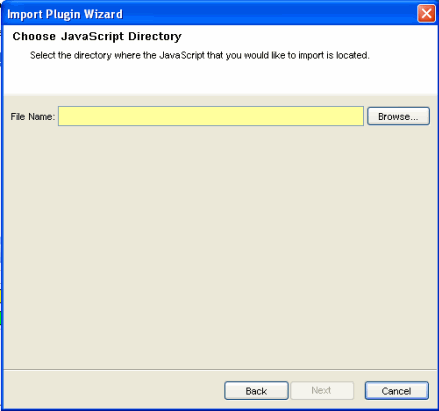
Select . The Choose JavaScript Directory window displays.
-
Browse to a location of the JavaScript Plug-in directory and click , then click .
-
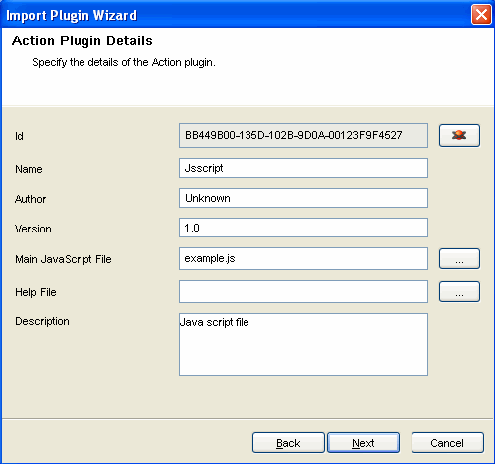
The Action Plugin Detail window displays. Provide the required information. Attach a main JavaScript file and a help file.
If the file you have selected is not the correct format, the Next button does not activate.
When you are updating an already-imported JavaScript file, you are provided with the option of updating the existing plug-in, going back and selecting a different plug-in, or canceling the import.
-
If you want to continue, click .
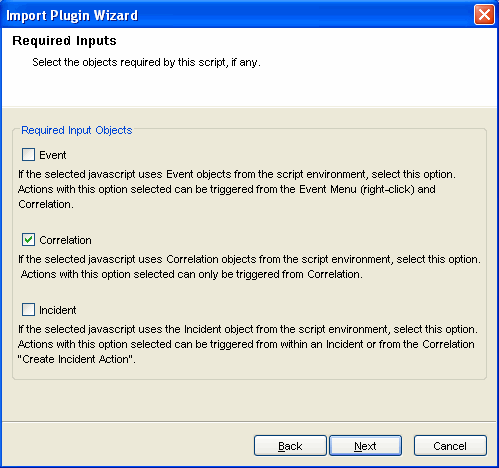
The Required Input window displays.
-
Select the objects that the JavaScript action requires.
This affects where the action is available in the interface. For more information, see the Table 17-1.
-
Click . The Plugin Parameters window displays.

-
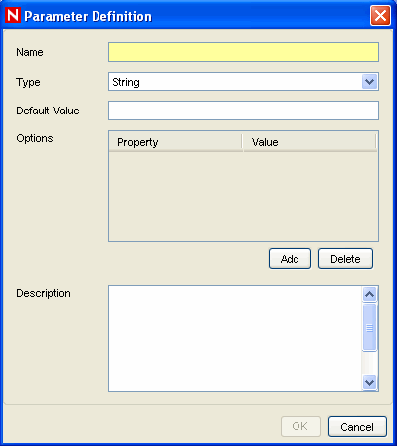
[Optional] Click the Add button to add parameters that can be set when an action is configured.
This option should be used for any JavaScript files that expect to receive parameterized information. The Parameter Definition window displays.
-
Specify the parameter name.
The name used here should be identical to one used in the JavaScript API method scriptEnv.getParameter in the script that is being imported.
-
Select parameter name from Type drop-down list.
The various parameter types available are:
-
String: Accepts the sting values for the parameters.
-
Boolean: The parameter can take a True or False value.
-
Integrator: Select Integrator name for the parameters.
-
Event Tag: Select an Event Tag for the parameters.
-
Severity: Select the Severity for the parameters.
NOTE:The Options area is only available for string-type parameters.
-
-
(Optional) Specify a description.
-
Click .
The Plugin Details window displays. Details of the plug-ins to be imported are displayed.
-
-
Click .
If the directory from which the JavaScript file is imported contains a package.xml file, the system updates the package.xml file with the information defined in the wizard. If no package.xml file exists in the directory, a new package.xml file is automatically created.
An action plug-in is also created from the JavaScript file. The package.xml file is zipped as part of the JavaScript plug-in along with other files in the specified directory.
NOTE: When a plug-in is created from a directory, the original contents of the directory are stored in a backup .zip file located on the same directory level as the directory being zipped. The name of the backup file is in the format <Directory Name>_<Randomly Generated Number>_bak.zip where <Directory Name> is the directory in which the plug-in is created.
The following is the example of package.xml file:
<?xml version="1.0" encoding="UTF-8"?>
<JavaScriptActionPackage>
 <ID>FA6944D0-DC43-102A-976F-001321B5C0B3</ID>
 <Name>Example JavaScript Plugin</Name>
 <Type>JAVASCRIPT_ACTION</Type>
 <DisplayName>Example JavaScript Plugin</DisplayName>
 <Author>Novell Engineering</Author>
 <Version>61r1</Version>
 <ReleaseDate>1206414663439</ReleaseDate>
 <MainScriptFile>example.js</MainScriptFile>
 <Description>An example JavaScript Action plugin.</Description>
</JavaScriptActionPackage>
NOTE:When a plug-in is created from a JavaScript file and an existing package.xml file, the package.xml file is updated with the list of files contained in the package, hash codes, current dates, and so on.