11.11 User Configurations
You must have the user permission in order to work in the User Configuration window.
User configuration allows you to:
The installer will create the following default users on the Sentinel Server:
11.11.1 Oracle and Microsoft SQL 2005 Authentication:
-
esecdba: Schema owner (configurable at install time).
-
esecadm: Sentinel administrator user (configurable at install time).
NOTE:For UNIX, the Installer also creates the operating system user with the same user name and password.
-
esecrpt: Sentinel Reporter User, password as the admin user.
-
ESEC_CORR: Sentinel Correlation Engine users, used to create incidents.
-
esecapp: Sentinel application username for connecting to the database.
11.11.2 Windows Authentication:
-
Sentinel DB Administrator: Schema owner (configurable at install time).
-
Sentinel Administrator: Sentinel administrator user (configurable at install time).
-
Sentinel Report User: Sentinel Reporter user, password as the admin user.
-
Sentinel Application DB User: Sentinel application username for connecting to the database
11.11.3 Opening the User Manager Window
To open the User Manager window:
-
Click the Admin tab.
-
Click Admin > User Configuration.
11.11.4 Creating a User Account
In order to meet stringent security configurations required by Common Criteria Certification, Sentinel requires a strong password with the following characteristics:
-
Select passwords of at least 8 with characters in length that includes at least one uppercase letter, one lower case letter, one special symbol (!@#$%^&*()_+), and one numeral (0-9).
-
Your password should not contain your e-mail name or any part of your full name.
-
Your password should not be a common word. For example, it should not be a word in the dictionary or slang in common use.
-
Your password should not contain words from any language, because numerous password-cracking programs exist that can run through millions of possible word combinations in seconds.
-
You should select a password you can remember that is still complex. For example, Msi5!YOld (My Son is 5 years old) or IhliCf5#yN (I have lived in California for 5 years now).
To use this feature, you must have the User Management user permission. User permissions are fairly detailed. For more information, see Sentinel Database Users, Roles, and Access Permissions
in the Sentinel 6.1 Reference Guide.
Creating an LDAP User Account for Sentinel
NOTE:By default, the LDAP option is disabled. Configure the Sentinel 6.1 server as given in Configuring the Sentinel 6.1 Server for LDAP Authentication
in the Sentinel 6.1 Installation Guide to enable this option.
-
Select the tab.
-
Expand the folder in the navigation tree.
-
Select .
The User Manager window is displayed.
-
Click or right-click any user and select .
The Add User window is displayed.
-
In the Add user window, perform the following:
-
Select for authentication.
-
Specify the LDAP username based on the value you specified for
Anonymous searches on LDAP directory
parameter while configuring LDAP authentication.-
y: The must be the same as the eDirectory username or Active Directory sAMAccountName.
-
n: The need not be the same as the eDirectory username or Active Directory sAMAccountName.
-
-
Click the drop-down arrow on the drop-down list.
The Filter Selection window is displayed that lists all the public filters.
-
Select a filter, and click or click to create a filter, then select the new filter.
After assigning a security filter to a user, you cannot delete that filter.
-
-
Specify the fully qualified Distinguished Name of the LDAP user in the field. Do not leave the field empty.
For example, cn=sentinel_ldap_user,o=novell
This field is available only if you have specified n for
Anonymous searches on LDAP directory
parameter while configuring LDAP authentication. For more information, seeLDAP Authentication
in Sentinel 6.1 Installation Guide.NOTE:If you had opted to perform anonymous searches when you had last run the ldap_auth_config script, and now you do not want to perform anonymous searches:
Run the script ldap_auth_config script again, and specify n for
Anonymous searches on LDAP directory
. For each existing LDAP user, right-click and select and specify the fully qualified DN of the LDAP user in the field.
-
(Optional) Under , specify the following:
-
-
Click the tab and assign user permissions. For more information about permissions, see
Sentinel Control Center User Permissions
in the Sentinel 6.1 Reference Guide. -
Click the tab and select an iTRAC workflow role for the user. This affects what work items appear in the user’s work list.
-
Click .
-
You can now log in to Sentinel Control Center and Sentinel Solution Designer using your LDAP username and password.
Creating a Database User Account for Sentinel
-
Select the tab.
-
Expand the folder in the navigation tree.
-
Select User Manager.
The User Manager window is displayed.
-
Click or right-click any user and select .
-
Under Authorization:
-
Select Local for Authentication.
-
Specify User Name.
-
Specify Password.
-
Confirm Password.
-
-
For Security Filter, click the down arrow. The Filter Selection window displays and shows all public filters.
-
Select a filter and click Select or click Add to create and then select a new filter.
NOTE:After assigning a security filter to a user, you cannot delete that filter.
(Optional) Under Details, specify:
-
First Name
-
Last Name
-
Department
-
Phone
-
Email
-
-
Click the Permissions tab and assign user permissions.
-
Click the Roles tab and select an iTRAC workflow role for the user.
-
Click OK.
NOTE:Oracle does not allow the creation of users named the same as one of the Oracle Reserved words. Also, Sentinel does not allow you to use these names.
Creating a Domain User Account for Sentinel
NOTE:The option is enabled only if the Sentinel server is installed on a Windows ptatform.
-
Select the Admin tab.
-
Open the User Configuration folder.
-
Open the User Manager window.
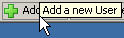
Click Add a new User,
or highlight any user, right-click any user and select Add User.

-
Under Authorization:
-
Select Domain authentication.
-
Specify an existing User Name in the form Domain\Username.
-
-
For Security Filter, click the down arrow. The Filter Selection window displays and shows all public filters.
-
Select a filter and click Select or click Add to create and then select a new filter.
NOTE:After assigning a security filter to a user, you cannot delete that filter.
(Optional) Under Details, specify:
-
First Name
-
Last Name
-
Department
-
Phone
-
Email
-
-
Click the Permissions tab and assign user permissions. For more information about permissions, see
Sentinel Control Center User Permissions
in Sentinel 6.1 Reference Guide. -
Click the Roles tab and select an iTRAC workflow role for the user. This affects what work items appear in the user’s work list.
-
Click OK.
NOTE:Oracle does not allow the creation of users named the same as one of the Oracle Reserved words. Also, Sentinel does not allow you to use these names.
11.11.5 Modifying a User Account
To use this feature, you must have the User Management permission.
NOTE:The Sentinel Database Administrator, Sentinel Administrator, Sentinel Application User, and Sentinel Report User are created during installation. For more information about changing passwords for these users, see Sentinel Accounts and Password Changes
in Sentinel 6.1 Reference Guide.
To modify a user account:
-
Open the User Manager window.
-
Double-click a user account or right-click > User Details.
-
Modify the account.
-
Click OK.
11.11.6 Viewing Details of a User Account
To use this feature, you must have the User Management permission.
To view user account details:
-
Open the User Manager window.
-
Double-click a user account or right-click > User Details.
Review the details of the user account and close the window.
11.11.7 Cloning a User Account
To clone a user account:
-
Open the User Manager window.
-
Select a user account ID, right-click > Clone User.
Change the user information and the user permissions.
Click Save.
11.11.8 Deleting a User Account
To use this feature, you must have the User Management permission.
To delete a user account:
-
Open the User Manager window.
-
Select a user account ID, right-click > Delete User.
-
A Delete box displays. Click Yes to Delete the User.
11.11.9 Terminating an Active Session
To terminate an active session:
-
Open the Active User Sessions window.
-
Highlight an active session you want to terminate.
Right click > Kill Session.
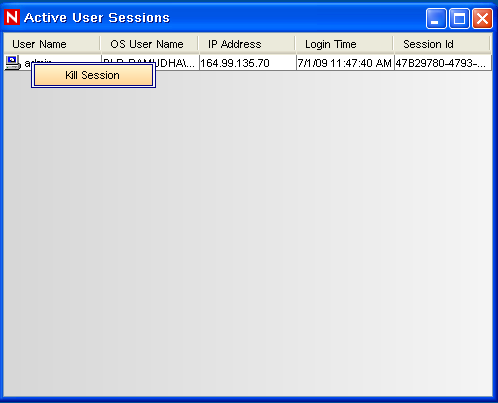
You will be prompted for a termination message. This option is provided so that you can inform the user why you are killing the session.
NOTE:If the Client machine has multiple network interfaces, the IP Address displayed in the Active User Sessions window might not be the desired IP address, as the non-loop back IP address of the first NetworkInterface returned by the system is displayed.
11.11.10 Adding an iTRAC Role
To add an iTRAC Role:
-
Open the Role Manager window.
-
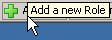
Click Add a new Role,
or right-click > Add New Role.
11.11.11 Deleting an iTRAC Role
To delete an iTRAC Role:
-
Open the Role Manager window.
-
Select a role, right-click > Delete Role.
11.11.12 Viewing Details of a Role
To view role details:
-
Open the Role Manager window.
-
Select a role, right-click > Role Details.