7.5 Installation
This topic provides the Crystal Reports Server installation instructions for the following:
7.5.1 Installing Microsoft Internet Information Server (IIS) and ASP.NET
If the IIS and ASP.NET are not installed on your Sentinel 6.1 server, use the following procedure to install. You might need the Windows Server 2003 installation CD to add these Windows components.
-
On the Windows desktop, go to > .
-
In the left pane, click .
-
Select .

-
Click .
-
Select and .

-
Click .
-
Click .
-
(Conditional) If you are prompted for the Windows Server 2003 installation CD, insert it into the CD drive.
-
Click .
-
Continue with one of the following sections:
-
If you are using SQL Server 2005 with Windows authentication, see Section 7.5.2, Installing Crystal Reports Server for SQL Server 2005 with Windows Authentication.
-
If you are using SQL Server 2005 with SQL authentication, see Section 7.5.3, Installing Crystal Reports Server for SQL Server 2005 with SQL Authentication.
-
If you are using Oracle, see Section 7.5.4, Installing Crystal Reports Server for Oracle.
-
7.5.2 Installing Crystal Reports Server for SQL Server 2005 with Windows Authentication
-
Install SQL Server 2005 in mixed mode.
-
Launch Microsoft SQL Server Management Studio.
-
In the navigation pane, expand .
-
Right-click , then select to create the Crystal CMS database.

-
In the field, specify BOE115 and click .
-
Exit Microsoft SQL Server Management Studio.
-
Insert the Crystal Reports XI R2 Server CD into the CD-ROM drive.
-
If Autoplay is enabled on your machine, the installation begins. Continue with Step 9.
or
If Autoplay is disabled on your machine, run setup.exe and follow the prompts.
-
Select the Crystal Reports setup language.
-
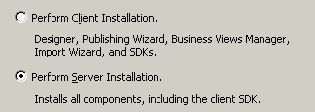
In the Select Client or Server Installation window, select .
-
Specify the Crystal license key that you received from the Novell Customer Center.
Novell provides two Crystal license keys, one for Crystal Reports Server and the other for the Crystal Reports Developer (to modify or create new reports). Ensure that you use the Crystal Reports Server key when installing Crystal Reports Server.
-
Specify a destination folder.
-
For the install type, select .

-
In the pane, click .
-
Click the tab, then click .
-
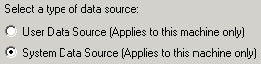
Select , then click .
-
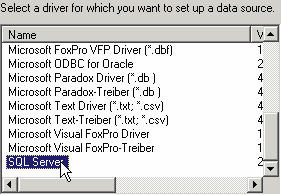
Scroll down and select , then click .
A new source displays.
-
Click .
-
Right-click , then select .
-
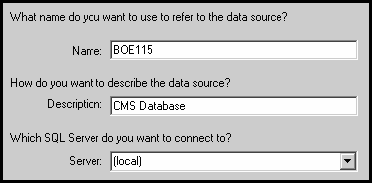
In the New Data Source to SQL Server window, specify the name of your data source (for example, BOE115) and an optional description.
-
For Server, click the down-arrow and select (local), then click .
-
Ensure that is selected, then click .
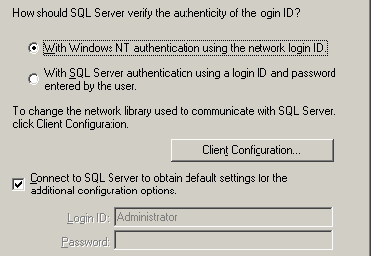
The Login ID that is displayed in this window is your Windows login name.
-
Select the check box. Change your default database to BOE115, then click .
-
In the Create a New Data Source to SQL Server window, click .
-
Click and test the data source. After testing the data source, click .
-
In the Select Data Source window, select the new data source (BOE115) and follow the prompts until you get to the SQL Server Login. Ensure that U is selected, then click .
The Login ID that is displayed in this window is your Windows login name.
-
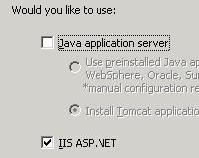
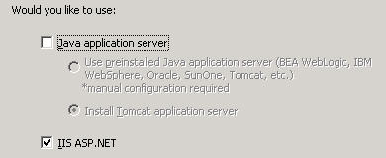
In the Web Component Adapter Type window, select .
If you have not installed IIS and ASP.NET through > > , IIS ASP.NET is disabled.
-
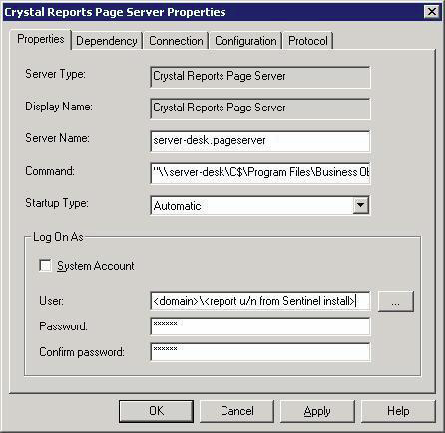
After installation, change the login account for Crystal Reports Page Server and Crystal Reports Job Server to the Sentinel Report User domain account:
-
Click > > > > .
-
Right-click , then select .
-
Right-click Crystal Reports Page Server again, then click .
-
In the pane, deselect the , specify the Sentinel Report User domain account username and password that was used for the Sentinel Report User during your Sentinel install, then click .
-
-
Right-click Crystal Reports Page Server, then click .
7.5.3 Installing Crystal Reports Server for SQL Server 2005 with SQL Authentication
-
Complete Step 1 through Step 20 in Section 7.5.2, Installing Crystal Reports Server for SQL Server 2005 with Windows Authentication.
-
When you are prompted for an authentication method, select .
-
Specify the as sa and specify a password, then click .
-
Select . Change your default database to BOE115, then click .
-
In the Create a New Data Source to SQL Server window, click .
-
Click , then click .
-
In the Select Data Source window, select BOE115 and continue to click until you get to the SQL Server Login window.
-
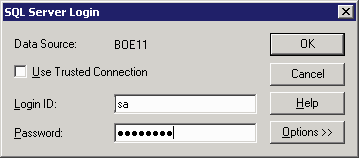
Ensure that is not selected. Click , then click .
-
In the Web Component Adapter Type window, select .
If you have not installed IIS and ASP.NET through > > , IIS ASP.NET is disabled.
Configuring Open Database Connectivity (ODBC)
This procedure sets up an ODBC data source name to allow Crystal Reports Server to connect to the Sentinel database on Windows and SQL Server. These steps must be performed on the Crystal Reports Server machine.
-
On the Windows desktop, go to > > .
-
Click , then click .
-
Select , then click .
A window displays prompting for driver configuration information.
-
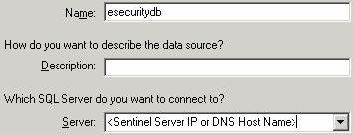
Specify the following information:
Data Source name: The default data source name is esecuritydb
Description: Description of the data source (optional)
Server: Host-name or the IP address of the Sentinel server
-
Click .
-
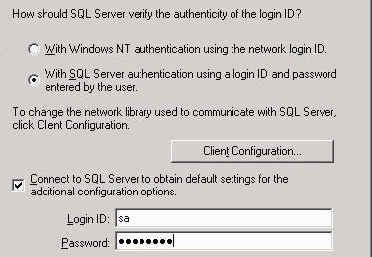
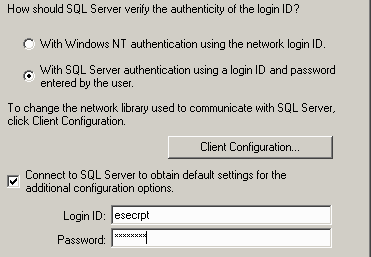
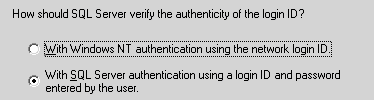
Select how SQL Server should verify the authenticity of the login ID:
For Windows NT Authentication: Select
The that is displayed in this window is your Windows login name.
For SQL Authentication: Select , specify the as esecrpt, then provide a password.
-
Click .
-
In the next window, select , and leave all the other settings as the defaults.
-
Click , then click .
-
Click . After testing, click until you exit.
7.5.4 Installing Crystal Reports Server for Oracle
-
Insert the Crystal Reports XI R2 Server CD into the CD-ROM drive.
-
Select the Crystal Reports setup language.

-
In the Select Client or Server Installation window, select .
-
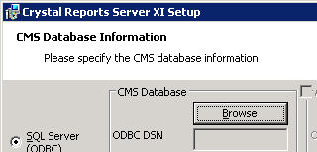
Select .
The CMS Database Information window displays.
-
Select , then click to select a DSN.
-
After you select a DSN, you are prompted for a username and password. Specify the required information and click .
Crystal Reports Server and SQL Server 2005 must reside on the same machine.
-
Select .
If you have not installed IIS and ASP.NET through > > , IIS ASP.NET is disabled. Installing IIS and ASP.NET is a prerequisite to this installation.
-
Select
The Crystal Reports Server supports direct access to a Sentinel database on Oracle. This accessibility is provided by the crdb_oracle.dll translation file. This file communicates with the Oracle database driver, which works directly with Oracle databases and clients, retrieving the data you need for your report.
Installing and Configuring Oracle Client Software
NOTE:In order for Crystal Reports Server to use Oracle databases, the Oracle client software must be installed on your system, and the location of the Oracle client must be in the PATH environment variable.
When installing Oracle Client, perform the following:
-
Accept the default install location.
-
Select for Perform Typical Configuration.
-
Select for Directory Service.
-
Select .
-
Specify the TNS Service Name as ESEC.
-
(Optional) Specify the Username (optional) as esecrpt.
After the installation, create a local Net Service Name configuration.
The following procedure is for the Oracle native driver, but the procedure should be similar for Oracle 10.
To create Net Service Name configuration for an Oracle native driver:
-
Select > > .
-
In the navigation pane, expand and select .
-
Click the plus sign on the left to add a Service Name.
-
In the Service Name window, specify the as ESECURITYDB, then click .
-
In the Select Protocols window, select , then click .
-
Specify the hostname or IP address of the machine that has the Sentinel database.
-
Select the Oracle port (the default 1521 on install), then click .
-
Identify the Sentinel database or service:
-
Select (Oracle8i or later), specify the (this is the Oracle instance name).
-
For connection type, select .
-
Click .
-
-
In the Test window, click , then click .
The test might fail because the test uses a database ID and password.
-
If the test fails:
-
In the Connection Test window, click .
-
Specify the (use esecrpt) and password then click
-
-
If the test fails again:
-
Ping the Sentinel Server.
-
Verify that the hostname of the Sentinel Server is in the hosts file on Crystal Reports Server. The hosts file is located at %SystemRoot%\system32\drivers\etc\
-
-
Click , then click .