13.1 Installing on Administrator Workstations
NOTE:The procedures for installing on administrator workstations and user workstations are the same.
The following procedureuses the Microsoft Windows Vista 64-bit installer.
-
Log in to the workstation as an administrator.
-
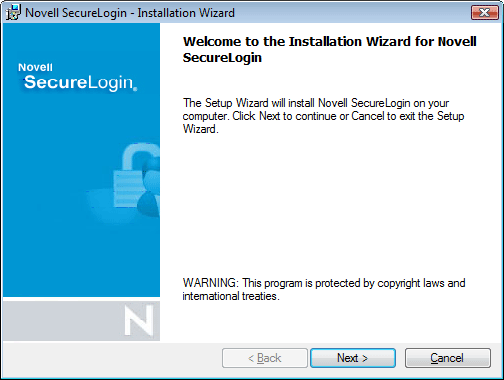
Double-click the Novell SecureLogin.msi that is available in SecureLogin\Client\x64 directory of the installer package. The Welcome to the Installation Wizard for Novell SecureLogin is displayed.
-
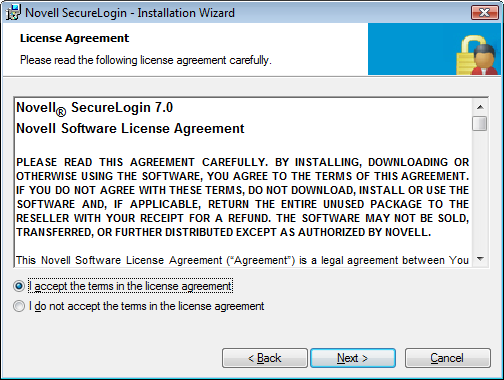
Click . The License agreement page is displayed.
-
Accept the license agreement, then click .
-
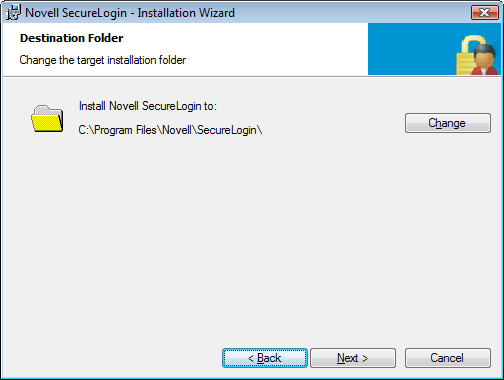
Click . The destination folder is displayed.
The default location for Novell SecureLogin is, ..\Program Files\SecureLogin\. If you want to change the location, click and select an alternative location for Novell SecureLogin on the drive.
-
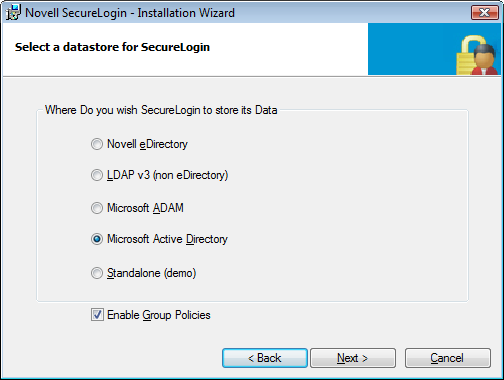
Click . The Select a datastore for SecureLogin (that is, the installation environment) page is displayed.
-
Select
IMPORTANT:There are no additional installation or configuration required when you are running Microsoft Active Directory in LDAP environment. The only variation is in selecting the installation environment. You select instead of the .
-
(Optional) Select .
-
Click . The smart card support page is displayed.
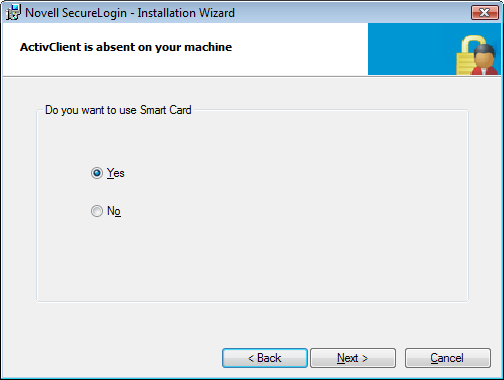
The ActivIdentity ActivClient card settings are used if they are detected.
This option is based on whether you want to have Novell SecureLogin users use their smart cards to store single sign-on data to encrypt the users’ directory data through Public Key Infrastructure (PKI) tokens.
-
(Conditional) If you want to use a smart card, select >, click , then continue with Step 12.
IMPORTANT:If your enterprise policy allows users log in to the workstation by using a smart card, you must select the smart card option
-
(Conditional) If you do not want to use a smart card, select > , click , then continue with Step 15.
-
Select a cryptographic service provider from which Novell SecureLogin requests PKI credentials through a Microsoft Crypto API.
-
Select a PKCS#11 compatible library required for accessing the smart card, then click .
This specifies the location of the cryptographic token interface installed as part of the smart card vendor’s software. These API files are used by Novell SecureLogin to communicate with the smart card.
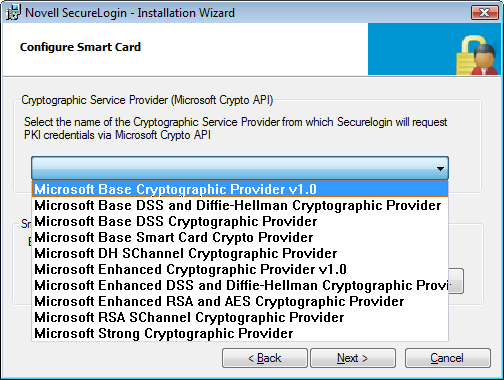
Manually configuring the third-party smart card PKCS library assumes a high level of understanding of the cryptographic service provider’s product.
-
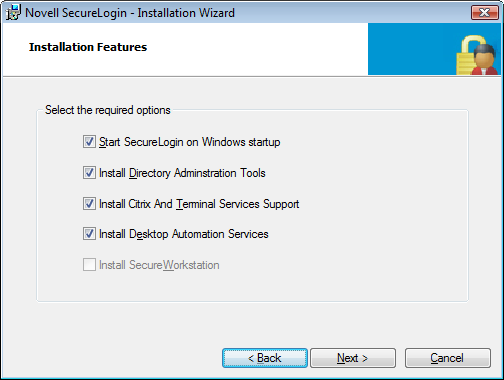
Select the features that you want to install, then click .
Select the options you want to install.
Secure Workstation is not available in Active Directory environment.
-
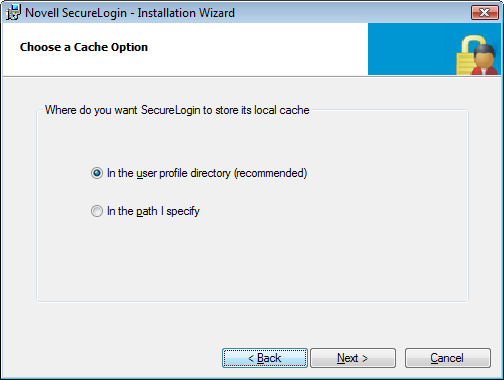
Select the location where you want Novell SecureLogin to store the local cache.
-
Click . The cache location folder page is displayed.
-
(Optional) If you want to change the location of the cache folder, select and specify an alternative folder.
IMPORTANT:If you selected option in Step 6, you must create or locate a unique custom folder for every user of the workstation. Include a user-specific variable such as %USERNAME% in the directory path
-
Click . The installation features page is displayed.
Select the options you want to install.
Secure Workstation is not available in Active Directory environment.
-
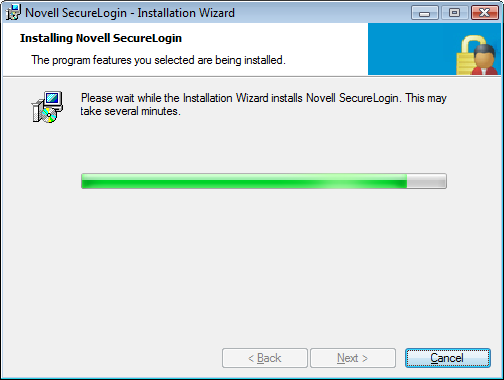
Click . The Ready to Install the Program page is displayed.

-
Click . The installation process takes a few minutes.
-
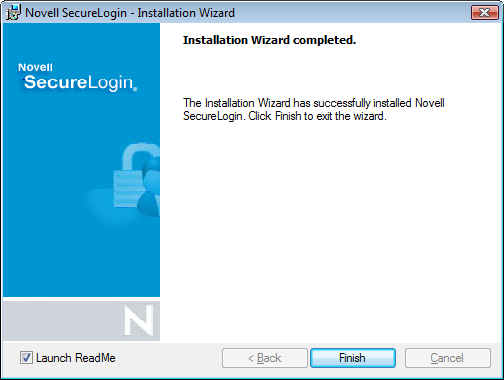
Click .
-
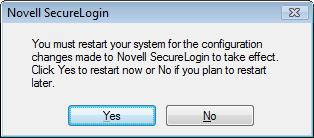
You are prompted to restart your system. Select