3.1 Installing the Hypervisor and Forge Components
This section provides information about installing the hypervisor and Forge software components in your appliance.
3.1.1 Installing ESX and the Forge 4 VM
IMPORTANT:Before performing this procedure, ensure that any iSCSI or HBA connection to the SAN infrastructure is disconnected. Do not proceed until the cards are disconnected from the SAN.
To install VMware ESX 4.1 and the Forge 4 VM:
-
Plug the PlateSpin Forge 4 Rebuild Kit USB flash drive into a USB port on the back of the PlateSpin Forge appliance.
-
Connect a keyboard and monitor to the PlateSpin Forge appliance.
WARNING:The Dell Enhanced Multimedia USB Keyboard – Model:SK-8135 is known to cause issues. Do not use this keyboard.
-
Power on the appliance and press F11 at the boot prompt.
-
Place the Forge 4.0 Installation CD into the CD-ROM/DVD drive.
-
When the system displays the boot menu (approximately 2 minutes after the previous step), select to boot from the SATA Optical Drive.
-
At the following prompt, select t he ESX Scripted Install for the Forge Appliance option and press Enter.

The system displays a progress indicator while the installation runs through several phases.
Wait until the installation process finishes and the server is rebooted.
-
Monitor the prompts as the installation process proceeds.
After the ESX Server is installed, the system copies the Forge Management VM from the USB drive and deploys it in the appliance.
You should see the Copying data from the USB key... message for approximately 30 minutes, after which the server reboots. Upon rebooting, it runs the PlateSpin Forge VM registration script.
The process displays the ESX Welcome screen when the installation finishes successfully:
3.1.2 Licensing and Initial Configuration
Use the following set of procedures to access the hypervisor’s inventory and the Forge VM to perform licensing and configuration tasks in order to finish rebuilding your appliance.
Setting up a Forge Administrative Computer
For licensing and configuration tasks in this section, use the following procedure to reconnect your administrative computer to the Forge Appliance Hardware. This requires downloading and installing the vSphere client, configuring with a static IP address in the same subnet as Forge, then reconnecting an administrative computer to the Forge Appliance Hardware.
To install the vSphere client on the administrative computer:
-
From a browser on the administrative computer, download the vSphere Client..
-
Run the vSphere Client installation .exe.
To configure up the network connection of the Forge administrative computer:
-
Access the TCP/IP properties of administrative computer’s wired LAN adapter.
-
In the TCP/IP properties, use the following parameters:
IP Address: 192.168.1.x (replace x with any valid number. Do not use numbers 200 (used by the hypervisor) or 210 (used by the Forge VM).)
Subnet: 255.255.255.0
Gateway: N/A
-
Save the settings and close the LAN Properties applet.
-
Connect the administrative computer to the Forge Appliance Hardware either by using a crossover cable or through a network switch with a standard Ethernet cable.
Accessing the Hypervisor and the Forge VM
To access the ESX hypervisor and the Forge VM from the administrative computer:
-
Launch the vSphere Client login, then connect to the PlateSpin Forge appliance by using these parameters:
IP address: 192.168.1.200
User name: root
Password: password
The vSphere Client program opens, connected to the hypervisor.
-
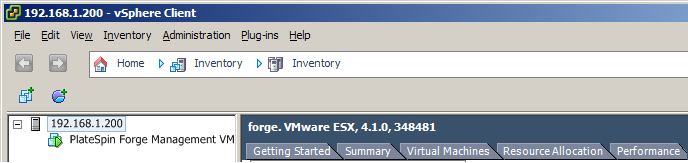
Click Inventory.
The tree view at the left displays the hypervisor inventory, which is the ESX node (192.168.1.200) and the Forge Management VM below it:
Licensing the Hypervisor (VMware ESX)
To license VMware ESX 4.1 from the administrative computer:
-
In the vSphere Client tree view, select the ESX server node, click the Configuration tab, then click Licensed Features.
-
In the upper right corner, click Edit and select the Assign a new license key to this host option.
-
Specify your license key and click OK.
-
Click OK and exit the vSphere Client program.
Licensing the Forge VM’s Operating System
To license Microsoft Windows Server 2003:
-
In the vSphere Client program, select the PlateSpin Forge Management VM item and click the green Play button to power it on (if it is not already on).
-
Click the Console tab, then click inside the remote console window.
-
When you are prompted, specify the Windows OEM Product Key* and click Next.
*The Windows OEM Product Key sticker is attached to every PlateSpin Forge appliance. It is located on the top cover of the appliance.
-
When the Windows operating system is loaded, log in using Administrator and password. (ensure that you press Ctrl+Alt+Insert to log in to the VM).
NOTE: You can activate your Windows license at this time, or you can wait to do so until after you finish configuring the Host and Appliance IP addresses and the VM is networked AND you can use an Internet connection to activate your Windows license. The disadvantage of the latter method is that on a factory reset you will need to activate the license on your Windows machine again.
-
(Optional) If you want to activate your Windows license now, click Start > All Programs > Activate Windows.
The Windows Activation Wizard launches.
-
Select Yes, I want to telephone a customer service representative to activate Windows and click Next.
-
Follow the step-by-step procedure listed on the Activate Windows by phone dialog,
Running the ForgeApplianceConfigurator Tool Inside the VM
To run the configuration tool:
-
In the vSphere Client program (see Accessing the Hypervisor and the Forge VM), click the Console tab to access the Forge VM’s Windows interface, then double-click the Configure Forge Appliance shortcut on the desktop.
-
Monitor the process in the Command Prompt window and wait for the process to finish.
HINT:You might experience connectivity issues to the Forge ESX Host during this time. If this occurs, reconnect when the service is available again.
-
Shut down the Forge VM in Windows (Start > Shut down) and select the Operating system reconfiguration (planned) option.