38.3 Scheduling Migration Execution (First Replication)
After the migration preparation completes successfully, the migration is ready for execution. Execution begins with the first replication, which might be a full replication or a data synchronization for a pre-existing target workload.
The default schedule setting is None. The first replication is unscheduled. You can schedule the start date and time to run the first replication. You can alternatively start the first replication manually. See Section 38.2, Starting Migration Execution (First Replication).
The first replication for a scheduled migration execution is a one-time event, but the run is attempted daily as scheduled until the first replication begins and completes successfully.
NOTE:You must prepare the workload prior to the scheduled time or the manual start. The first replication cannot run unless the target workload exists and the workload preparation is complete. If they are not ready, Migrate skips the scheduled replication and retries it at the scheduled time on the next day.
38.3.1 Using the Migrate Client
To modify the start date and time for the first replication:
-
In the Jobs view, locate the required job.
-
Right-click the job and select to open the Change Job Start Time dialog box.
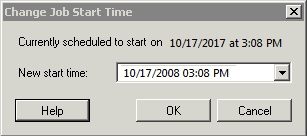
-
Specify the required start date and time, then click .
PlateSpin Migrate reschedules the job and executes it at the specified time.