13.3 Creating and Editing Schedules
A schedule defines the time intervals for capturing history and performance data, based on a selected calendar.
For example, assume a calendar captures data every Monday and Friday in every month, from 3:00 PM – 6:00 PM. A schedule associated with this calendar can capture data at fifteen-minute intervals between 3 PM and 6 PM, Monday through Friday.
In addition, a second schedule can use the same calendar, but capture data at five-minute intervals during the time period defined in the calendar.
Default schedules (One Minute, Five Minutes, Audit Schedule) cannot be edited or deleted.
To create and manage schedules:
13.3.1 Creating a Schedule
To create a schedule:
-
In the pane, expand > > .
-
Right-click the element, then select to open its dialog box:
-
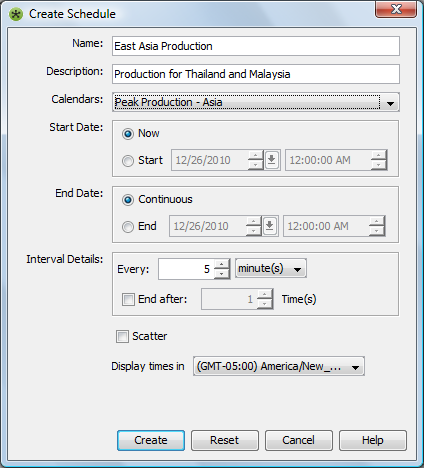
Fill in the fields:
Name and Description: Text naming and describing the schedule.
Calendar: Click the drop-down list, then select an existing calendar to apply to the new schedule.
Start Date: Set the dates when the schedule begins:
-
Select the radio button to select the current date as the start date.
-
Select the radio button and use the spinners to select the month, date, and time.
-
Click the drop-down list to display a calendar. Select a date, then click the drop-down list again to close the calendar.
End Date: Set the dates when the schedule ends:
-
Select the radio button to define no end date for the schedule.
-
Select the radio button and use the spinners to select the month, date, and time.
-
Click drop-down list to display a calendar. Select a date, then click the drop-down list again to close the calendar.
Interval Details: Use the Every spinner to select a number, click the drop-down list, then select the type of interval. For example, every 35 minutes.
If the schedule should run only a specific number of times, select the check box and use the spinners to specify the number of times the scheduled process runs.
Scatter: Select the check box to allow the schedule to adjust randomly to maximize efficiency and minimize taxing system resources.
Display Times: Click the drop-down list, then select the time zone for the schedule. The time zone used for the schedule can differ from the one used for the associated calendar.
-
-
Click to create the schedule.
13.3.2 Editing a Schedule
If a schedule is modified, stop and restart the associated profiles to update the profile. For details on profiles, see Section 12.2.1, Creating Profiles.
To edit a schedule:
-
In the pane, expand > > > .
-
Right-click a schedule, then select .
-
In the left pane, click to open its property page:

-
Edit the schedule as needed.
-
Click to update the schedule.