5.3 Defining Dynamic Groups (Generator Elements)
Dynamic groups (generator elements) are created directly from database columns. Use Generator elements to represent data from the database when no additional information about them is available or required.
For example, define a Generator element for every ticket number in a trouble ticket table when there is little need for additional alarm properties or element information.
As database information changes and is re‑queried by the run-time adapter, these elements are deleted or added as column data changes.
When setting up a Generated elements definition, the requirements are organized into two main tabs:
-
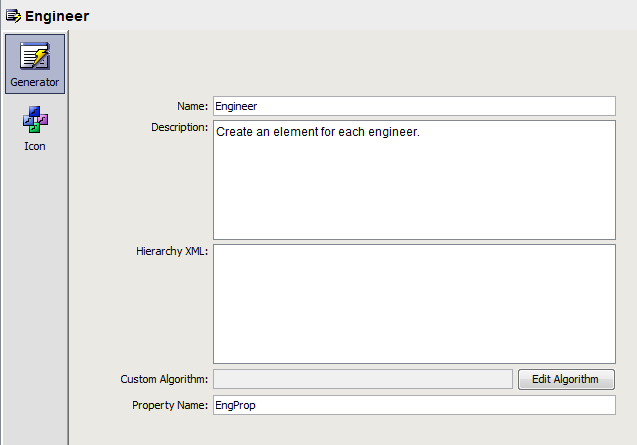
Generator: Specify basic descriptive information for the Generator element definition. Specify the database field that pulls unique values to produce each element.
-
Icon: Specify an icon for the Generator elements from the Operations Center Metamodel icon class browser or select custom icon. For more information, see Section 5.7, Assigning Icons to Groups, Dynamic Groups, and Database Elements.
To define dynamic groups, following the instructions in these sections:
5.3.1 Creating a Generator
-
In the pane, select the parent element of the new generator.
-
Click
 ().
().
A Generator element definition is created under the element in the pane.
5.3.2 Specifying Basic Properties for a Generator Element
It is possible to create a parent/child hierarchy directly from the database columns. For example, values from the first column can create parent elements, while the unique values from another column create the child elements.
To specify basic properties for a Generator element:
-
Select the Generator element in the pane.
-
In the left pane, is selected by default and the pane shows basic properties for the definition:
-
Use the feature at the bottom of the pane to run a quick sampling of database information and verify that the correct table column is used to drive a Generator element.
-
Specify the and for the definition (used only in the Definition Editor for the definition name).
-
Enter XML in the field.
The Hierarchy XML text area provides support for MODL (Managed Objects Definition Language) <param> tags, custom properties, and other tags that are valid with a MODL <generator> tag. You should know the XML syntax for what you want to accomplish.
MODL is an XML-based markup language used to create HierarchyFiles for Operations Center. The HierarchyFile reflects both the nature of information received from a management system and the processing logic of the Operations Center system.
For more information about MODL and the HierarchyFile, see
Using the HierarchyFile
in the Operations Center Adapter and Integration Guide. -
Specify a default algorithm for the group in the field.
For more information, see the following set of steps.
-
In the field, specify the database column whose values will drive the creation of these elements.
-
Specify a database column name or drag and drop a column name from the field to the field.
The query Property ID set for an alarm or database element definition that is a child definition of a Generator element must match exactly the Property Name specified for the Generator element. If these properties do not match, the elements are not created at run-time.