3.4 Working with Tabular Data
You can customize tabular data in the Summary and Alarms views in the following ways:
-
Sort the elements (Summary view) or alarms (Alarms view) by different columns
-
Rearrange the order of data columns
-
Hide or show columns
-
Resize columns
The following sections describe:
3.4.1 Sorting Data
Some analyses might require sorting elements or alarms in the or view by a specific data column. When you sort the display of alarms based on any column other than the common columns (, , , ), sorting is performed using a string sort, so numeric data values might not sort properly.
To sort elements or alarms by a specific column:
-
In the or view, click a column heading:

The items in the column sort in descending order, as represented by the down arrow icon.
-
Click the heading a second time to sort in ascending order. The up arrow icon displays in the column.
-
Rearrange the order in which the columns display by clicking and dragging a column to a new location.
3.4.2 Hiding, Displaying, and Selecting Columns
Hiding Columns
To hide a column:
-
Right-click a column heading.
A drop-down list of available column headings displays:
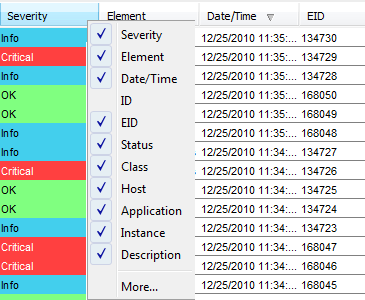
A check mark identifies the columns currently displayed. The column names vary among adapters associated with the alarms.
-
Click to view additional columns.
-
Click to remove the check mark next to a column name.
The column disappears from the view.
-
To rearrange the order in which the columns display, click and drag a column to its new location.
Displaying a Hidden Column
To display a column:
-
Right-click a column heading.
A drop-down list of column headings displays.
-
Select a column name.
A check mark displays next to the column and the column displays in the view.
Selecting Multiple Columns
To select multiple columns:
-
Right-click a column heading to display a drop-down list.
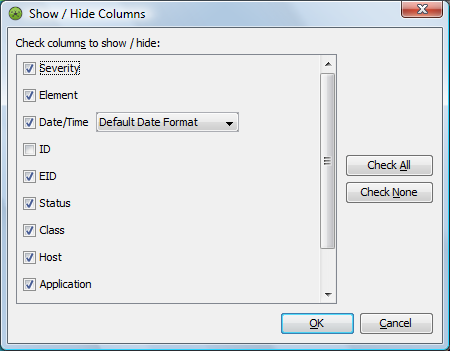
-
From the drop-down list, select to open the Show/Hide Columns dialog box.
-
Do one of the following:
-
Select individual check boxes, or click to select all check boxes.
-
To deselect all columns at the same time, click .
-
-
Click .
The selected columns display in the view and the deselected columns disappear from the view:
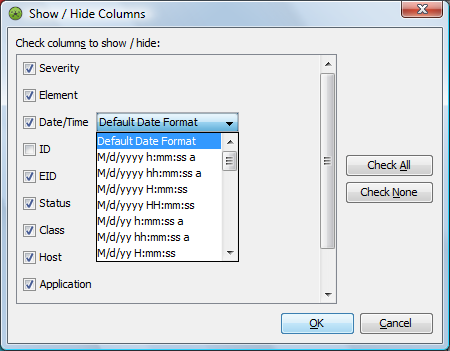
The column has multiple display options. In addition to the standard mm/dd/yy format, you can specify only a 24‑hour clock display without the date, as well as other date/time display combinations.
-
Click the drop-down to view, then select a date and time format:
3.4.3 Sizing Columns
The default column size might make it difficult to read values in specific columns. Use the option to expand specific columns to accommodate the longest text strings that they contain.
To resize columns based on the length of text strings:
-
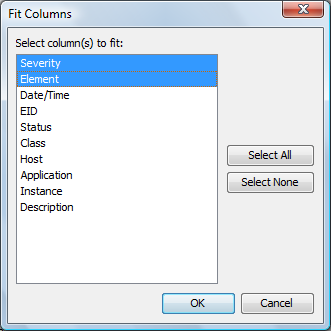
From the menu, select to open its dialog box.
By default, all columns are selected.
-
Do one of the following:
-
Deselect individual column names.
-
Click or to select all or none of the columns at the same time.
-
-
Click to resize each selected column to accommodate the longest text string in it: