6.6 Associating Custom Graphics with Classes and Elements

Use the Editing Channel to create custom graphics and drawings and associate them with specific classes and elements. You can also associate a node style or drawing template with an element or class.

A class association results in all elements created using the class inherit the associated graphic, drawing, node style, or template. It is possible to override the class association by selecting an element and changing the drawing, template, graphic, or node style associated with it.

6.6.1 Viewing a Drawing or Graphic

To view a drawing or graphic associated with a class or element:

  1. Do one of the following:

    • In the Explorer pane, expand Elements > parent elements (if necessary), then select an element.

    • In the Explorer pane, expand Administration > Metamodel > Classes, then select a class.

  2. In the Layout view toolbar, click the Editing Channel drop-down list (which by default, is selected to and displays as Drawing), then select one of the following options:

    • Drawing
    • Element Graphic
    • Element Node Style
    • Element Drawing Template

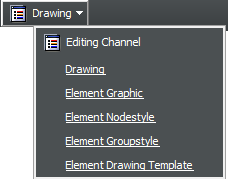
    The Layout view updates. The Layout view is empty if there is no graphic or drawing associated with the element or class, or if a new drawing was created without any graphics. If there is no associated node style or template, the Layout view displays “none” in the middle of the screen.

    When a different element is selected in the Explorer pane, the Editing Channel returns to the default Drawing channel.

6.6.2 Creating and Associating a Custom Drawing or Graphic

To create and associate a custom drawing or graphic with an element or class:

  1. Do one of the following:

    • In the Explorer pane, select an element.

    • In the Explorer pane, expand Administration > Metamodel > Classes, then select a class.

  2. In the Layout view toolbar, click the Editing Channel drop-down list, then select Drawing or Element Graphic.

    The Layout view updates.

  3. Click Switch to Edit Mode.

  4. Create the drawing or graphic.

  5. Press Ctrl+S to save the drawing or graphic.

6.6.3 Associating a Node Style or Drawing Template

Associating node styles and templates with an element or class requires dragging and dropping the node style or template on to the Layout view.

To associate a node style or drawing template with an element or class:

  1. Do one of the following:

    • In the Explorer pane, select an element.

    • In the Explorer pane, expand Administration > Metamodel > Classes, then select a class.

  2. In the Layout view toolbar, click the Editing Channel drop-down list, then select Element Node Style or Element Drawing Template.

    The Layout view updates.

  3. In the Explorer pane, click the plus (+) symbols to expand Administration > Graphics, then expand either Node Styles or Templates.

    HINT:Take care not to click these elements. You do not want to change the focus from the class or element selected in Step 1.

  4. Drag and drop a node style or template into the Layout view.

    The Layout view updates to display the selected node style or template.

  5. To replace a node style or template in the Layout view, simply drag and drop a different node style or template into the Layout view.

    The view updates.

  6. To delete the existing node style or template, click Clear.