8.9 Configuring the Properties Table Portlet
The Properties Table portlet provides a summary view of an element and its children. It can be customized for the number of properties shown and the order that they display.
Figure 8-9 Properties Table Portlet
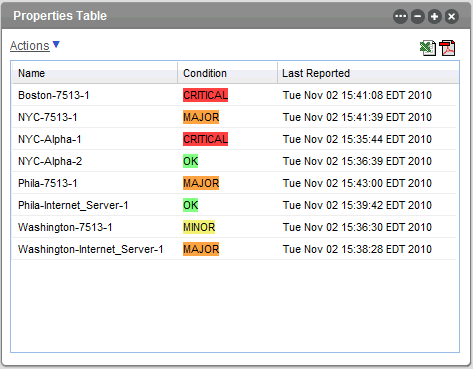
Property table information can be exported from the Properties Table portlet into Excel and PDF formats. Click the Excel or PDF icon to export the data.
The Properties Table portlet is also available as a view from other Operations Center portlets including Alarms, Layout, Tree Map, Element Properties, Show Impacted, Root Cause, Chart Builder, Performance and Summary. Click and select > from any of these portlets.
8.9.2 Configuring the Portlet Properties Table
Configuring Columns for the Properties Table
To configure column heading for the Properties Table:
-
Click
 and select
  .
.
The columns currently displayed appear on the tab.

-
Deselect the option to manually control content updates to the portlet. This option is selected by default and enables the Dashboard to receive automatic updates from the Operations Center server as content changes occur.
-
Deselect the option to show the parent element in the properties table.
-
Make changes to the property columns included in the portlet:
-
To remove the column from the Properties Table display without deleting it from Preferences, select the option’s check box.
-
To edit any of the properties, click the associated link.
For instructions, see Adding Properties.
-
To delete a property column from Preferences, select the option’s check box, and click .
-
-
After making the necessary configurations, click .
Adding Properties
To add a new property to the :
-
Click .
-
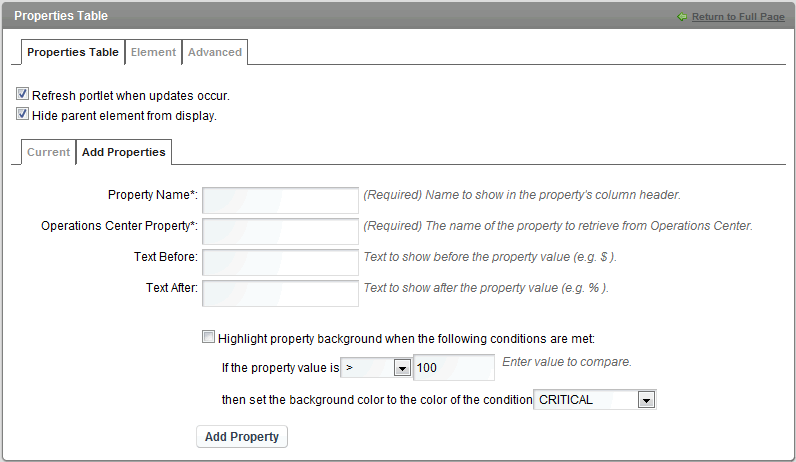
Specify the following options:
Property Name: Specify the name to display on the portlet.
Operations Center Property: Specify the name of the Operations Center property.
Text Before: (Optional) Specify any text to display in front of the property’s value. For example, $.
Text After: (Optional) Specify any text to display after the properties value. For example, %.
-
Specify the following check box options:
Highlight property background when the following conditions are met: If enabled, use the selectors to set a value at which the background is highlighted, then specify a background color.
The colors are mapped to conditions on the Operations Center console. For more information, see Managing Condition/Severity Colors in the Operations Center 5.6 User Guide.
-
Click .
-
Click the tab to specify the display order for the new property.