6.2 Adding Portlets
Portlets can be added to pages. When you add a portlet to a community, generally the objects in the portal belong to that community only. For example, if a Message Board is added to the Support community, all of the topics created through that portlet belong to the Support community only.
The admin portlets (Enterprise Admin, Organization Admin, and Location Admin) are the exception because they span all communities and thus can be accessed through multiple communities.
6.2.1 Adding a Portlet
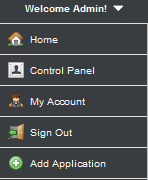
To add a portlet:
-
Go to and click .
-
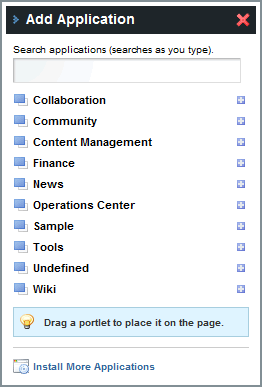
Click a category to open a list of portlets.
For Service Management portlets, expand .
-
To add a portlet to the page, do one of the following:
-
Click next to a portlet.
-
Click the portlet name and drag to the desired position on the page.
-
-
Add more portlets as needed.
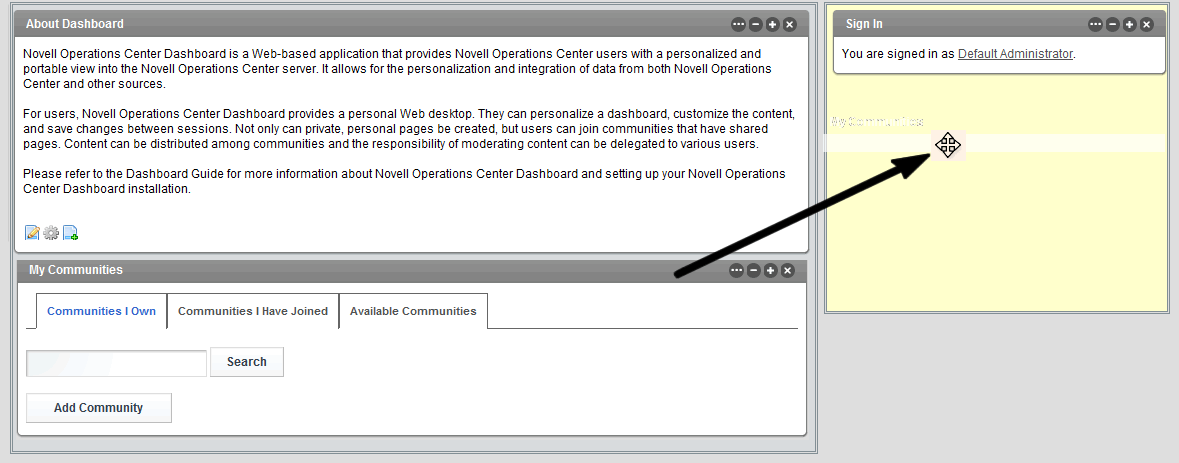
6.2.2 Moving Portlets on a Page
In the dashboard, new portlets are automatically added at the top of the page above any existing portlets (unless you’ve strategically placed it when dragging over from Add Applications onto the page). A portlet can be moved to a new location depending on the page layout. For example, if the page layout has two columns, a portlet can be moved from the left column into the right column.
To reposition a portlet to a different location on the same page:
-
Click the portlet title bar and drag the portlet to a new location on the page:

6.2.3 Configuring Portlet “Look and Feel”
After a portlet is added to a page, you can configure its appearance including:
-
General portlet settings such as title and disable borders
-
Text, background, and border styles
-
Background styles
-
Margin and padding
-
Custom css for advanced styling
-
WAP Styling
In addition to appearance, some portlets have other configuration options.
To configure the look and feel for a portlet:
-
Click
 , and select
-
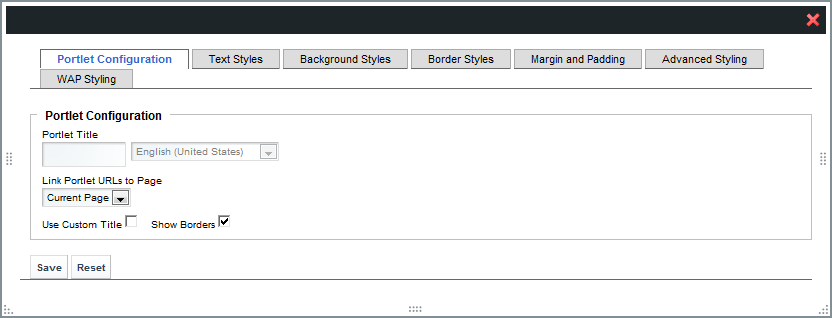
Select one of the following tabs:
-
Portlet Configuration: Set portlet title options, disable borders, and link portlet URLs to pages:
-
Text Styles: Define styles for portlet text including alignment, line height, and spacing.
-
Background Styles: Set the color for the portlet background.
-
Border Styles: Set color and spacing styes for the portlet border.
-
Margin and Padding: Set margin and spacing for the portlet.
-
Advanced Styling: Define any custom css.
-
WAP Styling: Set options for the portlet when viewed by a wireless device.
-
-
Make any changes, then click .