10.2 Creating Roles and Users
10.2.1 Creating Roles
-
Log in to the Sentinel Log Manager as an administrator.
-
Click the link in the upper left corner of the page.
The tab is displayed in the right pane of the page.
-
Click in the section to create a new role.
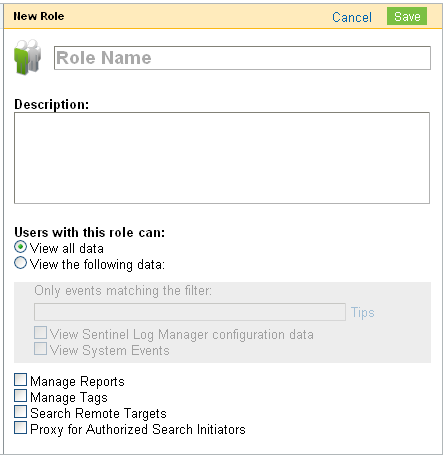
The New Role creation form is displayed.
-
Specify a name for the role and a brief description about the role. A role name can not exceed 40 characters.
-
Specify the values to filter events that a user can view. For more information on filters, see Section 10.1.2, Filtering Data.
-
Select the permissions that you want to set for the users of the role. For more information, see Section 10.1.3, Setting Permissions.
-
Click .
-
To create users for this role, continue with Section 10.2.2, Creating Users.
10.2.2 Creating Users
Adding a user in the Sentinel Log Manager system creates an application user who can then log in to the Sentinel Log Manager application.
-
Log in to the Sentinel Log Manager as an administrator.
-
Click the link in the upper left corner of the page.
The tab is displayed in the right pane of the page.
-
Click . in the section.
The new user creation form is displayed.

-
Specify the name and e-mail address of the user. The e-mail address format is validated.
The fields with an asterisk (*) are mandatory, and the username must be unique. If the username already exists with the specified name, a Username taken message is displayed.
A user name:
-
must begin with a letter or an underscore (_).
-
cannot exceed 30 characters.
-
can only contain letters, digits and special characters (! @ # $ % ^ & * ( ) _ - = , < > ?)
-
supports extended characters.
-
-
Select a role to which the user must be assigned.
-
Select the authentication type:
Local: Select this option for the server to authenticate the user login against the Sentinel Log Manager database. By default, the option is selected.
Directory: The option is enabled only if you have configured the Sentinel Log Manager server for LDAP authentication. Select this option for the server to authenticate the user login against an LDAP directory.
-
Specify a user name in the field.
-
Local: Specify any user name and move to Step 8.
-
Directory:
When you configured the LDAP settings:
-
If you selected Yes for Anonymous Search: User name must be the same as the LDAP directory username.
-
If you selected No for Anonymous Search and did not specify the Domain Name: Username need not be the same as the LDAP directory username.
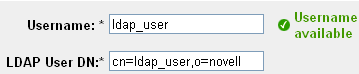
You must also specify the . If Base DN was set, the Base DN is appended to the relative user DN to construct the absolute user DN.
For example, if the Base DN was set to o=novell and the absolute user DN is cn=sentinel_ldap_user,o=novell only the relative user DN i.e cn=sentinel_ldap_user can be specified.
-
If you selected No for Anonymous Search and specified the Domain Name: User name must be the same as the LDAP directory username.
For more information on configuring LDAP settings, see Section 11.0, LDAP Authentication.
Move to Step 10.
-
-
-
Specify a password in the field.
-
Re-enter the password in the field.
-
The , , , fields are optional. The phone number fields allow any format. Make sure you have entered a valid phone number so that the user can be contacted directly.
-
Click .