13.1 Adding a License Key
This section describes the procedure to add a license key either by using the Web UI or through the command line.
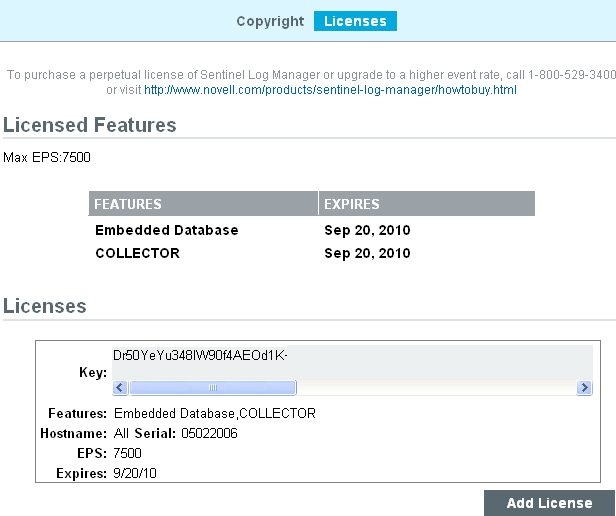
13.1.1 Adding a License Key By Using the Web UI
-
Log in to Sentinel Log Manager as an administrator.
-
Click the link in the upper left corner of the page.
-
Click the s tab.
-
In the section, click .
The following fields are displayed:
Key: Specify the license key here.
Features: Specifies features that a customer is licensed to use.
Hostname: This field is for internal Novell use only.
Serial: This field is for internal Novell use only.
EPS: Specifies the maximum licensed event rate for the Sentinel Log Manager instance. During event spikes, the system continues to collect data even though it is out of compliance.
Expires: Specifies the expiry date of the license. You must specify a valid license key before the expiry date to prevent an interruption in functionality.
-
Paste the license key in the field.
If you paste the license key, the preview of the license is displayed immediately.
-
Click .
-
Restart the Sentinel Log Manager server.
13.1.2 Adding a License Key Through Command Line When the License has Expired
You can add license through the command line by using the softwarekey.sh script. This is the only method to add the license if the license has expired and either the system does not start or it refuses to accept any login.
-
Log in to the Novell Sentinel Log Manager server as root.
-
Change to the /opt/novell/sentinel_log_mgr/bin directory.
-
Enter the following command to change to novell user:
su novell
-
Specify the following command to run the softwarekey.sh script.
./softwarekey.sh
-
Specify the option to enter the key value.
-
Specify the license key, then press enter.
-
Restart the Sentinel Log Manager server.