9.1 Configuring Rules
You can configure rules to filter events based on one or more of the searchable fields. Each rule can be associated with one or more of the configured actions.
The rules are evaluated on a first-match basis in top-down order and the first matched rule is applied to the events that matches the filter criteria.
9.1.1 Adding a Rule
You can add a filter-based rule and then assign one or more configured actions that get executed to handle or output the events that meet the rule criteria.
-
Log in to the Sentinel Log Manager as an administrator.
-
Click in the upper left corner of the page.
The tab is displayed on the right pane of the page.
-
Click .
-
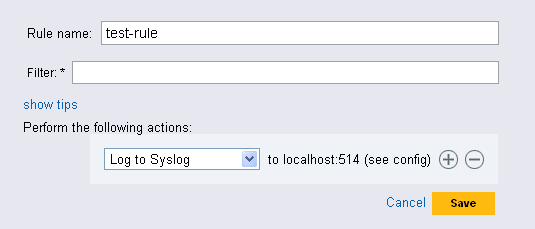
Specify a name for the rule.
-
Specify a filter value. The filter value can be the same value required to perform a search.The available operators depend on the data type of the event field. For example, match subnet is available for IP addresses, and match regex is available for text fields.
Click the link to use the tag names defined in the table for defining rule filter. For example, to define a rule that applies to all events with a severity of 3 or 5 use sev:[3 TO 5].
-
Select an action to be performed on every event that meets the filter criteria. The list of available actions in the drop-down list is determined by the defined actions. Actions are created and configured individually.
For more information about how to add, modify, and delete actions, see Configuring Actions.
For each selected action, information is displayed to indicate where this action will send events. The information comes from the configuration details for the action.
-
Click
 icon to select additional actions to be performed.
-
Click
 to remove the selected action for this rule.
-
Click to save the rule.
The newly created rule appears at the end of rule list under the tab.By default, this new rule is active.
9.1.2 Editing a Rule
-
Log in to the Sentinel Log Manager as an administrator.
-
Click in the upper left corner of the page.
-
The tab is displayed on the right pane of the page.
The created rules appear on the page.
-
Click the link next to the rule to change a rule definition.
-
Click to save the settings.
If the rules settings are changed, a Successfully Saved Rule message is displayed.
9.1.3 Ordering Rules
When there is more than one rule, the rules can be reordered by using drag-and-drop. Events are evaluated by rules in the specified order until a match is made, so you should order rules accordingly. More narrowly defined rules and more important rules should be placed at the beginning of the list.
-
Log in to the Sentinel Log Manager as an administrator.
-
Click in the upper left corner of the page.
-
The tab is displayed on the right pane of the page.
Existing rules appear on the page.
-
Mouse over the icon to the left of the rule numbering to enable drag-and-drop. The cursor changes.
-
Drag and drop the rule to the correct place in the ordered list.
If the rules are ordered, a Successfully Moved Rule message is displayed.
If the rules are not ordered, a Reordering rules failed message is displayed.
9.1.4 Deleting a Rule
-
Log in to the Sentinel Log Manager as an administrator.
-
Click in the upper left corner of the page.
-
The tab is displayed on the right pane of the page.
Existing rules appear on the page.
-
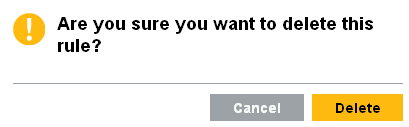
Click the link next to the rule to delete a rule definition.
-
The following confirmation message is displayed:
-
Click to delete the selected rule.
If the rule is deleted, a Successfully Deleted Rule message is displayed.
9.1.5 Activating or Deactivating a Rule
New rules are activated by default. If you deactivate a rule, incoming events are no longer evaluated according to that rule. If there are already events in queue for one or more actions, it might take some time to clear the queue after the rule is deactivated. If the check box beside the rule is selected, it indicates that the rule is activated. If the check box is not selected, then it indicates that the rule is deactivated.
-
Log in to the Sentinel Log Manager as an administrator.
-
Click in the upper left corner of the page.
-
The tab is displayed on the right pane of the page.
Existing rules appear on the page.
-
To activate the rule, select the check box next to each rule, in a column headed .
If the rule is activated, a Successfully activated the rule message is displayed.
-
To deactivate the rule, select the check box next to each rule, in a column headed .
If the rule is deactivated, a Successfully deactivated the rule message is displayed.