3.3 Configuring Data Retention Policies
You can configure one or more data retention policies to control the duration for which specific types of events are retained in the Sentinel Log Manager. A retention policy contains a filter that is used to identify the events for which the retention policy applies and the minimum and maximum number of days these events should be kept in the system. Except for the Raw Data Retention policy, all of the configured policies apply to the event data.
The configured retention policies are displayed in the Data Retention policy table. By default, data retention policy is refreshed every 30 seconds to reflect the changes made by multiple users. For every 30 seconds, the refresh operation synchronizes the policy table and reflects the changes made to the retention policies by multiple administrators.
3.3.1 Raw Data Retention Policy
The raw data retention policy controls how long the raw data is kept in the system before being deleted. The data retention policy table contains a raw data retention policy. Like the default data retention policies for events, the Raw Data Retention policy cannot be deleted or disabled. However, you can change the (number of days after which the raw data file is deleted) and (minimum number of days the raw data file is kept) values.
The process to delete raw data runs when the server is started, for every one hour (because the raw data files are closed every one hour), and whenever the value is changed. All the files exceeding the retention time are removed permanently from the local and archive storage locations.
3.3.2 Event Data Retention Policies
The event data retention policies control how long different types of event data are kept in the system before being deleted.
Adding a Data Retention Policy
-
Log in to the Sentinel Log Manager as an administrator.
-
Click the link in the upper left corner of the page.
The tab appears on the right pane of the page.
-
Click the tab.
-
In the Data Retention section, click the option located at the top right corner of the policy table.
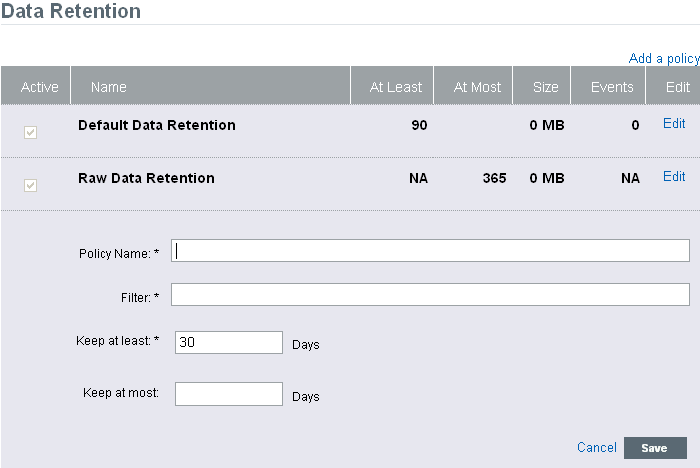
-
Specify a name for the retention policy.
The policy name must be unique and must contain alphanumeric characters. If a duplicate policy name is specified an error message is displayed when you save the retention policy.
-
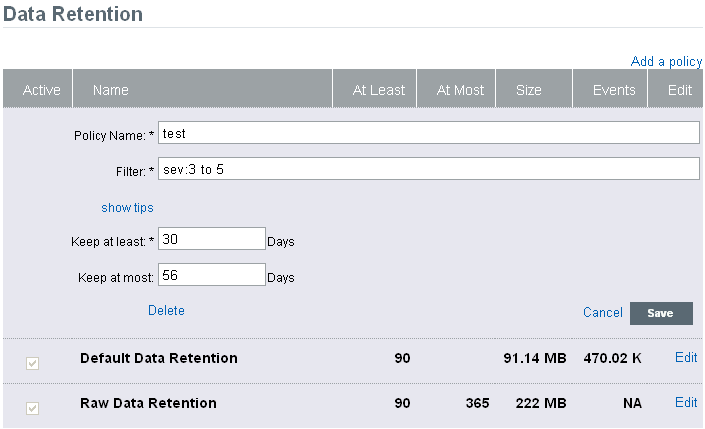
Specify a filter value. The filter value uses the same syntax as searches.
For example, the filter field contains a filter such as sev:[3 TO 5] AND (evt:"SyslogNICListener"). This filter value matches all the events with a severity of 3, 4 or 5 and event name SyslogNICListener.
For more information, see Section 5.1.2, Running an Advanced Search.
-
Click the link to view the tag names that can be used for defining the retention policy filter.
For example, use sev:[0 TO 1] to define a retention policy that applies to all events with a severity of 0 or 1.
-
Specify the minimum number of days to retain the events in the system in the field. The value must be a valid positive integer.
-
(Optional) Specify the maximum number of days for which the events should be retained in the system. The value must be a valid positive integer and must be greater than or equal to the value. If no value is specified, the system retains the events in the system until the space is available.
-
Click . The newly created policy is displayed under the data retention table.
The table also contains the following additional columns:
-
Size: Displays the amount of space used to store the events for the respective retention policy.
-
Events: Displays the number of events count for the selected retention policy.
The policies are sorted in alphabetical order by policy name. The default retention policy is always shown as the last policy in the list.
If there is any error when saving a retention policy, an error message is displayed on top of the policy table.
For more information, see Data Expiration Policy.
-
Activating or Deactivating a Data Retention Policy
-
Log in to the Sentinel Log Manager as an administrator.
-
Click the link in the upper left corner of the page.
The tab is displayed on the right pane of the page.
-
Click the tab.
The data retention policy table is displayed in the section.
-
To activate a retention policy, select the check box next to the policy, in the column headed .
-
To deactivate the retention policy, clear the check box next to the policy.
You cannot disable the default data retention policy.
Editing a Data Retention Policy
NOTE:You cannot edit the name of the default data retention policy. You can only change the and values.
-
Log in to the Sentinel Log Manager as an administrator.
-
Click the link in the upper left corner of the page.
The tab is displayed on the right pane of the page.
-
Click the tab.
The data retention policy table is displayed in the section.
-
To edit the retention policy, click the link next to the configured policy.
The policy editor opens within the policy table.
-
Specify the minimum and maximum days to store events.
-
Click to save the changes to the existing policy.
You can edit only one policy at a time. If a policy is currently being edited and you edit another policy, the previously opened editor is closed and changes are not saved.
Deleting a Data Retention Policy
You cannot delete the Default Data Retention and Raw Data Retention policies.
-
Log in to the Sentinel Log Manager as an administrator.
-
Click the link in the upper left corner of the page.
The tab is displayed on the right pane of the page.
-
Click the tab.
The data retention policy table is displayed in the section.
-
To delete the retention policy, click the link next to the configured policy.
The policy editor opens within the policy table.
-
Click . A confirmation message is displayed.
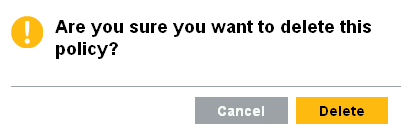
-
Click .
The selected data retention policy is deleted from the data retention table.
3.3.3 Rules for Applying Appropriate Retention Policy
You can apply multiple data retention policies that apply to the event data, including the Default Data Retention policy. To determine how long an event is retained before being deleted from the local and archive data stores apply the following rules:
-
If an event meets the criteria of only one data retention policy filter, that data retention policy is applied to the event.
-
If an event does not meet the criteria for any of the data retention policies, the default data retention policy is applied to that event.
-
If an event meets the criteria for more than one of the data retention policies, the following guidelines are used to determine, which data retention policy should be applied:
-
If the maximum retention period of a policy is shorter than the others, that policy is applied. (If the maximum retention period is not specified for a policy, then the policy is considered to have a long maximum retention period.)
-
If multiple matching policies have the same shortest maximum retention period, the policy with the longest minimum retention period is applied.
-
If multiple matching policies have the same shortest maximum retention period and the same longest minimum retention period, the system arbitrarily applies one of the policies.
-