3.2 Configuring Data Archiving
You can enable data archiving on Sentinel Log Manager for both the raw data and event data. You can configure following three types of archive locations:
-
User-configured SAN mount location or a local directory on the Sentinel Log Manager server. (This is the recommended configuration.)
-
Remotely configured CIFS share.
-
Remotely configured NFS share.
For more information about the archive server configuration settings, see Configuring Archive Server Settings
in the Sentinel Log Manager 1.0.0.5 Installation Guide.
WARNING:Only one Sentinel Log Manager should be configured to archive to a particular archive directory (remote share). Configuring the same archive location across multiple Sentinel Log Manager servers can cause system failure.
3.2.1 Configuring Archive Locations
NOTE:The NFS, CIFS, and SAN must be configured in such a way that Sentinel Log Manager has read and write permissions for it.
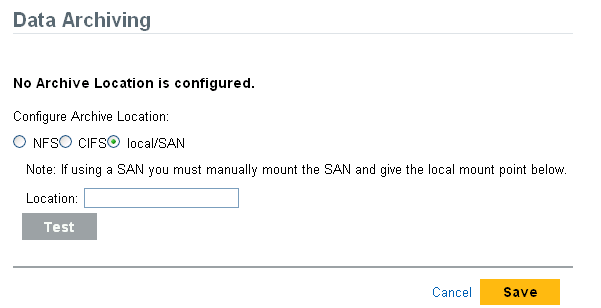
Configuring SAN/Local Directory as an Archive Location
This is the preferable configuration for the best performance, security, and reliability.
-
Log in to the Sentinel Log Manager as an administrator.
-
Click the link in the upper left corner of the page.
The tab is displayed on the right pane of the page.
-
Click the tab.
-
In the Data Archiving section, select the option.
-
In the field, specify the local directory path or the location on which the SAN is mounted.
If you are using a storage area network (SAN), you must manually mount the SAN, and specify the mount location.
-
Click the button to check the write permissions for the specified location.
If the location is configured properly, a message is displayed that the test is successful.
If the location is not configured, the test fails, and a message is displayed stating the reason for the failure.
-
Click to configure the specified archive location.
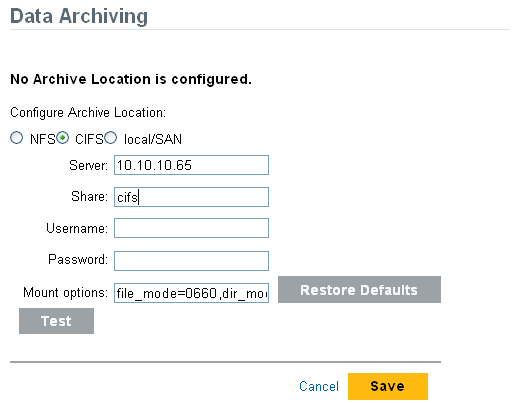
Configuring a CIFS Server as an Archive Location
For more information about configuring the CIFS server, see CIFS Configuration
in the Sentinel Log Manager 1.0.0.5 Installation Guide.
-
Log in to the Sentinel Log Manager as an administrator.
-
Click the link in the upper left corner of the page.
The tab is displayed on the right pane of the page.
-
Click the tab.
-
In the Data Archiving section, select the option.
-
In the field, specify the IP address or host name of the machine where the CIFS server is configured.
-
In the field, specify the share name of the CIFS server.
The mounted shares are unmounted when the server stops and are mounted again when the server starts. If the configured share unmounts, the Sentinel Log Manager server detects this and mounts it again.
-
Specify the username (if one is assigned) to access the share.
-
Specify the password (if one is assigned) to access the share.
-
The field specifies the options that are used while mounting the archived location of the CIFS server.
You can also specify a new mount options. For more information about the available nfs mount options, see mount.cifs (8) - Linux man page.
The default mount options are file_mode=0660,dir_mode=0770.
-
Click the button to restore the default mount options.
-
The field specifies the options of the CIFS server.
You can also specify a new mount location.
-
Click the button to change to the default mount location.
-
Click the button to mount the CIFS server and to check the write permissions on the server. If the CIFS server is configured properly, a message is displayed that the test is successful.
If the CIFS server is not configured, the test fails, and a message is displayed the reason for failure.
-
Click to configure the specified archive location.
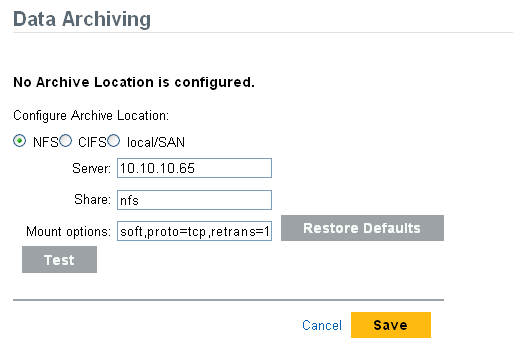
Configuring an NFS Server as an Archive Location
The NFS protocol requires significant configuration to improve performance and security, and it is recommended only when you already have a well-established NFS infrastructure in your environment.
For more information about configuring the NFS server, see NFS Configuration
in the Sentinel Log Manager 1.0.0.5 Installation Guide.
-
Log in to the Sentinel Log Manager as an administrator.
-
Click the link in the upper left corner of the page.
The tab is displayed on the right pane of the page.
-
Click the tab.
-
In the Data Archiving section, select the option.
-
In the field, specify the IP address or host name of the machine where the NFS server is configured.
-
In the field, specify the share name of the NFS server.
The mounted shares are unmounted when the server stops and are mounted again when the server starts. If the configured share unmounts, the Sentinel Log Manager server detects this and mounts it again.
-
The field specifies the options that are used while mounting the archived location of the NFS server.
You can also specify a new mount options. For more information about the available nfs mount options, see NFS (5) Linux Programmer’s Manual.
The default mount options are soft,proto=tcp,retrans=1,timeo=60.
-
Click the button to restore the default mount options.
-
Click the button to verify the configuration of the NFS server and to check the write permissions on the server. If the NFS server is configured properly, a message is displayed that the test is successful.
If the NFS server is not configured, the test fails and the reason for failure is displayed.
NOTE:This procedures tests a subset of all of the settings that are necessary for the NFS server and client.
-
Click to configure the specified archive location.
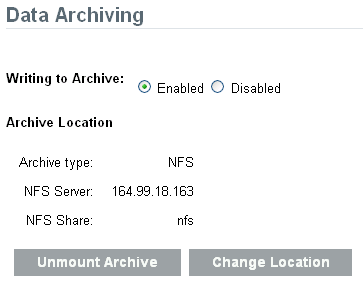
3.2.2 Enabling or Disabling Data Archiving
The enabling and disabling data archiving options appear only when the archive location is configured. However, event search and reporting work even when the data archiving is disabled.
-
Log in to the Sentinel Log Manager as an administrator.
-
Click the link in the upper left corner of the page.
The tab is displayed on the right pane of the page.
-
Click the tab.
-
To enable writing to archive select .
You can write both the raw data and event data at the configured archive location. To configure data archive locations, refer to Configuring Archive Locations.
-
To disable writing to archive the raw data select .
This selection disables the writing of raw data and event data archiving.
NOTE:You cannot write to the archive location, but you can still read the archived data. Search shows the events that are archived, and you can also download the archived raw data.
-
Click .
3.2.3 Unmounting Archive Location
Unmount Archive option appears only if the archive location is configured. If the archive is unmounted, data archiving is disabled. Searches and reports would include only the online data.
-
Log in to the Sentinel Log Manager as an administrator.
-
Click the link in the upper left corner of the page.
The tab is displayed on the right pane of the page.
-
Click the tab.
-
To unmount the data archiving, select .
When you unmount the archive location, Sentinel Log Manager can no longer access the archive data. If the archive location is configured to a remote location (NFS or CIFS), the archive location is unmounted.
A confirmation message is displayed, asking if you really want to unmount the archive location.

-
Click .
3.2.4 Changing the Archive Location
The option is displayed only if the archive location is configured.
-
Log in to the Sentinel Log Manager as an administrator.
-
Click the link in the upper left corner of the page.
-
The tab appears on the right pane of the page.
-
Click the tab.
-
In the Data Archiving section, select .
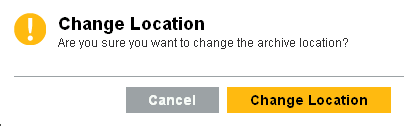
A confirmation message is displayed, asking if you want to change the archive location.
-
Click .
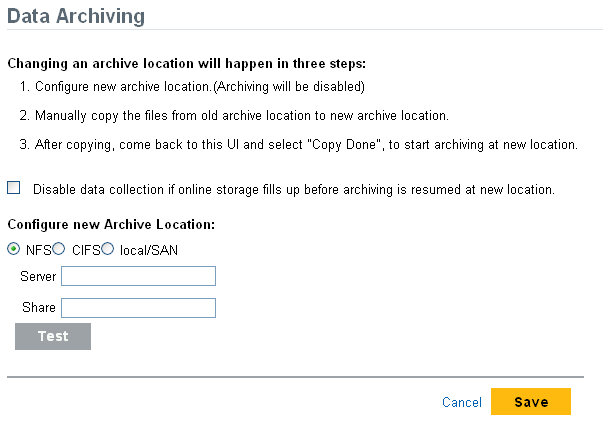
The following page allows you to configure a new archive location.
-
Select the check box to disable data collection if local storage fills up before archiving is resumed at new location. Otherwise, the oldest data is deleted to make space for the incoming data.
-
Configure the new archive location.
For more information about configuring the NIFS or CIFS or local/SAN archive locations, see Configuring Archive Locations.
-
Click to save the changes and configure the new archive location.
-
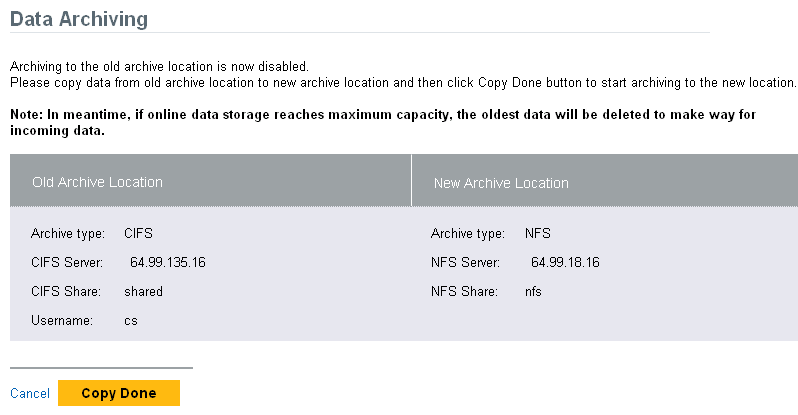
Manually copy the files from the old archive location to the new archive location.
-
After copying the files, select the option to start data archiving to the new location.
-
Click to return to the previous archive configuration.