7.2 Configuring Actions
An event is delivered to one or more channels when it meets the criteria specified by one of the rules. An incoming event is evaluated against each filtering rule in the specified order until a match is found, then the delivery actions associated with that rule are executed. Before the events can be output to a channel, an action to send the events to that channel should be configured.Actions are added, deleted, and modified independent of the rules that use them (however, an action that is associated with one or more rules cannot be deleted).
There may be many actions, but each action will be one of the following six action types:
Execute a Script: This type of action executes a specified script on a Sentinel Log Manager server by passing events to it as argument.
Log to File: This type of action writes the event to a specified file on a Sentinel Log Manager server.
Log to Syslog: This type of action forwards the event to a configured syslog server.
Send an Email: This type of action sends the event to one or more user by using a configured SMTP relay. For example, a Send to Email action can be used to escalate specific events to notify a system administrator or Tier 2 analyst. It can also be used to forward events to an incident response system that accepts e-mail input.
Send SNMP Trap: This type of action sends the SNMP traps.
Send to Sentinel Link: This type of action uses Sentinel Link to forward events to another Sentinel Log Manager, Sentinel, or Sentinel RD system.
For more information on how to configure these actions, see Adding Actions.
NOTE:Events are processed by the associated actions one at a time. You should therefore consider performance implications when selecting the output channel to which events are sent. For example, the Write to File action is the least resource-intensive, so it can be used to test rule criteria to determine the data volume before sending a flood of events to e-mail or syslog.
Also, when you set up the Send to e-mail action, you should consider how many events the recipient can effectively handle, and adjust the filtering on the rule accordingly.
Event output is in JavaScript* Object Notation (JSON), which is a lightweight data exchange format. Events consist of field names (such as “evt” for Event Name) followed by a colon and a value (such as “Start”), separated by commas.
For example:
{"st":"I","evt":"Start","sev":"1","sres":"Collector","res":"CollectorManager","rv99":"0","rv1":"0","repassetid":"0","rv77":"0","agent":"Novell SecureLogin","obsassetid":"0","vul":"0","port":"Novell SecureLogin","msg":"Processing started for Collector Novell SecureLogin (ID D892E9F0-3CA7-102B-B5A1-005056C00005).","dt":"1224204655689","id":"751D97B0-7E13-112B-B933-000C29E8CEDE","src":"D892E9F0-3CA7-102B-B5A2-005056C00004"}
The following sections describe how you can add, edit, and delete the actions:
7.2.1 Adding Actions
You can add multiple actions and then associate these actions to the rules. The column under the tab displays the number of rules associated with each action.
This section describes how you can add actions of the following action types:
Executing a Script
All Sentinel Log Manager events that meet the filter criteria for which the Execute a Script action is defined are passed as argument to the same script.
To configure the Execute a Script action, you need to specify the path of the script that will be executed. The script must already exist and the novell user must have permissions to execute it.
-
Log in to the Sentinel Log Manager as an administrator.
-
Click in the upper left corner of the page.
-
The tab is displayed on the right pane of the page.
-
Select the tab.
-
Click the link on the right side of the screen.
-
Select the Execute a Script action type.
The screen appears.

-
Specify an action name. The action name should be unique.
-
Specify the path to the script that you want to be executed. Specify either an absolute path or a relative path, where the working directory is under the application’s home directory.
If required, click to test if script exists and novell user has the required permissions.
-
Click . If the action is configured, a Successfully Added Action message is displayed.
The newly created action appears under the tab.
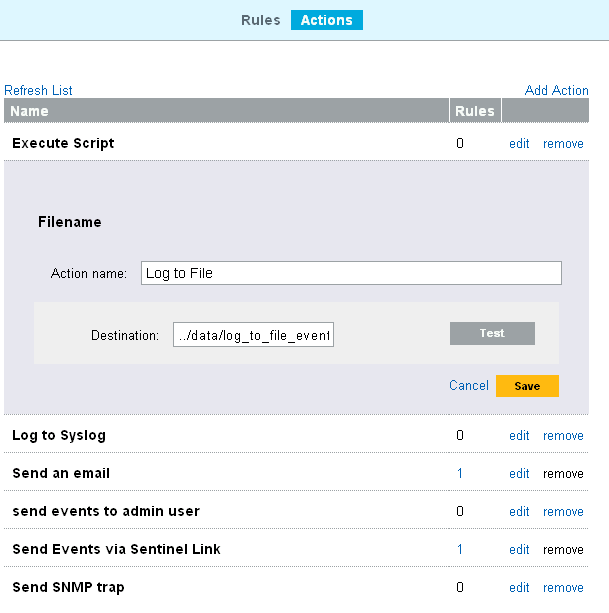
Writing the Events to a File
All Sentinel Log Manager events that meet the filter criteria for which the Write to File action is defined are written to the specified file.
To configure the Write to File action, you need the name and path of the file onto which the events will be written. The directory should already exist and the novell user must have permissions to write to it. If the file does not already exist, Sentinel Log Manager creates it.
-
Log in to the Sentinel Log Manager as an administrator.
-
Click in the upper left corner of the page.
-
The tab is displayed on the right pane of the page.
-
Select the tab.
-
Click the link on the right side of the screen.
-
Select the Log to File action type.
The screen appears.

-
Specify an action name. The action name should be unique.
-
Specify the path to the file to which you want the events to be written. Specify either an absolute path or a relative path, where the working directory is under the application’s home directory.
If required, click to test permissions and create a zero-byte file to hold the data.
-
Click . If the action is configured, a Successfully Added Action message is displayed.
The newly created action appears under the tab.
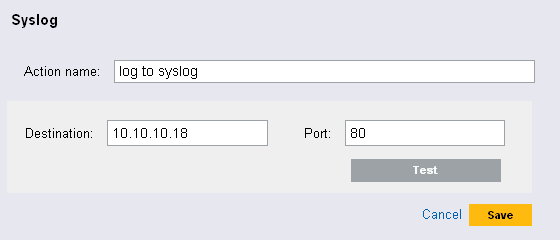
Sending the Events to Syslog
All Sentinel Log Manager events that meet the filter criteria for which the Send to Syslog action is defined are sent to the specified syslog server.
To configure the Send to Syslog action, you need the IP address and port number of the syslog server.
-
Log in to the Sentinel Log Manager as an administrator.
-
Click in the upper left corner of the page.
-
The tab is displayed on the right pane of the page.
-
Select the tab.
-
Click the link on the right side of the screen.
-
Select the Log to Syslog action type.
The screen appears.
-
Specify an action name. The action name should be unique.
-
Specify a name or IP address and the open UDP port of a syslog server.
If required, click to test if the destination server and port are specified correctly.
-
Click . If the action is configured, a Successfully Added Action message is displayed.
The newly created action appears under the tab.
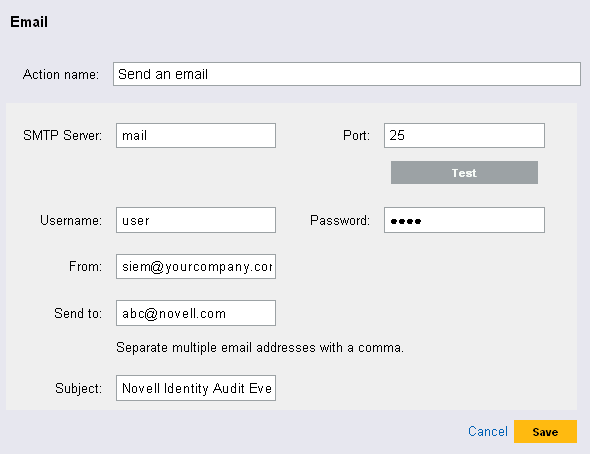
Sending the Events by an E-Mail
All Sentinel Log Manager events that meet the filter criteria for which the Send an E-mail action is defined are sent to the associated SMTP relay and e-mail addresses.
To configure the Send to e-mail action, you need the IP address and port number of an SMTP relay, and the To and From e-mail addresses. To send events to more than one e-mail addresses, use a comma-separated list.
NOTE:To avoid overwhelming your SMTP relay or e-mail recipients, this action should only be used with rules that generate a low volume of events.
This SMTP relay configuration is also used to deliver reports to users.
-
Log in to the Sentinel Log Manager as an administrator.
-
Click in the upper left corner of the page.
-
The tab is displayed on the right pane of the page.
-
Select the tab.
-
Click the link on the right side of the screen.
-
Select the Send an Email action type.
The screen appears.
-
Specify an action name. The action name should be unique.
-
Specify the hostname or IP address of an available SMTP server.
-
Specify the port number of an available SMTP server.
-
If the SMTP server requires authentication, specify a username and password.
If required, click to validate the hostname or IP address, port, username, and password fields.
-
Specify an address from where the e-mail messages are sent.
-
Specify one or more e-mail addresses for recipients, separated by commas.
-
Specify the subject line for the e-mail.
-
Click . If the action is configured, a Successfully Added Action message is displayed.
The newly created action appears under the tab.
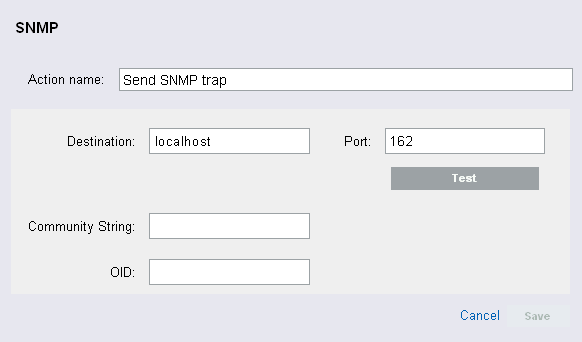
Sending the SNMP Traps
All Sentinel Log Manager events that meet the filter criteria for which the Send SNMP Traps action is defined are sent to the specified SNMP addresses.
To configure the Send SNMP Traps action, you need the connection information for an SNMP server, including the IP address and the port number.
-
Log in to the Sentinel Log Manager as an administrator.
-
Click in the upper left corner of the page.
-
The tab is displayed on the right pane of the page.
-
Select the tab.
-
Click the link on the right side of the screen.
-
Select the Send SNMP Trap action type.
The screen appears.
-
Specify an action name. The action name should be unique.
-
Specify the IP address or hostname of the SNMP server you want to send the trap.
-
Specify the port number for the SNMP server. The default port is 162.
If required, click to validate the hostname or IP address and port number.
-
Specify the community string (password) to access the SNMP management system. If no community string is specified, the Integrator sets the default value to public.
-
Specify the desired asnl object ID you want to associate with this message. If no Object ID is specified, the Novell Audit internal OID is used (2.16.840.1.113719.1.347.3.1).
-
Click . If the action is configured, a Successfully Added Action message is displayed.
The newly created action appears under the tab.
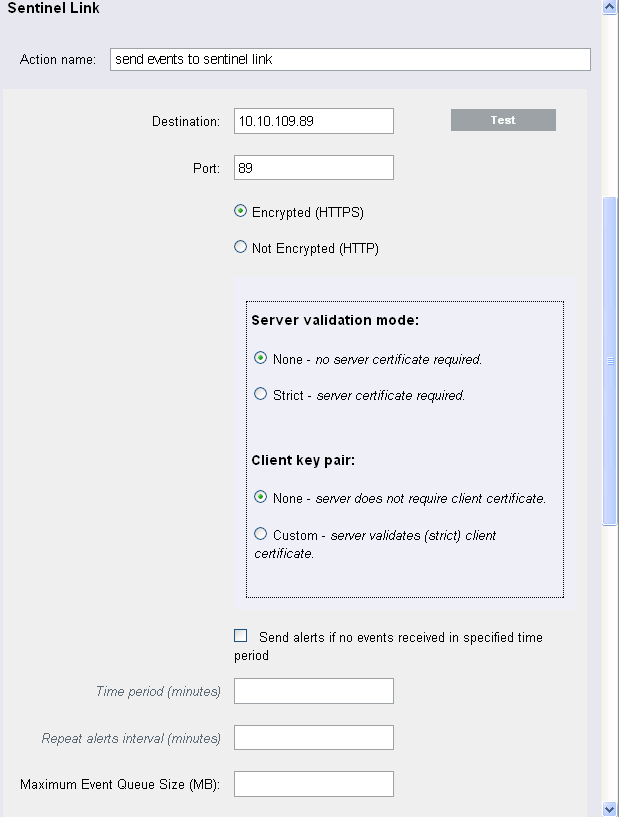
Sending the Events to a Sentinel Link
Sentinel Link provides the ability to hierarchically link multiple Sentinel systems, including Sentinel Log Manager and the two Sentinel SIEM (Security Information Event Management) systems, Novell Sentinel and Novell Sentinel Rapid Deployment (RD) systems. Sentinel Link provides several benefits:
-
Several Sentinel Log Managers can be linked in a hierarchical manner. Regional or distributed Sentinel Log Manager servers can manage a large volume of data, retaining raw data and event data locally, while also forwarding important events to a central Log Manager for consolidation.
-
One or more Sentinel Log Managers can forward important data to either Sentinel or Sentinel RD, which are SIEM (Security Information Event Management) systems. These systems provide real-time visualization of data, advanced correlation and actions, workflow management, and integration with identity management systems.
-
Sentinel Link must be configured in two locations: on the Sentinel Log Manager system that sends the data and on the Sentinel Log Manager, Sentinel, or Sentinel RD system that receives the data.
The following instructions describe how to configure the system sending the data:
-
Set up the Sentinel Link connection to receive messages from another Sentinel or Sentinel Log Management system.
For more information about configuring Sentinel systems for receiving events, see Sentinel Link Solution Guide.
-
Log in to the Sentinel Log Manager as an administrator.
-
Click in the upper left corner of the page.
-
The tab is displayed on the right pane of the page.
-
Select the tab.
-
Click the link on the right side of the screen.
-
Select the Send to Sentinel Link action type.
The screen appears.
-
Specify an action name. The action name should be unique.
-
Specify the IP address or hostname of the destination Sentinel system where a Sentinel Link connector is configured.
-
Specify the port number for the sentinel system. The default port is 1290.
If required, click to validate the hostname or IP address and port fields.
-
Select either of the following:
-
Not Encrypted (HTTP): Establish an unsecured connection.
-
Encrypted (HTTPS): Establish a secured connection. If you select the encrypted (HTTPS) option, you are optionally allowed to specify a Server validation mode and an Integrator key pair.
-
-
Select the option to allow the sentinel link to generate alerts (internal events) that can be monitored by a system administrator.
These alerts are generated when the sentinel link has not received any events for a specified time period. The internal event type for this alert is NoEventsReceived.
If the option is enabled, the user is allowed to specify the following two parameters:
-
Time period (minutes): The time period is the number of minutes that must elapse without receiving an event before the sentinel link generates the NoEventsReceived alert.
-
Repeat alerts interval (minutes): The repeat alert interval is the number of minutes between repeating the NoEventsReceived alert. The alert is sent repeatedly at this interval until sentinel link starts receiving the events again.
-
-
In the field, specify the maximum event queue size value in megabytes. The value must be between 0 and 2147483647.
The following options are enabled only when you specify a value in the field.
: Select this option to drop the oldest events in the event queue when the value specified in the field exceeds the limit.
: Select this option to drop the newest events when the value specified in the field exceeds the limit.
-
Select the option to generate the alerts when the sentinel link drops the received events because its queue is full. The internal event type for this alert is DroppedEvents.
-
Specify the maximum data rate value in kilobytes per second. The value must be between 0 and 2147483647.
-
Select one of the following options to specify the Event Forwarding Mode:
Forward Events Immediately: Select this option to forward the events immediately to the Sentinel system.
Scheduled Event Forwarding: Select this option to schedule event forwarding. You can specify the and (in minutes) for each day of the week. The valid format for the Time Of Day is hh:[mm] [am|pm]. The duration must be between 1 and 1440 minutes.
If you do not specify a time or the duration for any of the days of the week, the schedule is considered to be 24 hours a day, seven days a week. It would be equivalent to the option.
Queue Events Only (do not forward): Select thisto stop forwarding events to the destination Sentinel system. However, the integrator stores the events it receives in its queue unless the queue has a size limit and has reached its maximum capacity.
This mode is useful if the destination Sentinel is down for maintenance or any network problems persist in communicating with the Sentinel system that might not be fixed immediately. In such situations, rather than continually trying to forward events, you can select the option to temporarily stop forwarding messages. After the problems are resolved, you can re-enable event forwarding by selecting the or options.
-
Click . If the action is configured, a Successfully Added Action message is displayed.
The newly created action appears under the tab.
7.2.2 Editing an Action
-
Log in to the Sentinel Log Manager as an administrator.
-
Click in the upper left corner of the page.
-
The tab is displayed on the right pane of the page.
-
Select the tab.
-
To change the action settings, click the link next to the action.
-
Edit the parameter values for the action.
-
Click to save the settings.
If the action settings are changed, a Successfully Saved Action message is displayed.
7.2.3 Deleting an Action
-
Log in to the Sentinel Log Manager as an administrator.
-
Click in the upper left corner of the page.
-
The tab is displayed on the right pane of the page.
-
Select the tab.
-
To delete the selected action, click the link next to the action
NOTE:The link is only enabled if an action is not associated with a rule.
The following confirmation message is displayed.
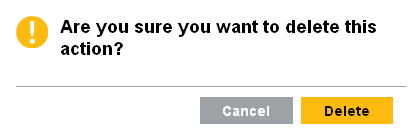
-
Click to delete the action.
If the action is deleted, a Successfully Deleted Action message is displayed.
The selected action is deleted from the configured action list.