2.3 Example Role Policies
The following examples describe how to create a general Employee role, a restrictive Manager role, and a role from a contract with ORed credentials. These roles can be used by the Access Gateway in Identity Injection policies and by the Access Gateway and the J2EE Agent in Authorization policies.
2.3.1 Creating an Employee Role
The following role policy creates an Employee role. Because the role does not include conditions, all authenticated users are assigned to this role when they log in. This role can then be used to grant access to resources to all users in your user stores.
-
In the Administration Console, click > > Edit > >
-
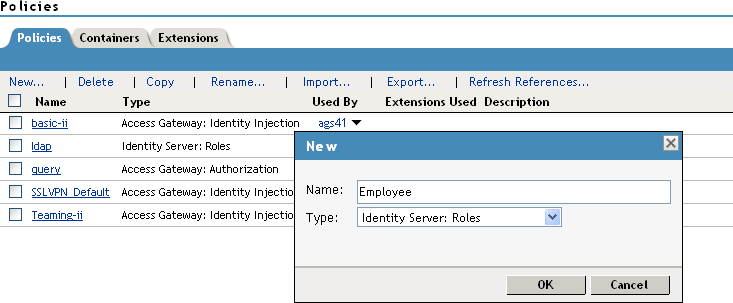
On the Policies page, click .
-
Select a policy type of and specify a display name, such as Employee.
-
Click .
-
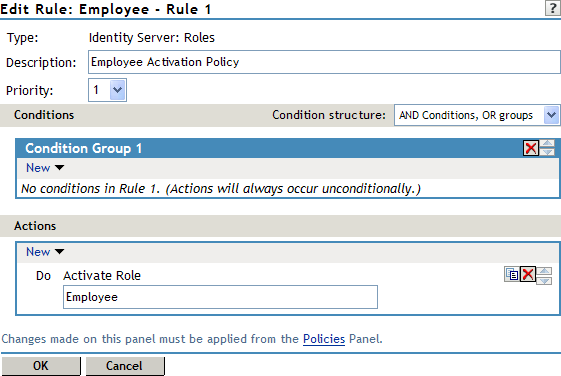
On the Edit Policy page, specify a description in the field.
It is important to use this field to keep track of your roles and policies. The policy feature is powerful, and your setup can be as large and complex as you want it to be, with a potentially unlimited number of conditions and choices. This description is useful to help keep track of various role and policy configurations.
-
Make sure the section has no conditions, so that all users who authenticate match the condition.
-
In the section, click .
-
In the box, type Employee, then click .
If this role needs to match the name of a role required by a Java or Web application, ensure that the case of the name matches the application’s name.
-
On the Rule List page, click .
-
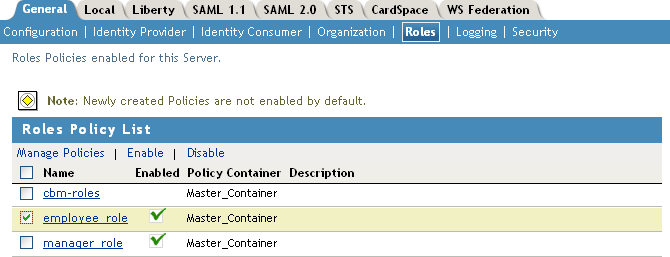
On the Policies page, click , then click .
-
On the Role Policy page, select the Employee role, then click
-
Click , then update the Identity Server.
The Identity Server configuration must be updated after you enable a role.
-
To create a Manager role, continue with Creating a Manager Role.
2.3.2 Creating a Manager Role
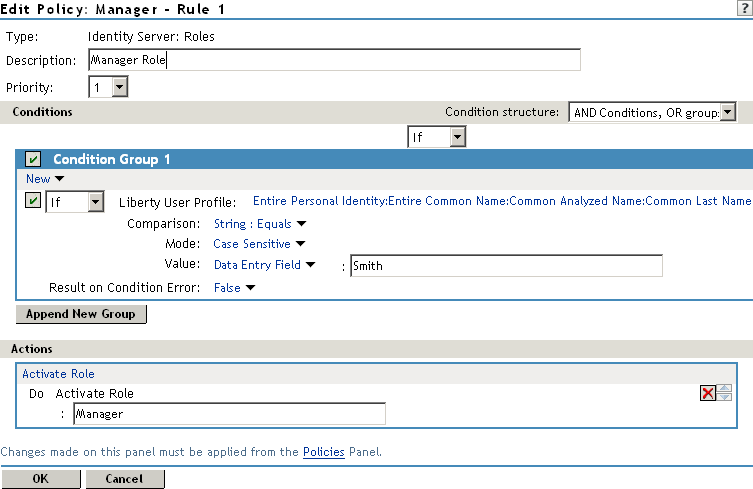
Because the Manager role is restrictive, role policy conditions must be specified. The Manager role is assigned only to the users who meet the conditions.
-
In the Administration Console, click > > Edit > >
-
On the Policies page, click .
-
Select a policy type of and specify a display name (for this example, Manager.)
-
Click .
-
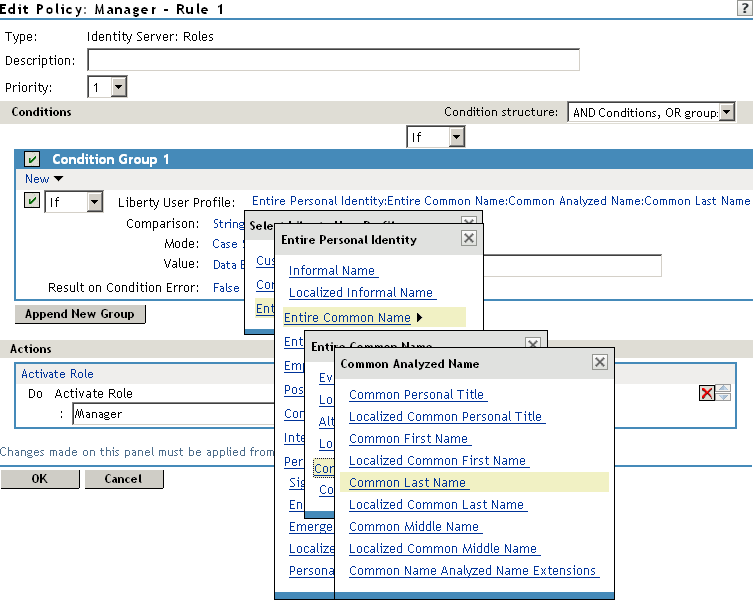
In the section, click > .
-
In , select the conditions the user must meet:
Liberty User Profile: Select > > >
If these options are not available, you haven’t enabled the Liberty attributes. Click > > > , then enable one or more of the following: or
Comparison: Select how you want the attribute values to be compared. For the Common Last Name attribute, select > .
Mode: Select .
Value: Select and type the person’s name in the box (Smith, in this example). This sets up the condition that if the user has the name Smith, his or her role as Manager is activated at authentication.
Result on Condition Error: This sets up the results that are returned if an error occurs while evaluating the condition (for example, the LDAP server goes down). This rule is set up to grant the user the role of Manager if the condition evaluates to . If an error occurs, you do not want random users assigned the role of Manager. Therefore, for this rule, you need to select .
-
In the section, click .
-
In the box, type Manager, then click twice.
-
On the Policies page, click .
-
Click , select the Manager role, then click
-
Click , then update the Identity Server.
2.3.3 Creating a Rule for a Contract with ORed Credentials
A contract with ORed credentials allows the user to decide which credentials to use for authenticating. If you are creating a role policy that grants the user the role regardless of which method was used for authentication, you can use such a contract just as you would any other contract in a condition. However, if you want to base the condition on the user using the contract with multiple credentials for authentication and on the user authenticating with a particular credential (password, token, or certificate), you need to create a rule with two conditions: one condition checks for the contract and the second condition checks for the authenticating credential.
If the contract with ORed credentials was named OringContracts, the first condition in the rule should look similar to the following:
Figure 2-10 Checking for the Contract

This condition verifies that the user used the OringContracts contract for authentication. The second condition needs to verify the type of credential that was used. To do this, you need to check for the existence of the credential in the Credential Profile. This condition should look similar to the following if you are verifying that the user used a certificate for the credential.
Figure 2-11 Checking for the Credential

The policy engine evaluates the above condition to true when the Credential Profile contains a value for the certificate. If the user used another method for authentication, the certificate field is empty, and the policy engine evaluates two null entries to false.
This type of condition works for the LDAP credentials and the X.509 credentials. It does not work for the Radius token, because the Credential Profile does not store the Radius token. You need to use “If Not” logic to verify that the user authenticated with a token. For example, if the OringContracts contract ORed the Radius token class with the Name/Password class, you would know that the user authenticated with a token when the password credential has no value. This type of condition should look similar to the following:
Figure 2-12 Using “If Not” Logic

If the Credential Profile contains a value for the password, this condition evaluates to false because of the “And If Not” logic. If the password value in the Credential Profile is empty, this condition evaluates to true, and you know that the user authenticated with a Radius token.