11.4 Generating the Brokering URLs by Using an ID and Target in the Intersite Transfer Service
You can generate the brokering URL’s using the ID of the target. You can use this value to simplify the Intersite Transfer Service URL that must be configured at the service provider. For more information, see Section 7.11.4, Configuring an Intersite Transfer Service Target for a Service Provider.
-
In the Administration Console, click or click (Broker Identity under the Service Providers list) >.
-
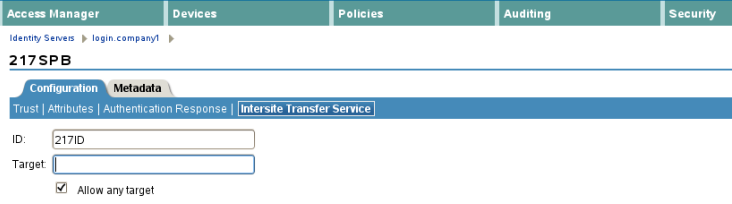
ID: Specify the ID value of the target.
-
Target: Specify the URL of the page that you want to display to users when they authenticate with an Intersite Transfer URL.The behavior of this option is influenced by the option. If you are using the target ID as part of the Intersite Transfer URL and did not specify a target in the URL, you need to specify the target in this field. For example, if you enter the target URL as it appears below, then it will be displayed when you select option.
https://login.company1.com:8443/nidp/saml2/idpsend?id=217ID&TARGET=https%3A%2F%2FSPBROKER1.labs.blr.novell.com%3A8443%2Fnidp%2Fsaml2%2Fidpsend%3FPID%3Dhttps%3A%2F%2Flogin.partner2B.com%3A8443%2Fnidp%2Fsaml2%2Fmetadata%26TARGET%3Dhttps%3A%2F%2Fpartner2b.com
-
Allow any Target: Select this option to use the target that was specified in the Intersite Transfer URL. If this option is not selected, the target value in the Intersite Transfer URL is ignored and you can see the URL specified in the option.